how to connect wifi in laptop windows 7 youtube

Title: How To Enable WiFi Internet Connection In Windows 7
Channel: MDTechVideos International
How To Enable WiFi Internet Connection In Windows 7 by MDTechVideos International
Wifi on Windows 7 Laptop? Solved in 60 SECONDS!
Windows 7 WiFi Woes Vanquished: Your 60-Second Solution!
Ever felt the frustration of a stubbornly silent laptop? That digital silence when your Windows 7 machine refuses to connect to the internet? I've been there, trust me. Instead of tearing out your hair, get ready for a breath of fresh air. Because, believe it or not, we can fix your WiFi problem. You can get back online in a mere 60 seconds. Let's dive right in!
Understanding the WiFi Wilderness: Common Culprits
Before we conjure a solution, let's briefly explore the usual suspects. Sometimes, the simplest things trip us up. First, ensure your physical WiFi switch on the laptop is ON. It seems obvious, I know. However, it is a frequent oversight. Another culprit? Your network adapter may be disabled. Perhaps it simply needs a kickstart. Furthermore, outdated drivers can wreak havoc. They can silently sabotage your wireless connection. Sometimes, it is a router glitch. In that case, a quick reboot can often work wonders.
Step-by-Step: Your 60-Second WiFi Salvation
Alright, enough preamble. Let's get your laptop connected. Follow these straightforward steps. Prepare to be amazed. You will be back browsing in a blink. Consider this your quick-start guide:
Check That Physical Switch: Believe me, I know it's silly but it's often the answer. On most laptops, there's a physical switch. It may be on the side or the front. It may even be a function key combination. Make sure it's flipped to the "on" position. It’s worth double checking so do it first.
Network Adapter Check: This option is a sure bet if step one doesn’t work. Click on the Start button. Then, type "Network Connections" into the search bar. Choose it from the menu. You will now see a list of network connections. Look for your WiFi adapter. Is it enabled? If not, right-click on it and select "Enable." If prompted, confirm your choice. From time to time, a simple reboot will make it work.
Driver Dilemma? A Quick Resolution: Outdated drivers are a frequent cause. Go to your Start menu again. Type "Device Manager" into the search bar. Open it. Expand the "Network adapters" section. Right-click your WiFi adapter again. Then, choose "Update driver." Select "Search automatically for drivers." Windows will hunt for the latest version. If found, it will install it. Keep a close eye, it is very exciting.
Router Reboot: The Ultimate Reset: In many instances, this is all it takes. Unplug your router. Wait for a full 30 seconds. Plug it back in. Give it a few minutes to reboot completely. Now, try connecting your laptop. Hopefully, your problem will be gone.
Troubleshooting: When you have followed all the steps, and nothing works, it is time to troubleshoot. Windows 7 has a built-in troubleshooter. It can often pinpoint the problem. Right-click the WiFi icon in your system tray. Choose "Troubleshoot problems." Follow the on-screen prompts.
Beyond the Basics: Advanced Troubleshooting Tips
So, what do you do if the above steps don’t work? Don't despair just yet! Here's some additional advice. Firstly, check your router's settings. Ensure your laptop is allowed to connect. You might need to enter your WiFi password again. Secondly, investigate your firewall or antivirus software. They sometimes block network connections. Temporarily disabling them can help to identify the problem. If you are using a static IP address, double-check the settings. Ensure they match your network configuration.
The End Result: Connecting Bliss!
See? That wasn’t so bad, was it? In just a few moments, you’ve reclaimed your internet connection. You have banished those WiFi woes. You can now browse, stream, and connect. I hope you have been successful.
Preventative Measures: Keeping the Connection Strong
Prevention is always better than cure. To avoid future issues, keep your drivers updated regularly. Regularly scan your system for malware. Secure your WiFi network with a strong passphrase. You can also consider restarting your router once a month. These steps ensure a smooth online experience. They also prevent future headaches.
Final Thoughts: Stay Connected and Keep Learning
WiFi issues on Windows 7 can be frustrating. However, they are often easily fixed. With a few simple steps, you can restore your internet connection. Now, you can get back to what matters most. Keep learning, keep exploring, and stay connected! If the issue persists, consider seeking professional help. It is better to seek guidance than to worry!
Laptop to Phone WiFi: The SHOCKINGLY Easy Trick!Wifi on Windows 7 Laptop? Solved in 60 SECONDS!
Hey everyone! Ever feel like your Windows 7 laptop is playing hard to get when it comes to Wi-Fi? You're not alone! It’s a common headache, a digital dilemma that can leave us staring blankly at the screen, longing for the sweet embrace of the internet. But fear not, because we're about to dive deep, uncover the secrets, and get you connected faster than you can say "bandwidth!" We’re not just talking about a quick fix; we’re talking about understanding why your Wi-Fi might be AWOL and how to troubleshoot it like a seasoned pro, all within about a minute! (Okay, maybe a little longer if you're a slow clicker like me!).
The Wi-Fi Woes: A Windows 7 Reality Check
Let's be real, Windows 7 has been around the block – it's like that trusty old car that still gets the job done, but sometimes throws a wrench in things. Wi-Fi issues are practically a rite of passage for Windows 7 users. Whether it's a disappearing signal, a refusal to connect, or just painfully slow speeds, we've all been there. Think of it as the digital equivalent of a grumpy old router refusing to share its signal; the key is knowing how to coax it back to life.
Step 1: The Simple Stuff – Obvious, But Often Overlooked!
Before we reach for the technical manuals (or, you know, start Googling frantically), let's cover the basics. It's like checking to see if your car has gas before you start troubleshooting the engine:
- Is your Wi-Fi switch ON? Sounds silly, I know, but sometimes the simplest solutions are the ones we miss. Look for a physical switch on your laptop (often on the side or front).
- Is the Wi-Fi light illuminated? This little light is your friend. If it's not lit, something's wrong.
- Are you within range of your Wi-Fi router? Walls, distance, and even your microwave can interfere with the signal. Try moving closer.
- Restart Everything. This is the digital equivalent of "Have you tried turning it off and on again?" Restart both your laptop and your router. Seriously, it works more often than you think!
Step 2: Digging a Little Deeper: The Network Adapter's Tale
Okay, so the basics didn't do the trick? Time to put our detective hats on. The network adapter is the crucial piece of hardware that allows your laptop to "speak" Wi-Fi. Think of it as your laptop's translator for the digital world.
- Check the Device Manager: Right-click on "Computer" on your desktop or in the start menu and select "Manage." Click on "Device Manager" in the left pane. Expand "Network Adapters." Do you see your Wi-Fi adapter listed? Is there a yellow exclamation mark or a red X next to it? If so, that's your first clue.
- Enable/Disable the Adapter: Right-click on your Wi-Fi adapter and select "Enable" if it's disabled. If it's enabled, try "Disable" and then "Enable" again (the digital equivalent of a hard reset!).
Step 3: The Driver Drama: Keeping Things Updated
Drivers are the software that allows your hardware to work properly. Imagine them as the behind-the-scenes stage crew making sure everything runs smoothly. Outdated or corrupted drivers can be the silent saboteurs of your Wi-Fi connection.
- Update Your Drivers: Back in the Device Manager, right-click on your Wi-Fi adapter, and select "Update Driver Software." Choose "Search automatically for updated driver software." Windows will (hopefully) find and install the latest drivers.
- Consider Driver Rollback (If Updates Caused the Problem): If the problems started after a driver update, you can try rolling back to the previous driver. Right-click on the adapter, select "Properties," go to the "Driver" tab, and click "Roll Back Driver" if the option is available.
Step 4: The Wireless Network Properties: Fine-Tuning Your Connection
Sometimes, the problem lies in the settings of your wireless network itself. It's akin to not having the correct password to get into the secret club.
- Access the Network and Sharing Center: Go to the "Control Panel," then "Network and Internet," and finally "Network and Sharing Center."
- Manage Wireless Networks: Click on "Manage wireless networks" in the left pane.
- Check your Network Properties: Right-click on your network and select "Properties." Ensure "Connect automatically when this network is in range" is checked (unless you don't want it to connect automatically!). Also, verify your security type and password.
Step 5: IP Address Issues: The Digital Address Book Snafu!
Think of your IP address as your laptop's unique postal address on the internet. If this address is incorrect, you won't receive any "mail" (data).
- Obtain IP Address Automatically: Back in the "Properties" of your Wi-Fi network (Step 4), double-click "Internet Protocol Version 4 (TCP/IPv4)." Ensure "Obtain an IP address automatically" and "Obtain DNS server address automatically" are selected.
Step 6: Network Reset: A Fresh Start for Your Settings
Sometimes, your Wi-Fi settings become a jumbled mess. A network reset is like hitting the reset button on a complicated gadget, putting everything back to factory settings for a clean start.
- Use the Command Prompt (Advanced): This involves a bit of command-line magic. Open the Command Prompt as an administrator (search for "cmd" in the start menu, right-click, and select "Run as administrator"). Type the following commands (one at a time, pressing Enter after each):
netsh winsock resetnetsh int ip resetipconfig /releaseipconfig /renewipconfig /flushdns
- Restart Your Computer: After running these commands, restart your computer.
Step 7: Firewall Frustrations: The Gatekeeper's Dilemma
Your firewall is like a digital gatekeeper, guarding your computer from unwanted visitors. Sometimes, it's too good at its job and blocks legitimate connections.
- Temporarily Disable Your Firewall (For Testing): This is just for testing purposes! Go to the "Control Panel," then "System and Security," and finally "Windows Firewall." Select “Turn Windows Firewall on or off” (in the left pane). Turn off the firewall (for both private and public networks – remember to turn them back on after testing!). If this immediately fixes your Wi-Fi, the firewall was the culprit.
- Add an Exception: If your firewall is the problem, you can add an exception for your Wi-Fi adapter or the specific program trying to access the internet.
Step 8: Malware Mayhem: The Silent Saboteur
Malware (malicious software) can wreak havoc on your computer, including disrupting your Wi-Fi connection. It's like having a digital vandal messing with your setup.
- Run a Virus Scan: Use your antivirus software to perform a full system scan to detect and remove any malware.
- Consider a Second Opinion: If your primary antivirus doesn't find anything, consider running a scan with a different antivirus program or an online scanner.
Step 9: Hardware Hurdles: The Adapter's Demise
Sometimes, the problem isn't software; it's hardware! Your Wi-Fi adapter might be faulty.
- External USB Wi-Fi Adapter: As a temporary fix, you can purchase an inexpensive external USB Wi-Fi adapter. If this works, it confirms the internal adapter is the problem.
- Professional Repair: For a more permanent solution, consider taking your laptop to a qualified computer repair shop to have the internal adapter replaced.
Step 10: Channel Congestion: The Wi-Fi Traffic Jam
Think of your Wi-Fi router as a radio station. If too many "stations" are broadcasting on the same channel, it's like a huge traffic jam, causing interference.
- Change Your Router's Channel: Access your router's settings (usually by typing its IP address into your web browser – check your router's manual for instructions) and try changing the Wi-Fi channel to a less congested one. Channels 1, 6, and 11 are generally recommended.
Step 11: Physical Obstructions: The Signal Snatchers
As we mentioned, physical obstructions can interfere with Wi-Fi Signals. Let's do a quick recap.
- Move Your Router: Place your router in a central, elevated location, away from walls, metal objects, and appliances.
- Eliminate Interference: Keep your router away from microwaves, cordless phones, and other devices that emit radio waves.
Step 12: Router Firmware: Keeping Your Router Up to Date
Your router’s firmware (software) is like the operating system for your router. Keeping it updated will improve performance, security, and stability.
- Check for Firmware Updates: Log into your router
How to enable your network connection in Windows 7

By MHELP2U How to enable your network connection in Windows 7 by MHELP2U
Cara Cepat Mengaktifkan Wifi di Windows 7

By HandleCustom Cara Cepat Mengaktifkan Wifi di Windows 7 by HandleCustom
Not connected no connections are available windows 7 laptop

By IT Magics Not connected no connections are available windows 7 laptop by IT Magics
Title: How to Share internet Connection From Windows 7
Channel: Data Science
How to Share internet Connection From Windows 7 by Data Science
Change Wifi Settings
WiFi on Windows 7 Laptop? Solved in 60 Seconds!
Are you wrestling with the frustrating paradox of a seemingly functional Windows 7 laptop that stubbornly refuses to connect to your home Wi-Fi? The flickering network icon, the dreaded "Limited Access" message, or simply, the blank screen where your network list should be – these are all signs of a common, yet easily rectified, predicament. We understand the immediate need for a swift and reliable connection; therefore, we will equip you with a precise, step-by-step guide designed to get you back online within the blink of an eye. Prepare to be amazed by the simplicity of the solution, as we guide you through the process and unlock the full wireless potential of your Windows 7 laptop.
Diagnosing the Connectivity Crisis: Pinpointing the Problem
Before leaping into solutions, a quick diagnostic assessment is paramount. Before anything else, take a moment to ensure the physical switch or function key on your laptop responsible for enabling Wi-Fi is turned on. Look for a physical switch, likely on the side or front of your laptop, often labeled with the Wi-Fi symbol (a series of curved lines radiating from a point). If your laptop lacks a dedicated switch, consult your laptop's user manual to see if it requires a combination of keys to turn on the WiFi. The combination usually involves pressing the "Fn" key (typically located near the Ctrl key on the left side of the keyboard) and the appropriate function key (F1-F12).
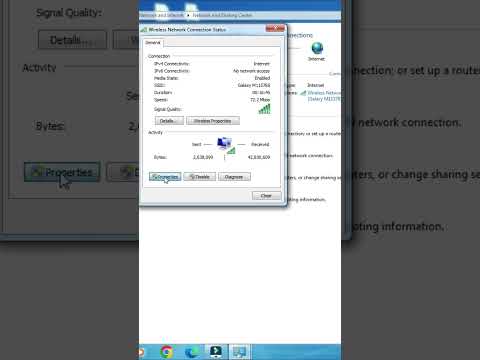
If the physical switch is engaged and the Wi-Fi appears to be enabled, let's check the software side. Navigate to the system tray, which is located at the bottom right corner of your screen. Locate the network icon (it resembles a small computer or a series of ascending bars). Right-click on the icon. If you see a list of available Wi-Fi networks, and your desired network is visible, then you can proceed. If the icon features a red "X", a yellow warning triangle, or shows no networks, we are one step closer to solving the issue.
Another crucial step involves assessing the status of your network adapter. Click the "Start" button, type "Device Manager" in the search bar, and press Enter. In the Device Manager window, expand the "Network adapters" section. Observe the items listed. If your wireless network adapter is listed with a yellow exclamation mark or a red "X", it signifies a problem. If the adapter is not listed at all, the situation warrants further investigation. The absence of your wireless network adapter suggests a driver issue, a hardware incompatibility, or potentially, a disabled adapter.
The Quick Fix: Resetting Your Network Adapter
Often, the root cause of Wi-Fi woes is a temporary glitch within the network adapter itself. Here’s how to perform a quick reset:
- Disable the Adapter: Return to the Device Manager (as described previously). Right-click your wireless network adapter (e.g., "Realtek Wireless LAN 802.11n USB") and select "Disable." Wait a few seconds.
- Enable the Adapter: Right-click the same network adapter and select "Enable."
- Check for Connection: Return to your system tray and click on the network icon. See if the Wi-Fi now functions. If your network appears, you will need to input your password.
This simple disabling and enabling process reinitializes the adapter, often resolving minor software conflicts that impede connectivity. Try connecting to the network after completing these steps.
Driver Dilemma: Updating and Reinstalling Your Network Adapter Drivers
If the quick fix fails, driver-related issues are the likely culprit. Outdated, corrupted, or missing drivers can prevent your laptop from communicating effectively with your Wi-Fi router. Fortunately, Windows 7 provides several mechanisms for driver management:
- Automatic Driver Update: Return to the Device Manager. Right-click on your wireless network adapter. Select "Update Driver Software." Choose the option "Search automatically for updated driver software." Windows will then attempt to locate and install the latest drivers from its internal database or via Windows Update. If any drivers are found, follow the on-screen prompts to install them.
- Manual Driver Installation: If the automatic update fails (or you prefer a more proactive approach), you can manually install drivers. The first step is to find the right driver. You can download drivers from the manufacturer’s website. The manufacturer’s website will often provide more up-to-date drivers that can fix your problem. Another place to find the appropriate drivers is to search for your laptop’s model and “drivers” on a search engine such as Google. Download the appropriate driver. Locate the file you downloaded. Double-click the file to begin the installation process. Follow the prompts. You may need to restart your laptop after installation.
- Driver Rollback: If your WiFi connection has been working properly and you are noticing issues after an update, you may want to roll back your driver to a previous version. In the Device Manager, right-click on the network adapter. Select "Properties". Click the "Driver" tab. If the "Roll Back Driver" button is active, click it. Otherwise, it is unlikely that you had installed a previous version, so you may proceed to the next steps.
- Reinstalling the Driver: If the drivers are causing severe problems, consider completely removing the current drivers and reinstalling them. Return to the Device Manager, right-click on your wireless network adapter, and select "Uninstall." Follow the on-screen prompts to uninstall the driver. Restart your computer. After restart, Windows should automatically attempt to reinstall the network adapter driver, or, navigate to your device manufacturer’s website. From the website, you can find the appropriate driver. Follow the prompts to install the selected driver.
Router Reboot: The Simple Solution That Works Wonders
Network issues can sometimes stem from problems with your router, not the laptop itself. A quick router reboot can often resolve these problems:
- Locate Your Router: Your router is generally a small box that receives its internet connection from your Internet Service Provider (ISP). It usually has several ports at the back.
- Unplug the Router: Locate the power cable connected to your router. Unplug the power cable from the router. Wait for around 30 seconds.
- Plug In and Restart: Plug the power cable back into your router. Allow the router to fully restart (this may take a few minutes). The lights on your router’s front panel will provide information about the start-up process. Once the router has restarted, try to connect your Windows 7 laptop to the Wi-Fi network.
Network Troubleshooter: Windows 7's Built-in Assistant
Windows 7 features a built-in network troubleshooter designed to diagnose and fix common connection problems. Accessing it is straightforward:
- Open the Network and Sharing Center: Click the network icon in your system tray and then select "Open Network and Sharing Center."
- Run the Troubleshooter: In the Network and Sharing Center, click "Troubleshoot problems." Windows will then automatically run a series of diagnostic tests and attempt to resolve any identified issues. Follow any recommendations.
Firewall Frustrations: Allowing Network Access
While firewalls protect your computer from external threats, they can, on occasion, inadvertently block your Wi-Fi connection. Ensure your firewall is not interfering with your wireless network:
- Open the Windows Firewall: Click the "Start" button, type "Windows Firewall" in the search bar, and press Enter.
- Check Firewall Settings: In the Windows Firewall window, click "Allow a program or feature through Windows Firewall."
- Allow the Network Adapter: Ensure your wireless network adapter is allowed. If it is not, click "Change settings" and then mark the checkbox next to your wireless network adapter in the list. Consider also granting access to any related software that is essential for your network operation. Also, check that the network is enabled for both private and public networks.
Security Protocol: Is Your Network Protected?
Ensure that the security protocol used by your router is compatible with your Windows 7 laptop. Older encryption methods (like WEP) are becoming obsolete. It is important to ensure your router is using a modern security protocol:
- Access Your Router's Configuration: To access your router’s configuration, you will need to connect to your router via Ethernet cable or via your computer’s default Wi-Fi connection. Open a web browser and type your router’s default IP address into the address bar. The default IP address is often found on a sticker on the back or bottom of your router (common addresses include 192.168.1.1 or 192.168.0.1). You will be prompted for your username and password. This information is usually also available on the router itself or in the instruction manual.
- Locate Wireless Security Settings: Once logged into your router’s settings, navigate to the wireless security or wireless configuration section.
- Choose the Right Security Protocol: Ensure the selected security protocol is WPA2-PSK or WPA3-PSK. These are highly recommended protocols that are both secure and compatible with all modern devices. Using a less secure protocol can make it impossible for your devices to connect.
- Update Your Password: Select a strong, unique password.
Further Considerations For Enhanced Performance
Sometimes, beyond the simple fixes, there are other ways to enhance your Wi-Fi performance.
- Wireless Interference: Wireless
