cara menyambungkan jaringan wifi ke laptop windows 8

Title: Cara mengaktifkan wifi di windows 8
Channel: AW Tutorial
Cara mengaktifkan wifi di windows 8 by AW Tutorial
Windows 8 WiFi Nightmare? Solved! (Easy Fix Inside!)
WiFi Woes on Windows 8? Conquer the Connectivity Crisis!
Ah, Windows 8. Remember that era? A time of experimental interfaces and…well, patchy WiFi connections for some. It was often a digital battleground. Are you still battling the ghosts of dropped signals? Fear not! Today, we are going to navigate through the murky waters of Windows 8 WiFi issues. The good news? Resolutions are often simpler than you imagine.
The Phantom of the WiFi: Recognizing the Symptoms
First, let's acknowledge the problem. Then, we can tackle solutions. Do you find your connection dropping frequently? Does it vanish into the ether at the most inconvenient moments? Perhaps webpages load at a glacial speed? Or maybe you’re struggling to connect at all. These are all classic warning signs you've encountered the Windows 8 WiFi monster. So, let's address this prevalent issue directly.
Is Your WiFi Adapter the Culprit? A Quick Diagnostic
Before you start tearing your hair out, let’s do some basic troubleshooting. Because, sometimes, it’s not Windows 8 itself. But instead, another factor at hand. First, let’s check the basics. Look at your WiFi adapter. It is the unsung hero of your internet access. This is typically a small piece of hardware inside your device. It translates the digital signals into usable data. Verify it’s enabled. Next, make sure your router is functioning correctly. Check other devices. Do they connect without difficulty? If other devices are working, the problem is likely with the Windows 8 machine. Therefore, we can eliminate one potential source of error.
Driver Drama: Updating Your WiFi Adapter Drivers
Often, outdated drivers are the root of the problem. This is a common source of frustration. Because drivers are the software middlemen. So, to update them, follow these steps. First, locate the Device Manager. You can typically find it. Just search it in the Windows search bar. Then, expand the “Network Adapters” section. Right-click on your WiFi adapter. After that, select "Update driver." Windows will then search for the latest drivers. Subsequently, install any available updates. Restart your computer. After these steps, test your connection once more. Hopefully, this will resolve the issues.
Power Management Shenanigans: Preventing Sleep Mode Interference
Windows 8's power management can sometimes interfere with your WiFi. This is especially true on laptops. Thus, your adapter might be switching off to save battery. Here’s how to address it. Go back to the Device Manager. Find your WiFi adapter again. Right-click and select “Properties.” Navigate to the “Power Management” tab. Uncheck the box. It should read "Allow the computer to turn off this device to save power." Apply the changes. Reboot your machine. It has been shown to fix this issue.
Network Reset Roulette: The Nuclear Option (But Usually Effective)
If the above tactics fail, there is one more option. It is a network reset. This clears saved network settings. Furthermore, it restores things to their default settings. To do this, go to “Settings” in your Windows 8 setup. Further along, then pick “Network and Internet.” Now, locate “Network reset.” Select it. Then, follow the on-screen prompts. After that, your computer will restart. Finally, reconnect to your WiFi network. You will need to re-enter your password now.
The Router's Role: Modernising Your Setup
Sometimes, the issue is not Windows 8 itself. It is your router. Over time, these devices age, too. They can also struggle with newer technologies. Therefore, consider upgrading to a newer router. One that supports the latest WiFi standards. For example, routers offer faster speeds. They also often provide improved compatibility.
Security Snafus: Checking for Interference
Security software can sometimes block your connection. Though rare, it can happen. Firewalls, for example, are set to protect your system. But, they might accidentally block network access. Therefore, check your firewall. Ensure that your WiFi connections are allowed. Temporarily disable your security software. Find out if that solves the problem. Then, review your software's settings. Adjust your settings accordingly.
The DHCP Dilemma: Setting a Static IP (If Necessary)
Rarely, the dynamic IP assignment from your router can trigger issues. Because, it makes it difficult to locate the device. In such situations, assigning a static IP can fix the issue. But, you need a bit more tech know-how here. Research how to assign a static IP. Then, follow the instructions carefully. Always make sure you understand the risks before making changes.
Beyond the Bandwidth: Considering Network Congestion
Consider your surroundings. Because other devices on the network might also slow things down. More devices equals decreased performance. Because all of these devices share your available bandwidth. Thus, reduce the number of devices actively using the internet. This will improve the connection speed.
Final Thoughts: Reclaiming Your Windows 8 WiFi Experience
So, there you have it. We've covered the most common culprits. We've also offered some fixes. Furthermore, these should help to conquer your Windows 8 WiFi frustrations. Remember to start with the simple solutions. Then, work your way up to the more advanced ones. The goal is to get you back online. Your patience will likely pay off. Because, solving WiFi issues can be rewarding. Because, ultimately, it is about enjoying a smooth online experience. Happy surfing!
Is Your Laptop WiFi Speed TORTURE? This 1 Trick Fixes It!Windows 8 WiFi Nightmare? Solved! (Easy Fix Inside!)
Ah, Windows 8. Remember that? A bold experiment in the world of operating systems, a bit like trying to juggle chainsaws while riding a unicycle. Ambitious, yes. Smooth sailing? Not always. And one of the biggest headaches for many of us wasn't the Metro interface (though that certainly had its detractors), but the Wi-Fi. Were you constantly battling dropped connections, painfully slow speeds, or just plain refusal to connect? We've all been there, right? Trust me, I spent enough time wrestling with my own Windows 8 laptop to feel your pain. But guess what? We've got some good news!
1. The Windows 8 Wi-Fi Woes: A Relatable Reality
Let's get real for a second. Before we dive into the solutions, let's acknowledge the problem. Windows 8 and Wi-Fi often seemed to have a turbulent relationship, a bit like a cat and a vacuum cleaner. The Wi-Fi signal would be strong one minute, gone the next. You'd be staring at that little icon in the corner, begging it to connect, while your patience slowly dwindled. We're talking about dropped connections in the middle of video calls, sluggish download speeds while trying to stream your favorite shows, and the frustrating experience of being online one moment and offline the next. Sound familiar?
2. Why Did Windows 8 Wi-Fi Go Awry? Unpacking the Culprits
So, what exactly caused this Wi-Fi chaos? Well, it wasn't always a single culprit, but rather a combination of factors, a digital storm brewing in your laptop. Think of it like a recipe gone wrong – too much of one ingredient, not enough of another. Here are some of the usual suspects:
- Driver Issues: This was probably the most common offender. Outdated, corrupted, or incompatible network drivers were like the gremlins in the engine, wreaking havoc.
- Power Management Settings: Windows 8, with its focus on battery life, sometimes got a little too enthusiastic about conserving power. This could lead to the Wi-Fi adapter being shut down to save juice, leaving you disconnected.
- Router Incompatibilities: Believe it or not, some older routers just didn't play nice with Windows 8's networking protocols. It's like trying to fit a square peg in a round hole.
- Network Configuration Problems: Incorrect IP addresses, DNS server settings, or other network configuration issues could also prevent your laptop from properly connecting to the internet.
- Security Software Interference: Your antivirus or firewall, while designed to protect you, could sometimes block your Wi-Fi connection.
3. Diagnosis 101: Spotting the Symptoms of Wi-Fi Failure
Before we start throwing solutions at the problem, let's make sure you actually have a problem. Identifying the symptoms is key. Are you seeing any of these?
- "Limited Connectivity" or "No Internet Access" Errors: This is the most common sign. You're connected to the network, but you can't actually do anything online.
- Frequent Disconnections: Your Wi-Fi drops out randomly, sometimes after just a few minutes, sometimes after hours.
- Slow Internet Speeds: Even when connected, the internet feels sluggish, websites take forever to load, and streaming is a nightmare.
- Inability to Connect: Your laptop simply won't connect to your Wi-Fi network, even when you enter the correct password.
- The "Yellow Triangle of Doom": You see the little yellow triangle with an exclamation point over your Wi-Fi icon, indicating a connection problem.
4. The First Aid Kit: Basic Troubleshooting Steps
Okay, so you've got the symptoms. Now what? Before we get into more advanced solutions, let's try some basic troubleshooting steps. Think of these as the digital equivalent of putting a Band-Aid on a scrape.
- Restart Everything: Yes, the classic "turn it off and on again" solution. Restart your Windows 8 laptop, as well as your router and modem. Sometimes a simple reboot is all it takes.
- Check Your Router: Make sure your router is turned on and broadcasting a Wi-Fi signal. Check the lights to see if everything is working correctly.
- Move Closer to the Router: The signal strength might be weak. Try moving your laptop closer to the router and see if the connection improves.
- Forget and Reconnect to Your Wi-Fi Network: Go into your Wi-Fi settings, "forget" your network, and then reconnect using your password. Sometimes this resets the connection and fixes the issue.
- Run the Windows Network Troubleshooter: Right-click on the Wi-Fi icon in the system tray and select "Troubleshoot problems." Windows 8 will automatically try to diagnose and fix the problem.
5. Driver Dilemmas: Updating or Reinstalling Your Network Driver
If the basic steps didn't work, it's time to delve into the world of drivers. Remember those gremlins we mentioned earlier? They need tending to. A corrupt or outdated driver is often the root cause.
- Updating Your Driver:
- Press the Windows key + X and select "Device Manager."
- Expand "Network adapters."
- Right-click on your Wi-Fi adapter (e.g., "Wireless Network Adapter") and select "Update driver."
- Choose "Search automatically for drivers" and let Windows search for the latest version online.
- Reinstalling Your Driver:
- Follow steps 1 and 2 above.
- Right-click on your Wi-Fi adapter and select "Uninstall device."
- Restart your computer. Windows will automatically attempt to reinstall the driver.
- If that doesn't work, visit the website of your laptop manufacturer or the Wi-Fi adapter manufacturer to download the latest driver.
6. Power Management Pitfalls: Taming the Power Saver
As we talked about before, Windows 8’s power management settings can be a little overzealous, so let's ensure it's not the culprit behind your Wi-Fi woes.
- Open Device Manager (Windows key + X, then select Device Manager).
- Expand "Network adapters."
- Right-click on your Wi-Fi adapter, and select "Properties."
- Go to the "Power Management" tab.
- Uncheck the box that says, "Allow the computer to turn off this device to save power."
- Click "OK."
7. Router Reboot: Refreshing Your Connection
Sometimes, the issue isn't with your laptop at all, but with your router. A simple reboot can do wonders!
- Unplug your router and modem from the power outlet.
- Wait for about 30 seconds.
- Plug the modem back in and wait for it to fully power on.
- Plug the router back in and wait for it to fully power on.
- Try connecting to your Wi-Fi again.
8. Network Configuration Examination: Check Those Settings!
Let's peek at some of your Windows 8 network settings, just to make sure everything is configured correctly:
- Open the Control Panel (search for "Control Panel" in the Start menu).
- Go to "Network and Internet" > "Network and Sharing Center."
- Click on your Wi-Fi network connection.
- Click "Properties."
- Double-click on "Internet Protocol Version 4 (TCP/IPv4)."
- Make sure "Obtain an IP address automatically" and "Obtain DNS server address automatically" are selected. If they aren't, select them and click "OK."
9. Bypassing the Security Software Barrier
Your security software (antivirus and firewall) is there to protect you, but it can sometimes mistakenly block your Wi-Fi connection.
- Temporarily disable your antivirus software and firewall. Test your Wi-Fi connection. If it works, then the security software is the issue.
- Re-enable the security software.
- Check the settings of your security software and make sure your Wi-Fi adapter is allowed. You may need to add your Wi-Fi adapter to the exception list.
10. The Hidden Troubleshooters: Advanced Techniques
If you've tried everything above and are still struggling, don't despair! Here are some more advanced techniques.
- Run the Network Reset: In Settings > Network & Internet > Status > Network reset. This will reset all your network adapters to their default settings. Be prepared to re-enter your Wi-Fi password.
- Check for Router Firmware Updates: Outdated router firmware can sometimes cause compatibility issues. Check your router's manual for instructions on how to update the firmware.
- Contact Your Internet Service Provider (ISP): If all else fails, it might be an issue on their end.
11. The Signal Strength Saga: Optimizing Your Wireless Reach
A weak Wi-Fi signal can be the bane of any connection. Let's ensure you're getting the best signal possible!
- **Position Your
Cara Mengatasi Laptop Tidak Bisa Connect Wifi Windows 10, 8 & 7
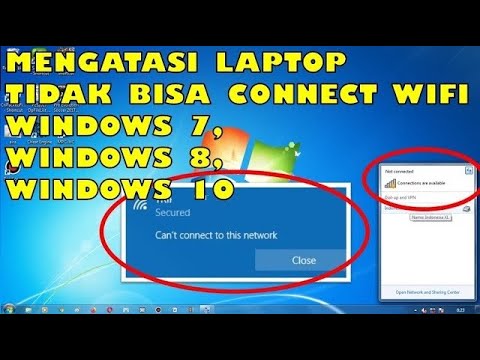
By Jari Mungil Rayyan Cara Mengatasi Laptop Tidak Bisa Connect Wifi Windows 10, 8 & 7 by Jari Mungil Rayyan
Cara Menghubungkan ke WiFi di Windows 8

By HOWTECH Cara Menghubungkan ke WiFi di Windows 8 by HOWTECH
Windows 8 - How to turn on WiFi

By HowTo Windows 8 - How to turn on WiFi by HowTo

Title: Cara atasi WiFi tidak bisa connect di laptop not connected
Channel: ijal tutorial
Cara atasi WiFi tidak bisa connect di laptop not connected by ijal tutorial
My Laptop Work
Windows 8 WiFi Woes Vanquished: A Comprehensive Troubleshooting Guide
The digital age, for all its marvels, is unfortunately plagued by occasional technological gremlins. Perhaps no gremlin is more frustrating, more disruptive to our daily lives, than the capricious behavior of a faltering WiFi connection. If you're reading this, chances are you've experienced the infuriating reality of Windows 8's sometimes-temperamental wireless capabilities. The good news? The solution, or at least a swift pathway toward it, is often simpler than you might think. We'll delve into the most common culprits behind Windows 8 WiFi issues, providing you with a series of troubleshooting steps tailored to restore your internet access and reclaim your digital serenity.
Identifying the Source of the Disconnect: A Preliminary Scan
Before diving into complex solutions, it's crucial to pinpoint the source of your WiFi woes. Is the problem confined to your Windows 8 device, or are other devices in your home experiencing similar difficulties? A quick check of a smartphone, tablet, or another laptop connected to your home network will help narrow down the possibilities. If all devices are struggling, the issue most likely resides with your router or your internet service provider (ISP). If only your Windows 8 machine is affected, then the focus of our troubleshooting will shift towards the OS and its associated drivers and settings.
Step 1: Basic Diagnostics – The Quick Checks
Sometimes, the simplest solutions are the most effective. Before we tackle the more intricate fixes, let’s address the obvious:
- Airplane Mode: Ensure Airplane Mode on your Windows 8 device isn't inadvertently activated. This setting disables all wireless communications, including WiFi. You can toggle it by accessing the Charms bar (swipe from the right edge of the screen) and clicking on the airplane icon.
- WiFi Switch: Many laptops feature a physical switch or a function key combination (often Fn + a specific key) to enable/disable WiFi. Double-check to confirm the switch is in the "on" position, and that you haven't accidentally disabled WiFi through a keyboard shortcut.
- Restart, Restart, Restart: The classic cure-all. Restarting your computer, and especially your router, can often resolve temporary glitches and reset network connections. A full power cycle (turning off and unplugging the device for at least 30 seconds before plugging it back in and restarting) is often more effective than a simple restart.
- Check Your Physical Connection: Ensure the WiFi adapter is physically connected to the computer, such as the antennae.
Step 2: Driver Detective – Updating and Reinstalling Wireless Network Adapters
Outdated or corrupted network drivers are frequent instigators of WiFi problems. Here’s how to ensure your drivers are up-to-date:
- Open Device Manager: Right-click on the Start button (or press the Windows key + X) and select "Device Manager" from the menu.
- Locate Your Wireless Adapter: In the Device Manager window, expand the "Network adapters" category. You'll see a list of network adapters, including your wireless adapter. It might be labeled as "Wireless Network Adapter," "WiFi Adapter," or something similar, depending on your specific hardware.
- Update Driver: Right-click on your wireless adapter and select "Update driver." Choose "Search automatically for updated driver software." Windows will search for and install any available updates.
- Reinstall if Necessary: If driver updates don't work, or if problems persist, consider uninstalling and reinstalling the driver. Right-click on your wireless adapter in Device Manager and select "Uninstall device." Restart your computer. Windows should automatically reinstall the driver upon startup. If not, you can download the latest drivers from your adapter manufacturer's website. (Refer to your computer's documentation or the manufacturer's website for driver download instructions appropriate for your hardware.)
Step 3: Power Management – Optimizing for Stability
Windows 8's power-saving features can sometimes interfere with WiFi performance. To address this:
- Open Device Manager: (See Step 2 for instructions.)
- Navigate to Network Adapters: Expand the "Network adapters" category.
- Access Adapter Properties: Right-click on your wireless adapter and select "Properties."
- Power Management Tab: In the Properties window, go to the "Power Management" tab.
- Disable Power Savings: Uncheck the box labeled "Allow the computer to turn off this device to save power." Click "OK" to save your changes.
This setting prevents Windows from aggressively shutting down the network adapter to save energy.
Step 4: Network Configuration – Examining Advanced Settings
Sometimes, incorrect network settings can impede WiFi functionality. Let's inspect these settings:
- Open Network and Sharing Center: Right-click the WiFi icon in the system tray (the area near the clock) and select "Open Network and Sharing Center." Alternatively, you can access it through the Control Panel.
- Change Adapter Settings: In the Network and Sharing Center, click on "Change adapter settings" in the left pane. This will open up the Network Connections window.
- Properties of Your WiFi Connection: Right-click on your WiFi connection (it should be labeled with your network name) and select "Properties."
- Configure Protocol: In the Properties window, make sure "Internet Protocol Version 4 (TCP/IPv4)" and "Internet Protocol Version 6 (TCP/IPv6)" are enabled (checked).
- Obtain IP and DNS Automatically: Double-click on "Internet Protocol Version 4 (TCP/IPv4)" and ensure that "Obtain an IP address automatically" and "Obtain DNS server address automatically" are selected. Doing so ensures that your computer intelligently receives the proper network configuration from the router. Click "OK" on all prompts.
Step 5: Router Review – Ensuring Compatibility and Optimal Performance
Your router is an integral part of your WiFi system, so it's essential to make sure it's configured correctly and functioning optimally:
- Router Firmware: Ensure that your router's firmware is up-to-date. Router manufacturers regularly release firmware updates to fix bugs, improve performance, and enhance security. Consult your router's manual or manufacturer's website for instructions on how to update its firmware.
- Channel Conflicts: WiFi routers broadcast on different channels. If your router is using the same channel as nearby routers, it can lead to interference and reduced performance. Access your router's configuration interface (usually by typing its IP address, such as 192.168.1.1 or 192.168.0.1, into your web browser; the default login credentials are often printed on the router itself) and change the WiFi channel to a less crowded one. Experiment with channels 1, 6, and 11, as these are typically less congested.
- Router Placement: Position your router in a central, elevated location, away from walls, metal objects, and other electronic devices that might interfere with the WiFi signal.
- Router Reboot: As previously stated, a simple router reboot often resolves many WiFi issues. Unplug your router for 30 seconds, then plug it back in and allow it to fully restart.
Step 6: Network Reset – Reclaiming a Fresh Start
If the above steps haven't resolved your WiFi problems, consider resetting your network settings:
- Open Settings: Open the Settings app (press the Windows key + I).
- Network & Internet: Click on "Network & Internet."
- Status: Select "Status" on the left-side menu.
- Network Reset: Scroll down and click on "Network reset." This will reset all of your network adapters to their default settings.
- Confirm and Restart: Click "Reset now" and confirm your decision. Your computer will restart.
Step 7: Advanced Troubleshooting – Exploring Further Options
If you’ve worked through all the above steps without success, the problem may be more complex. Consider the following:
- Check for Interference: Other electronic devices, such as microwaves, cordless phones, and Bluetooth devices, can interfere with your WiFi signal. Try to identify and eliminate any sources of interference near your router and device.
- WiFi Adapter Hardware Issues: In rare cases, the WiFi adapter itself may be faulty. If you strongly suspect this, you may want to consider replacing it. If it is a laptop, this process is often more complex.
- Firewall Interference: Your firewall might be blocking your WiFi connection. Double-check your firewall settings to ensure that your WiFi adapter and related applications are allowed to communicate. Sometimes, temporarily disabling your firewall may help identify if this is the problem. If so, adjust your firewall settings accordingly.
- Contact Technical Support: If all else fails, contact your internet service provider or a qualified computer technician for further assistance.
Concluding Remarks: A Path to a Seamless Connection
Experiencing WiFi issues on Windows 8 can be incredibly frustrating, but as you've seen, a structured, methodical approach often leads to a successful resolution. By carefully working through the steps outlined above, you can diagnose and fix the most common causes of WiFi problems, restoring your online access and returning your peace of mind. Remember to be patient, methodical, and persistent, and you'll be back to streaming, browsing, and connecting in no time.
