wifi camera connect to laptop
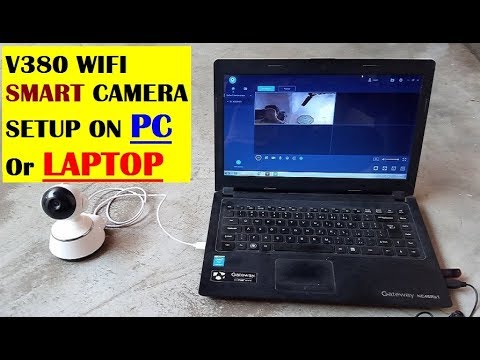
Title: V380 wifi Camera software installation & Setup & remote viewing on Laptop or PC Over Wifi Local
Channel: Dev Tech Help
V380 wifi Camera software installation & Setup & remote viewing on Laptop or PC Over Wifi Local by Dev Tech Help
wifi camera connect to laptop, wireless camera connect to laptop, ip camera connect to laptop, cp plus wifi camera connect to laptop, canon camera connect to laptop wifi, how to connect camera to laptop using wifi, how do i connect my camera to my computer through wifi, how to connect cctv camera to laptop via wifi
WiFi Camera to Laptop: The SHOCKINGLY Easy Setup Guide!
Unlock Your World: Effortlessly Connect Your WiFi Camera to Your Laptop
Have you ever wished you could see what your WiFi camera sees, directly on your laptop screen? It’s easier than you think. Forget complicated tech manuals and confusing jargon. This guide will walk you through the process. We'll navigate the setup, making it simple and painless. We’ll explore the surprisingly straightforward steps.
The Gateway: Preparing Your Camera and Laptop
First, you need to ensure your WiFi camera is ready. Check that the camera is powered on and connected to your home WiFi network. Most cameras utilize a small LED that indicates whether it has connected successfully. The camera's manual offers specific instructions for that. This ensures that data can flow seamlessly.
Next, consider your laptop. It should also be connected to the same WiFi. This synchronicity is paramount. Make sure your laptop's WiFi is active and functioning correctly. You wouldn’t want any connectivity hiccups. Ensure you have a stable internet connection for smoother streaming.
Unveiling the Camera’s IP Address: Your Secret Key
Every device on your network has a unique IP address. This address is crucial for finding your camera. Finding this is quite simple. There are a few methods to discover this.
One option is to check your router’s admin panel. Log into your router’s interface through your web browser. You’ll find a list of connected devices. Locate your camera on this list. Its IP address will be listed alongside it.
Alternatively, many camera models have their own dedicated apps. These apps usually show the camera's IP address. The camera's packaging or product literature should detail how to find the application. This is often the most straightforward approach.
Finally, some cameras come with software that scans your network. This software will identify your camera and display its IP address. Now you know it.
Software Solutions: Choosing Your Viewing Portal
Now that you have your camera's IP address, you need software. This is the virtual window to your camera's view. Several options exist. Each offers unique features and interfaces.
One popular choice is the camera’s proprietary software. If your camera manufacturer provides software, use it. It’s optimized for your specific camera model. This often provides the best performance.
If your camera lacks dedicated software, you have more choices. Check out third-party viewing software. These programs often support a variety of camera models. They enable you to view multiple cameras simultaneously. They often offer additional features.
Another method is to use a web browser. Some cameras have a built-in web interface. Use your camera’s IP address. Type it into your browser's address bar. This will often give you access to the camera's live feed.
Step-by-Step Connection: Making It Happen
With your camera’s IP address and software ready, it’s time to connect. The specific steps vary slightly depending on your software. However, the general process remains the same.
First, open your chosen software. Look for an option to add a new camera. This might be labeled "Add Camera," "Add Device," or similar. Then, enter your camera’s IP address. This establishes the connection.
You might also be prompted to enter your camera's login credentials. This involves a username and password. This is a security measure. Enter the credentials that you set up for your camera. Next, select your camera model from the list. The software will then connect to your camera.
Once the connection is established, you should see the camera’s live feed. If not, double-check your IP address. Verify your login details. Review your camera's settings. You should be able to see the camera feed on your screen.
Troubleshooting and Refinement
Sometimes, things don’t go as planned. Don’t worry, it's usually easy to fix. Here are a few common troubleshooting tips.
First, ensure that both your camera and laptop are on the same network. Double-check your WiFi connection. This step is critical. Next, verify the IP address is correct. A typo can be problematic. Make sure you entered it correctly.
If you’re still having trouble, reboot your camera and your laptop. This often fixes minor glitches. Finally, consult your camera’s manual. This resource contains specific troubleshooting advice.
Beyond the Basics: Exploring Additional Features
Once you have your camera connected, explore its features. Most WiFi cameras offer more than just live viewing. Some cameras support remote Pan, Tilt, and Zoom (PTZ). Others provide recording to an internal SD card or external storage.
Many cameras also offer motion detection. This can trigger alerts or recordings. Play around with the settings. Customize your viewing experience. Discover the full potential of your camera.
The Benefits: Why Connect Your Camera to Your Laptop?
Connecting your WiFi camera to your laptop opens up new possibilities. You can monitor your home while you're working. You can watch pets from afar. You can keep an eye on your property.
Having your camera feed on your laptop expands its usability. You can easily record footage. Analyzing the videos becomes much easier. You can also use your laptop's larger screen. This makes it easier to observe details.
Conclusion: Your Window to the World, Connected
Connecting your WiFi camera to your laptop is easy. The process is achievable. By following these simple steps, you can enjoy the convenience. You will have access to this powerful capability. You are now ready to unlock a new dimension to your surveillance capabilities. Enjoy the enhanced live view and a host of features. You're now ready to start!
Unlock Your Desktop's Wi-Fi Power: Laptop to Desktop Wireless Magic!WiFi Camera to Laptop: The SHOCKINGLY Easy Setup Guide!
Alright, tech enthusiasts and curious minds, let’s cut the jargon and get straight to the good stuff: setting up your WiFi camera to stream directly to your laptop. Seriously, it's easier than making instant noodles (and arguably more rewarding!). We've all been there, staring blankly at complicated manuals and feeling like you need a PhD in computer science just to see what your pet is doing while you're at work. But not anymore! We're going to break down this process into bite-sized, easy-to-digest chunks. Think of this as your personalized, stress-free, and – dare I say – fun guide.
1. Why Connect Your WiFi Camera to Your Laptop? The Big Picture!
Why bother, you ask? Well, think of the possibilities! A WiFi camera connected to your laptop is like having your own personal spy, a security guard, or even a candid photographer, all rolled into one. Perhaps you want to:
- Monitor your home: Keep an eye on your valuables, check in on the kids, or simply ensure your pet isn’t turning your living room into a demolition derby.
- Live stream: Share your gaming adventures, broadcast a tutorial, or create engaging content for your viewers.
- Conduct video calls: Significantly improve your video call quality compared to your laptop's built-in webcam.
- Enhanced Surveillance: A more expansive view, particularly with Pan-Tilt-Zoom cameras, offering a much greater field of view than a static webcam.
The benefits are numerous, and the setup, surprisingly straightforward. Before we dive in, however, have you considered the peace of mind that comes from knowing you're in control of your own surveillance? It's like having an extra set of eyes, constantly watching over everything that matters.
2. Gathering Your Arsenal: What You’ll Need
Before we get our hands dirty, let's make sure you have the necessary tools. Think of it as assembling your equipment for a fun, tech-filled adventure! You’ll need the following:
- A WiFi Camera: This is the star of the show! Make sure it’s a WiFi-enabled camera (look for the little WiFi symbol).
- A Laptop: Your trusty companion, ready to receive the video feed.
- Your Home WiFi Network: This is the invisible bridge connecting your camera and your laptop. Ensure a stable connection!
- The Camera's App or Web Interface: This is how you'll configure your camera.
- Optional Software (if needed): Some scenarios necessitate specific software for broader control and greater accessibility.
That's it! No need for fancy gadgets or complicated setups. If you have these basics, you're practically ready to roll.
3. The Initial Setup: Connecting Your Camera to Your WiFi
This is usually the most crucial step, but don't let it intimidate you! Most WiFi cameras come with a user-friendly app or web interface. Here’s a general overview, but always refer to your camera's specific instructions:
- Download and Install the App: Locate the app for your camera on your smartphone or tablet and install it. Many cameras come with a QR code to make the installation easier.
- Create an Account and Log In: You'll most likely need to create an account within the app.
- Add Your Camera: The app should guide you through the process of adding your camera. This usually involves scanning a QR code on the camera itself or entering the camera's serial number.
- Connect to WiFi: This is where you enter your WiFi password. The camera will then connect to your home network.
- Test the Connection: Once connected, you should be able to see a live feed from your camera within the app.
Think of this step like befriending your camera and teaching it to communicate with your network. Simple, right?
4. Accessing Your Camera Feed on Your Laptop: Methods Revealed!
Now for the fun part: getting that sweet video feed onto your laptop! There are several methods you can use, each with its own pros and cons.
- Using the Camera's Official Software (Recommended): Many camera manufacturers offer desktop software that allows you to view the live feed directly on your laptop. Check the camera's website or included documentation for download links. This is often the easiest and most reliable method.
- Using the Camera's Web Interface: Your camera likely has a built-in web interface (accessible through a web browser). Find the camera's IP address (usually in the camera's app or manual) and enter it into your browser's address bar. This access is device-agnostic, but often contains fewer advanced configuration options.
- Using Third-Party Software (for more advanced control): Several third-party software applications are available that allow you to view and manage IP cameras. These apps may offer features like recording, motion detection, and remote control. This is ideal if you need additional features not covered by the prior two methods.
- Using RTSP Streams: Real-Time Streaming Protocol (RTSP) streams let you access live video feeds. This method can be used for virtually all IP cameras, but requires more technical expertise.
We'll navigate through each scenario, making sure you're equipped with the right steps.
5. Method 1: The Camera Software Approach (Easiest Path)
This is usually the simplest and most user-friendly method, particularly if you're new to all this.
- Download and Install the Software: Find the official software for your camera (usually on the manufacturer's website) and install it on your laptop.
- Launch the Software: Open the software.
- Locate Your Camera: The software should automatically detect your camera on your network. If not, you may need to enter your camera's IP address or serial number.
- View the Live Feed: Once your camera is connected, you should be able to view the live video feed within the software.
This is often as simple as clicking a button, like having your own personal viewing window.
6. Method 2: Accessing Through the Web Interface (For Tech-Savvy Souls)
If your camera has a web interface, this is another option.
- Find the Camera's IP Address: Check your router's settings or your camera's app for the camera's IP address.
- Open a Web Browser: Launch your favorite web browser (Chrome, Firefox, Safari, etc.).
- Enter the IP Address: In the address bar, type the camera's IP address and press Enter.
- Log In: You may need to enter a username and password to access the camera's web interface.
- View the Live Feed: Within the web interface, you should find an option to view the live video feed.
This is like peeking behind the curtain to see the inner workings of your camera.
7. Method 3: The Third-Party Software Option (For Extra Features)
For more functionality, third-party software can be a lifesaver.
- Choose Your Software: Select an IP camera viewing software (search online for "IP camera viewer software").
- Download and Install: Install the software on your laptop.
- Add Your Camera: Within the software, add your camera by entering its IP address, username, and password.
- Configure Settings: Customize the settings to your liking, such as recording, motion detection, etc.
- View the Live Feed: The software will then display the live video feed from your camera.
This is like having your own camera command center, ready to manage every aspect of your surveillance experience.
8. Troubleshooting: Common Hiccups and How to Fix Them
Let's be honest; sometimes things don't go according to plan. Here are some common issues and how to resolve them:
- Can't Find the Camera: Double-check your WiFi connection, the camera’s power supply, and make sure your camera is on the same network as your laptop. Verify your camera's IP address.
- Can't Connect to the Web Interface: Ensure you've entered the correct IP address and credentials. Try restarting your camera and laptop. Check your firewall settings.
- Poor Video Quality: Check your internet speed and WiFi signal strength. Consider moving the camera closer to the router. Adjust the video resolution settings in the camera's app or web interface.
- Camera is Offline: This confirms that the power supply works and the camera is turned on. Check the WiFi and router!
Don't fret; you’re not alone! We've all faced these bumps in the road.
9. Security Considerations: Protecting Your Privacy!
Security is paramount, especially when dealing with cameras.
- Strong Passwords: Use strong, unique passwords for your camera and your WiFi network.
- Keep Firmware Updated: Update your camera's firmware to patch security vulnerabilities.
- Check Privacy Settings: Review your camera's privacy settings and adjust them to your preferences. Consider two-factor authentication if available.
- Keep Your Network Secure: Maintain the security of your home network.
Think of this as wrapping your camera in an invisible shield, preventing unwanted access.
10. Optimizing Video Quality: Making the Most
Turn Your Windows 7 Laptop into a WiFi Hotspot! (Easiest Method EVER!)Hikvision IP camera connect directly with PC Laptop using LAN Ethernet cable Part 3
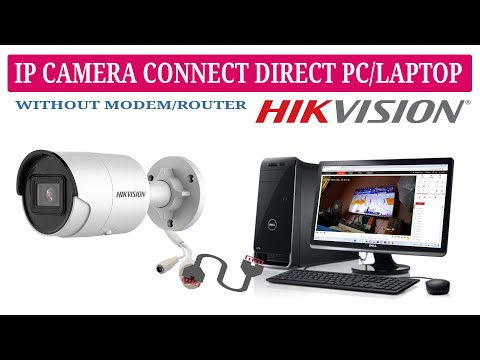
By TECHLOGICS Hikvision IP camera connect directly with PC Laptop using LAN Ethernet cable Part 3 by TECHLOGICS
V380 Windows PCLaptop Software Download, Install, and Setup for Live Stream & PTZ Control Features

By TECHLOGICS V380 Windows PCLaptop Software Download, Install, and Setup for Live Stream & PTZ Control Features by TECHLOGICS
Flipper Zero vs. WiFi Camera CCTV shorts wifi android iphone cctv

By David Bombal Flipper Zero vs. WiFi Camera CCTV shorts wifi android iphone cctv by David Bombal

Title: tapo camera view on windows pc free camlytics software, Easily connect and view Tapo camera on PC
Channel: TECHLOGICS
tapo camera view on windows pc free camlytics software, Easily connect and view Tapo camera on PC by TECHLOGICS
My Laptop Work
WiFi Camera to Laptop: The Astonishingly Simple Guide to Seamless Streaming
We've all been there: yearning for that extra layer of security, the ability to monitor a space, or simply wanting to capture candid moments without the hassle of tangled wires. The solution? A WiFi camera, connected directly to your laptop. And contrary to what you might believe, the setup process isn’t a labyrinth of complicated configurations. It's surprisingly straightforward, and we're here to illuminate the path. This guide will transform you from a tech novice to a WiFi camera aficionado in record time.
Understanding the Fundamentals: WiFi Cameras and Your Laptop's Role
Before we begin the setup adventure, let's clarify a few critical aspects. A WiFi camera is essentially a miniature, wireless surveillance system. It transmits live video and often audio, directly to your laptop, using your home's WiFi network. Your laptop, in turn, acts as the receiving and viewing station. The beauty of this arrangement lies in its flexibility. No cables are needed, and you can place the camera anywhere within your WiFi range. Your laptop becomes the central command center, allowing you to view, record, and control the camera's functionality.
Essential Preparations before the Digital Dance Begins
Before we dive into the setup, ensure you have the following items readily available. This will streamline the process and prevent frustrating delays:
- The WiFi Camera: Make sure it's fully charged (if it operates on battery power) or plugged into a working power source.
- Your Laptop: Ensure it's connected to your WiFi network.
- Your Router's Information: You’ll need the network name (SSID) and password.
- The Camera's Documentation: Keep the user manual handy, as it often contains specific instructions and troubleshooting tips.
- A Secure Location: Consider where you will safely mount the camera.
Choosing the Right WiFi Camera: A Crucial First Step
The market offers a dazzling array of WiFi cameras, each with its unique features and capabilities. Consider your specific needs when selecting a model:
- Resolution: Higher resolution (1080p, 4K) provides sharper, more detailed video.
- Field of View: This determines the breadth of the camera's view. Wider angles capture more of the surrounding environment.
- Night Vision: Essential for surveillance in low-light conditions.
- Motion Detection: Alerts you when movement is detected, saving you from constant monitoring.
- Two-Way Audio: Allows you to communicate through the camera's built-in microphone and speaker.
- Storage Options: Some cameras offer local storage (microSD card) or cloud storage for recording footage.
- Compatibility: Ensure the camera is compatible with your laptop's operating system (Windows, macOS).
Connecting Your WiFi Camera: The Step-by-Step Guide
Now, let's embark on the central task configuring your WiFi camera to connect directly to your laptop. The precise steps will vary slightly depending on the camera model, but the general process follows a similar pattern:
Power Up the Camera: Turn on your camera and ensure the power indicator illuminates.
Download and Install the Camera's Software: Most WiFi cameras require dedicated software or an app to function on your laptop. This software acts as the interface, allowing you to view, control, and manage the camera. Locate the software (usually from the manufacturer's website) and download it to your laptop. Follow the installation prompts.
Connect to Your WiFi Network (If Necessary): Some cameras have an initial setup mode where they broadcast their own temporary WiFi network. You may need to connect your laptop to this network. This is a preliminary connection, often used for the initial setup process.
Open the Camera Software: Launch the software you just installed. You'll likely see a search or "add camera" option.
Follow the On-Screen Instructions: The software will guide you through the remaining steps, which often involve:
- Entering your WiFi network's credentials. This is where you'll input your network name (SSID) and password.
- Pairing the camera: The camera will attempt to connect to your WiFi network. The software will display a status indicator indicating the progress.
- Configuring camera settings: This is where you will customize video settings, recording options, and alerts.
Verify the Connection: Once the setup is complete, you should see a live video feed from your camera within the software. If you're experiencing connection issues, refer to the troubleshooting section below.
Position and Secure the Camera: Once you've confirmed a successful connection, mount the camera in your desired location. Be sure to position it at a height that provides the best viewing angle.
Troubleshooting Common WiFi Camera Connection Issues
No digital adventure is without its occasional hiccups. Here’s a breakdown of solutions to typical challenges:
Camera Not Connecting to WiFi:
- Double-check your WiFi password: Ensure you’ve entered the correct credentials. Even a single incorrect character can prevent a connection.
- Proximity to the router: Ensure the camera is within range of your WiFi router. Move the camera closer if needed.
- Router compatibility: Verify that your router is compatible with the camera.
- Restart Router & Camera: Power cycle both devices. Sometimes, a simple reboot resolves connectivity issues.
- Check the camera’s network settings: Access the camera's settings menu within the software and confirm the correct network is selected.
Poor Video Quality:
- Check your internet speed: A slow internet connection can result in choppy video. Try running at speed test to ensure your internet speeds are sufficient.
- Camera resolution settings: Adjust the video resolution to optimize for your internet bandwidth.
- Camera placement: Position the camera to avoid obstructions.
Software Issues:
- Update the software: Ensure the software is up to date. Software updates often contain bug fixes and performance improvements.
- Restart the software: Close and reopen the software.
Firewall Restrictions:
- Check your firewall settings: Your laptop's firewall might be blocking the camera's connection. Allow the camera software through your firewall.
Utilizing Your WiFi Camera: Exploring Advanced Features
Once your camera is connected, the possibilities are vast. Consider exploring these advanced features:
Live Streaming: Continuously monitor your camera’s view in real time.
Recording: Record footage manually or set up scheduled recordings. Set up the camera to record upon motion detection.
Motion Detection Alerts: Configure the camera to send alerts to your laptop or smartphone when motion is detected.
Two-Way Audio: If the camera has this feature, communicate with people near the camera.
Remote Access: Many cameras offer remote access via a mobile app, allowing you to view and control the camera from anywhere in the world.
Cloud Storage: Consider using cloud storage to back up your video recordings.
Making the Most of Your WiFi Camera: Tips and Tricks
Regularly Update Software: Keep the camera’s software up-to-date to benefit from the latest features and security patches.
Protect Your Privacy: Change the default password of your camera and its software to a strong, unique password. Enable encryption options if available.
Proper Placement is Key: Position the camera in a location that provides the best view of the area you want to monitor.
Test Your Setup: Regularly test the camera to ensure everything is functioning correctly.
Explore Additional Features: Take the time to explore the camera’s various settings and features to customize its functionality.
Beyond the Basics: Advanced Applications
The applications for WiFi cameras are surprisingly broad. Consider these innovative uses:
Home Security: Monitor entryways, hallways, and other vulnerable areas.
Pet Monitoring: Keep an eye on your furry friends and ensure their safety.
Baby Monitoring: Check in on your baby as they sleep, and receive alerts if something stirs them awake.
Business Surveillance: Monitor your business premises and deter theft.
Event Recording: Capture special events, like birthday parties or family gatherings.
Creative Projects: Use the camera for time-lapse photography or to record your artwork.
Conclusion: Embracing the Power of Wireless Surveillance
Setting up a WiFi camera to work with your laptop may seem daunting, but as we've demonstrated, the process is surprisingly manageable. By following these simple steps, you’ll have a fully functional surveillance system up and running in no time. The benefits of a WiFi camera – enhanced security, increased peace of mind, and the ability to monitor your space from anywhere – are invaluable. Embrace this technology, unlock its full potential, and experience the convenience of wireless video streaming.
