laptop wifi keeps saying limited access windows 10

Title: How To Fix Limited WiFi Connection On Windows 1087 Fix Limited WiFi Connection Error
Channel: MK TECH
How To Fix Limited WiFi Connection On Windows 1087 Fix Limited WiFi Connection Error by MK TECH
Laptop WiFi Nightmare: Fix Limited Access on Windows 10 NOW!
Laptop WiFi Hell: Conquer the Windows 10 Limited Access Fiasco!
Ever been locked out of the digital world? Your laptop screams "connected," but the internet remains a ghost. The dreaded "Limited Access" message taunts you. It's a common Windows 10 WiFi woe, but don't despair. You can slay this digital dragon! The solutions are often surprisingly simple. We'll dive in, right now.
The WiFi Blues: Spotting the Culprit
First, let's identify the enemy. "Limited Access" on Windows 10 points the finger at connectivity issues. Your laptop successfully finds the network. However, it can't fully access the internet. This frequently frustrates users. So, where does the problem originate? The answer could be multifaceted. It could be a corrupted network configuration. It could also be a conflicting IP address. Furthermore, outdated drivers may be to blame. Your router might also be the issue.
Driver Drama: Updating Your Network Drivers
Network drivers are the unsung heroes. These software programs translate data. They allow your laptop to "speak" to your router. Outdated drivers are a frequent cause of "Limited Access." Thankfully, updating them is straightforward. Start by right-clicking the Windows Start menu. Choose "Device Manager" from the list. Locate "Network adapters" and expand the section. Right-click your wireless adapter. Select "Update driver." Then, pick "Search automatically for drivers." Windows will hunt for the latest version. Then, install the newest updates. Restart your laptop. Check for the WiFi signal again.
IP Address Inquisition: Release and Renew
Your IP address is your laptop's online identity. It's how your router knows where to send data. Sometimes, it gets a little confused. A quick refresh can often fix this. Therefore, you can use the Command Prompt. Search for "cmd" in the Windows search bar. Right-click "Command Prompt" and choose "Run as administrator." Now, run a series of commands. Type ipconfig /release and hit Enter. This releases your current IP address. Next, enter ipconfig /renew and press Enter. This gets you a fresh IP address. Lastly, type ipconfig /flushdns then Enter. This clears the DNS cache. Restart your computer. Try connecting to WiFi again.
Router Reboot: Giving the Gateway a Fresh Start
Even the best routers need a break. Like all technology, they can sometimes get stuck. A simple reboot is a fantastic fix. Unplug your router and modem. Wait at least thirty seconds. Now, plug the modem back in first. Wait for it to fully power on. Next, plug the router back in. Give it a moment to boot up. Then, test your laptop's WiFi connection.
Network Troubleshooter: The Windows 10 Savior
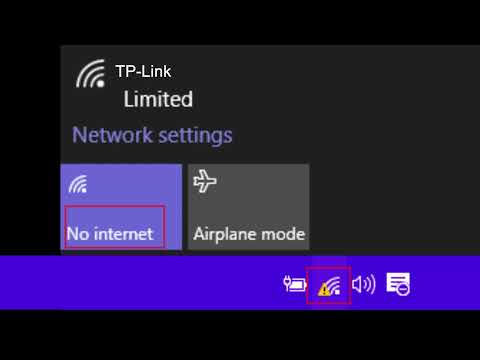
Windows 10 has a built-in troubleshooter. It's like a digital detective. It can automatically diagnose and fix common network problems. Access it by right-clicking the WiFi icon. This is located in your system tray. Then, choose "Troubleshoot problems." Windows will scan for issues. It will then attempt to repair them. Follow the on-screen prompts. See if this works.
Forget and Reconnect: A Fresh Start
Sometimes, a fresh connection is best. This means forgetting your network. Then, reconnecting as if it's the first time. Click the WiFi icon. Select "Network and Internet settings." Click "Change adapter options." Right-click your Wi-Fi adapter. Then, select "Disable." Wait a few seconds. Then, right-click again. Choose "Enable." Attempt to reconnect. Enter the password.
Antivirus Interference: Check for Blockades
Certain antivirus programs can sometimes block internet access. They might view your network as a potential threat. Temporarily disable your antivirus software. Try connecting to the internet. If this resolves the issue, then you know the cause. Tweak your antivirus settings. Add an exception for your network. Or, you might need to update your antivirus software.
Firewall Frenzy: Managing Network Access
Windows Firewall protects your computer. But, it can sometimes be overly protective. Make sure your network is allowed access. Go to "Control Panel." Select "System and Security." Click "Windows Defender Firewall." Choose "Allow an app or feature through Windows Defender Firewall." Find your browser and other apps. Ensure they have "Private" and "Public" checked. Click "OK."
Static IP vs. DHCP: Choosing the Right Protocol
Your router typically assigns IP addresses automatically (DHCP). Sometimes, a static IP configuration interferes. Check your router's settings. Ensure DHCP is enabled. If you've manually configured an IP address, try switching to DHCP.
Network Reset: The Nuclear Option (Use with Caution!)
If all else fails, you can reset your network settings. This is a more drastic step. It will erase all your network configurations. Before proceeding, back up important settings. Go to "Settings" (Windows key + I). Click "Network & Internet." Select "Network reset." Then, click "Reset Now." Your computer will restart. Reconfigure your network connections.
Staying Connected: Preventing Future WiFi Woes
Regularly update your drivers. Keep your antivirus software current. Then, restart your router periodically. Back up your network settings, too. Following these best practices reduces issues. You can enjoy a smooth online experience.
Final Thoughts: Winning the WiFi War
Don't let "Limited Access" hold you hostage. These steps can help you regain control. Use them to troubleshoot the issue. Restore your internet access. You can solve the problem. Celebrate your victory! You now hold the key to a fully functional WiFi connection. You have conquered the "Laptop WiFi Nightmare"!
Unlock Your Samsung Laptop's WiFi: The Secret Trick!Laptop WiFi Nightmare: Fix Limited Access on Windows 10 NOW!
Have you ever stared at your laptop screen, that little WiFi icon stubbornly displaying “Limited Access,” feeling like your internet connection is playing a cruel game of hide-and-seek? We've all been there, haven't we? The frustration is real. You need to check your emails, finish that report, or just mindlessly scroll (no judgment here!), but that blinking yellow warning sign is your nemesis. Don't worry, friend, you're not alone, and more importantly, we're going to banish this digital demon today. Let's dive into the battlefield and conquer this Laptop WiFi Nightmare!
1. The Dreaded "Limited Access": Understanding the Enemy
Before we charge headfirst into solutions, let’s understand what “Limited Access” actually means. Think of it like this: your laptop is trying to access the internet, but it's getting a little lost. It can see the WiFi network, like spotting a delicious cake from across the room, but it can't quite get to it. The connection is established, but data isn't flowing freely. This usually pops up when your laptop can't get a valid IP address from your router or when there’s a problem with the DNS server addressing. It’s like having a phone but no dial tone – you can’t make any calls.
2. First Steps: The Classic Reboot – (Yes, Really!)
Okay, I know what you're thinking. Reboot? Seriously? But trust me, this is the IT equivalent of "Have you tried turning it off and on again?" and, often, it works. It's like giving your computer a digital reset button.
- Reboot your laptop: Simply shut it down completely and restart it.
- Reboot your router: Unplug your router and modem (if separate). Wait about 30 seconds, then plug the modem back in first (wait for it to boot up completely), then plug in the router.
Sometimes, these simple steps are all it takes. It clears out the cobwebs and refreshes the connection. Think of it like getting a good night's sleep for your devices.
3. Diving Deeper: Checking Your IP Address Configuration
If the classic reboot didn't work, we need to get a little more technical. Don’t worry, it’s not rocket science! We need to check if your laptop is getting a proper IP address. An IP address is like your digital house number, allowing your computer to be found on the internet.
- Go to Network Settings: Right-click on the WiFi icon in your system tray (bottom right of the screen) and select “Open Network & Internet settings.”
- Check properties: Click on "Change adapter options." Right-click on your WiFi adapter and choose "Status." Then, click on "Details."
- Look for the IP Address: Does it start with 169.254…? If so, you're in trouble. That means your laptop isn't getting a valid IP address from your router.
4. Automatic vs. Manual IP: Deciding Your Approach
If your IP is in the 169.254 range, we need to manually assign one or change your network's settings to automatically grab one. Think of it like choosing between a GPS (automatic) or a map (manual).
- Automatic (Recommended): This is the default setup. Your router should automatically assign an IP address. We'll try to make sure this is happening.
- Manual: Technically, you can manually assign an IP address, but this is less common in home networks and can get complicated if not done correctly. I would only go this route if option one does not work.
5. The DNS Dilemma: Your Internet's Phonebook
DNS (Domain Name System) servers are like the internet's phonebook. They translate website names (like google.com) into IP addresses. If your laptop can't connect to a DNS server, you won't be able to browse the web.
- Checking DNS: In the same "Properties" window from steps 3, click on "Internet Protocol Version 4 (TCP/IPv4)." Click "Properties."
- Automatic DNS (Recommended): Ensure "Obtain DNS server address automatically" is selected.
- Alternative DNS (If Needed): If you still have problems, try using public DNS servers like Google's (8.8.8.8 and 8.8.4.4) or Cloudflare's (1.1.1.1 and 1.0.0.1). This is like using a different phonebook.
6. Driver Drama: Updating Your Network Adapter Driver
Sometimes, an outdated or corrupted network adapter driver can be the culprit. A driver is like the instruction manual that tells your computer how to communicate with your WiFi adapter.
- Open Device Manager: Right-click the Windows Start button and select "Device Manager."
- Find Your Network Adapter: Expand "Network adapters." You're looking for something like "Wireless Network Adapter" or "WiFi Adapter."
- Update Driver: Right-click the adapter and select "Update driver." Choose "Search automatically for drivers." Windows will try to find and install the latest driver.
7. Power Management Pitfalls: Preventing the Adapter From Sleeping
Windows has power management tricks to save battery life. Sometimes these can be too aggressive, causing your WiFi adapter to shut down.
- Device Manager, Again: Go back to Device Manager (see step 6).
- Power Management Tab: Right-click your WiFi adapter, select "Properties," and go to the "Power Management" tab.
- Uncheck the Box: Uncheck the box that says "Allow the computer to turn off this device to save power."
8. Firewall Fumbles: Ensuring WiFi Isn't Blocked
Your firewall is designed to protect your computer, but sometimes it can be overzealous and block your WiFi connection.
- Open Firewall Settings: Search for "Windows Defender Firewall" in the Windows search bar and open it.
- Allow an App: Click "Allow an app or feature through Windows Defender Firewall."
- Check Your WiFi App: Make sure the network profiles (Private and Public) are checked for your WiFi adapter.
9. Network Troubleshooter: Windows' Built-in Detective
Windows has a built-in troubleshooter that can often identify and fix common network problems. Think of it as a digital detective that sniffs out issues.
- Run the Troubleshooter: Right-click on the WiFi icon in your system tray and select "Troubleshoot problems."
10. Forget and Reconnect: The Digital Fresh Start
Sometimes, forgetting the network and reconnecting can clear up connection issues. It's like deleting and re-adding the contact in your phone.
- Forget the Network: Go to "Settings > Network & Internet > Wi-Fi > Manage known networks." Click on your WiFi network name and choose "Forget."
- Reconnect: Find your WiFi network in the list of available networks and enter your password.
11. Malware Mayhem: Scan For Infections
Unfortunately, sometimes malware can interfere with your network connection. Run a full scan with your antivirus software.
12. Router Rundown: Inspecting Your Wireless Base
It's not always your laptop. Sometimes the problem is the router.
- Check for Flashing Lights: Look for specific colors, solid or flashing, to indicate the status of your router.
- Location, Location, Location: Is your router hidden in a cupboard or behind some books? Keep it free from obstructions.
- Are other devices connected? Test the internet on another device to determine if the issue is with your laptop or the router itself.
13. Channel Surfing: Finding the Best WiFi Lane
WiFi signals travel on different channels. If too many devices are using the same channel, it can cause interference, creating a bottleneck.
- Access Router Settings: You'll need to log into your router's settings (usually by typing an address like 192.168.1.1 into your web browser).
- Find and Change the Channel: Look for the "Wireless" or "WiFi" settings and change the channel to a less crowded one (try channels 1, 6, or 11).
14. Resetting Your Network Settings: A Last Resort
If all else fails, you can reset your network settings to their default configuration. Be warned: This will erase saved WiFi passwords.
- Open Network Reset: Go to "Settings > Network & Internet > Status > Network reset."
- Confirm and Reboot: Click "Reset now" and confirm. Your computer will reboot. You'll need to re-enter your WiFi password after the reboot.
15. When to Call in the Pros: Seeking Expert Support
If, after trying all these steps, you're still battling "Limited Access," it might be time to call in the professionals. It's like trying to fix a car engine when you barely know how to change a tire. Contact your internet service provider (ISP) or a computer repair technician.
Conclusion: WiFi Freedom Achieved!
We've covered quite a bit of
Unlock Your XP Laptop's Hidden Hotspot: Free WiFi Now!How to Solve Windows 10 Wifi Limited Access - Not Connecting To Internet In Windows 10

By MDTechVideos How to Solve Windows 10 Wifi Limited Access - Not Connecting To Internet In Windows 10 by MDTechVideos
cara jitu mengatasi koneksi wifi limited pada laptop

By dhidick cara jitu mengatasi koneksi wifi limited pada laptop by dhidick
How to fix Limited WIFI connection on windows on Windows 1087 Limited WIFI Connection Fix
By Tutorial 4You How to fix Limited WIFI connection on windows on Windows 1087 Limited WIFI Connection Fix by Tutorial 4You

Title: Cara Mengatasi Koneksi WIFI Limited Di PC dan Laptop
Channel: Ni Chanel
Cara Mengatasi Koneksi WIFI Limited Di PC dan Laptop by Ni Chanel
Laptop Wifi Hotspot
Laptop WiFi Nightmare: Fix Limited Access on Windows 10 NOW!
Have you ever stared, frustrated, at that telltale yellow triangle over your WiFi signal, a constant reminder that your internet connection is, shall we say, less than cooperative? The dreaded "Limited Access" message on your Windows 10 laptop can turn a productive afternoon into a technological siege. Don't despair! We understand the frustration, and we're here to guide you through a range of proven solutions to banish this digital annoyance and restore your connectivity, quickly and effectively. We'll walk you through each step with clear, concise instructions, empowering you to reclaim your online freedom.
Understanding the Culprit: Why "Limited Access" Occurs
Before we dive into the fixes, let's briefly examine the common culprits behind the "Limited Access" error. This understanding will help you approach the troubleshooting process with a targeted strategy. Primarily, the issue stems from a failure of your laptop to properly communicate with your network's gateway – usually your router. This breakdown can manifest in several ways: a conflict in IP addresses, a disruption in the Domain Name System (DNS) resolution, problems with your network adapter, or, in some instances, driver issues. We'll tackle each of these root causes, ensuring you have a comprehensive arsenal of solutions.
Restarting the Usual Suspects: A Quick Initial Triage
Before implementing complex fixes, sometimes the simplest solutions are the most effective. Give these quick fixes a try:
- Restart Your Laptop: This reboot often resolves transient software glitches that cause connectivity problems. A fresh start can clear temporary files and reset network configurations.
- Restart Your Router and Modem: Unplug your modem and router, wait a full 60 seconds, then plug the modem back in first, allowing it to fully initialize before plugging the router back in. Often, your router has issues or is not able to renew its IP address. This will also help to flush out temporary memory issues that can cause connection problems. This forces a complete reset of your network connection.
- Forget and Reconnect to Your WiFi Network: Sometimes, a corrupted network profile is to blame. Forget the network by going to Settings > Network & Internet > Wi-Fi, then select 'Manage known networks.' Find your network, click 'Forget,' and then reconnect using your password.
If these initial checks fail to resolve the issue, proceed to the more advanced troubleshooting steps outlined below.
The IP Address Conundrum: Troubleshooting Your Network Configuration
One of the most common causes is an IP address conflict or a failure to automatically obtain a valid IP address. We will explore how to diagnose and fix these issues. We will provide precise steps that can usually resolve the issue.
Release and Renew Your IP Address: This forces your computer to request a fresh IP address from your router.
- Search for "cmd" in the Windows search bar, right-click "Command Prompt," and select "Run as administrator."
- In the Command Prompt window, type
ipconfig /releaseand press Enter. This releases your current IP address. - Next, type
ipconfig /renewand press Enter. This command requests a new IP address. - Finally, type
ipconfig /flushdnsand press Enter. This clears the DNS cache. - Restart your computer and check if the connection is restored.
Manually Configure a Static IP Address (If Necessary): In some scenarios, your router might not be providing a valid address. Use this method if the "release and renew" method doesn't work.
- Obtain your gateway IP address and subnet mask. The gateway IP address is the address of your router. You can find these by typing
ipconfigin the Command Prompt and looking for "Default Gateway" and "Subnet Mask." - Go to Settings > Network & Internet > Wi-Fi, select your connected network, and click "Change adapter options."
- Right-click your Wi-Fi adapter and select "Properties."
- Select "Internet Protocol Version 4 (TCP/IPv4)" and click "Properties."
- Select "Use the following IP address."
- Enter an IP address that is within the range of addresses your router assigns (but not already in use). You can use your Gateway IP address and then modify the last number. For example, if your router’s address is 192.168.1.1, and your router assigns to other devices between 192.168.1.2 and 192.168.1.254, you can select any free address. Be sure to find an address that is not in use on your network. Try a number like 192.168.1.100.
- Enter the Subnet mask. This will usually be 255.255.255.0.
- Enter your Default gateway IP address.
- For DNS servers, consider using Google's Public DNS servers; enter 8.8.8.8 in the "Preferred DNS server" field and 8.8.4.4 in the "Alternate DNS server" field.
- Click "OK." Restart your PC.
- Obtain your gateway IP address and subnet mask. The gateway IP address is the address of your router. You can find these by typing
The DNS Dilemma: Resolving Domain Name Server Issues
DNS servers translate website names (like "google.com") into IP addresses, which your computer uses to access the website. Problems here can result in limited connectivity.
Flush and Reset the DNS Cache: This clears any outdated or corrupted information. Execute this command as an administrator just like before:
- Open "Command Prompt" as an administrator.
- Type
ipconfig /flushdnsand press Enter. - Restart your computer.
Change Your DNS Servers: This bypasses your ISP's default DNS servers, which can sometimes be slow or unreliable.
- Click the Windows Start button.
- Go to Settings > Network & Internet > Wi-Fi, select your connected network, and click "Change adapter options."
- Right-click your Wi-Fi adapter and select "Properties."
- Select "Internet Protocol Version 4 (TCP/IPv4)" and click "Properties."
- Select "Use the following DNS server addresses."
- Enter the preferred DNS address as 8.8.8.8 (Google's Public DNS).
- Enter the alternate DNS address as 8.8.4.4 (Google's Public DNS).
- Click "OK." Restart your PC.
Network Adapter Troubleshooting: Examining Your Hardware
Your network adapter is the physical component that handles your WiFi connection. Issues here can cause significant problems.
Update Your Network Adapter Driver: Outdated drivers are a common source of connectivity problems.
- Right-click the Start button and select "Device Manager."
- Expand "Network adapters."
- Right-click your Wi-Fi adapter and select "Update driver."
- Choose "Search automatically for drivers." Windows will attempt to find the latest drivers online.
- If that doesn't yield results, visit the manufacturer's website (e.g., Intel, Realtek) for your laptop and download the latest driver for your specific adapter model and your Windows 10 version.
Roll Back Your Network Adapter Driver: If a recent driver update caused the problem, roll back to the previous version.
- Right-click the Start button and select "Device Manager."
- Expand "Network adapters."
- Right-click your Wi-Fi adapter and select "Properties."
- Go to the "Driver" tab.
- If the "Roll Back Driver" option is available, click it.
- Follow the instructions.
Disable and Re-enable Your Network Adapter: This forces a refresh of the adapter's connection.
- Right-click the Start button and select "Device Manager."
- Expand "Network adapters."
- Right-click your Wi-Fi adapter and select "Disable device."
- Right-click the adapter again and select "Enable device."
Windows Network Troubleshooter: Let Windows Do the Work
Windows includes a built-in troubleshooter designed to automatically diagnose and fix common network problems.
- Run the Network Troubleshooter:
- Right-click the network icon in the system tray (bottom right corner of your screen).
- Select "Troubleshoot problems."
- Windows will scan your network settings and attempt to resolve any issues.
- Follow the on-screen prompts.
Security Software Interference: Addressing Firewall and Antivirus Conflicts
Your firewall or antivirus software can sometimes incorrectly block your network connection, leading to limited access.
- Temporarily Disable Your Firewall: To test whether your firewall is the problem, temporarily disable it (ensure you re-enable it afterward for security).
- Search for "Windows Defender Firewall" in the Windows search bar.
- Click "Turn Windows Defender Firewall on or off."
