how to make wifi hotspot using laptop windows xp
Title: How to make your laptop to a wifi hotspot on windows xp788.1
Channel: Arafatur Rahman Shimul
How to make your laptop to a wifi hotspot on windows xp788.1 by Arafatur Rahman Shimul
Unlock Your XP Laptop's Hidden Hotspot: Free WiFi Now!
Unleash Your XP Laptop's WiFi Superpower: Free Internet Awaits!
Remember those relics of a bygone era? Yes, we’re talking about your trusty XP laptop. It might be gathering dust, but trust me, it still holds a secret. Are you ready to resurrect it from digital retirement? Prepare yourself, because this article will unveil a hidden talent. Your vintage laptop can become a free WiFi hotspot. Indeed, it's time to breathe new life into that old machine. It's time to connect.
The Forgotten Powerhouse: Your XP Laptop's Potential
Many dismiss older laptops as obsolete. Consequently, they underestimate their capabilities. However, your XP laptop silently possesses a powerful feature. It's the ability to share its internet connection. This functionality, surprisingly, is often overlooked. It provides a simple, cost-effective solution for internet access. Think about this: Free WiFi. That's right, you can enjoy internet access without extra charges. Moreover, you can do it using hardware you already own. The potential is huge if you know how.
Setting the Stage: What You'll Need to Get Started
First, a few essentials are needed. Your XP laptop, of course, is the star of the show. Second, you need an active internet connection. This can be through Ethernet or a USB wireless adapter. A wireless adapter is a must for connecting to an existing WiFi network. Fortunately, these are readily available and budget-friendly. Remember to consider your security settings during this process. Ensure your existing network is secure before you commence.
Step-by-Step: Creating Your Wireless Hotspot
The process has several steps, but don't fret. It's far easier than you might imagine. Let’s dive in.
Network Connections Mastery: Navigate to your network connections settings. Find them in the Control Panel under “Network and Internet Connections”. You can also access them by right-clicking your network icon and selecting "Open Network and Sharing Center."
Bridge the Gap: You will likely see your Ethernet adapter (if wired) and your wireless adapter. Right-click the active internet connection. Then choose “Bridge Connections.” This bridges your ethernet connection.
Configure Your Wireless Network: This step is crucial. Right-click on your wireless network connection. Select "Properties." Ensure you have the "Sharing" tab selected. Then, you must check the box to "Allow other network users to connect through this computer's internet connection." Furthermore, choose the correct network to share. This is your WiFi adapter.
Naming Your Network: You will need to name your newly created network. This setting also resides in the wireless network properties. Click on the "Wireless Networks" tab. Then, you will want to utilize the "Add…" button to build your network settings. You'll create your own "Network name (SSID)" and configure security settings.
Security First: It's exceedingly important to protect your network. Apply strong encryption. This will prevent unauthorized access. WPA2-PSK is usually the best choice, but WPA-PSK is acceptable. Choose a robust password.
Save and Reboot: Once you have completed these steps, save your settings. After that, you must reboot your XP system. The reboot is essential. It activates your changes effectively.
Troubleshooting Common Roadblocks
Sometimes, things don’t cooperate immediately. Don't worry; here are some solutions.
- Connection Issues: Ensure your internet connection is properly functioning. Check your cable connections. Examine your wireless adapter to ensure it is connected.
- Security Restrictions: You might encounter problems with firewall settings. Adjust your firewall settings temporarily to allow internet sharing.
- Driver Problems: Outdated drivers can sometimes hinder performance. Update your network adapter driver. You can do this via the device manager.
- Conflicting IP addresses: Ensure you don't have IP address conflicts. DHCP can greatly simplify matters here.
Beyond the Basics: Advanced Customization
You can definitely fine-tune your hotspot for optimal performance. Consider these additional features.
- Bandwidth Management: Prioritize tasks if you desire. Adjust connection sharing to guarantee smoother streaming.
- MAC Address Filtering: Employ MAC address filtering to secure your network further. This will limit access.
- Channel Selection: Experimenting with different WiFi channels can improve performance. This will help you find the least congested channel.
The Benefits: WiFi Freedom and Beyond
The advantages of your XP-powered hotspot are numerous.
- Free WiFi: Ultimately, you will get free internet. This saves money.
- Convenience: Sharing the internet connection is simple. It is seamless.
- Learn and Improve: You’ll master how to manage your network. You'll develop new technical skills.
- Recycle and Reuse: You're giving new meaning to an outdated device. You are promoting sustainability.
Conclusion: Embrace the Power of Retro Tech
So, what are you waiting for? Your old XP laptop is not dead; it's just resting. Now you can turn this "antique" into a functional WiFi hotspot. Moreover, you can enjoy free internet anywhere. This is a practical, cost-effective, and cool solution. It is a testament to the enduring power of technology. Go forth, unleash the hidden potential of your XP laptop, and enjoy free WiFi now!
**WiFi Freedom! Share Your Laptop's Internet on Your PC (Windows 10 Trick!)**Unlock Your XP Laptop's Hidden Hotspot: Free WiFi Now!
Hey everyone! Ever find yourself staring at your trusty, maybe slightly dusty, Windows XP laptop and wishing you could share its internet connection like a boss? Maybe you're stuck in a hotel with ridiculously overpriced WiFi, or perhaps you're just trying to keep everyone in the family connected without eating into your data plan. Well, guess what? We're about to dive into a world where your XP laptop turns into a WiFi-slinging superhero, offering free internet magic! Forget expensive hotspots – we're talking about turning your old machine into the ultimate connectivity solution. Get ready to unlock your XP laptop's hidden hotspot potential and enjoy free WiFi wherever you are!
1. The XP Revival: Why Still Bother With an Old Clunker?
Okay, I get it. Windows XP? It's like that classic car you've got hidden in the garage – a little outdated, perhaps, but still holding a special place in your heart (and maybe your pocketbook!). But seriously, there's a good reason to dust off that old laptop. Maybe you have a specific program that runs best (or only!) on XP. Perhaps it's a dedicated diagnostic device for your car. Or, you could just be stubbornly sentimental! Whatever the reason, your XP laptop, despite its age, still packs some serious potential, especially when we're talking about sharing a WiFi connection. Think of it this way: it's a small, dedicated WiFi router, ready to serve. And, hey, it’s a fantastic way to repurpose tech instead of adding to the landfill.
2. Is It Even Possible? Yes, Absolutely! (And Easier Than You Think)
The beauty of this whole operation is that it’s not rocket science. Sure, Windows XP is old school, but it's still capable of creating a wireless hotspot. We're not talking about reinventing the wheel here, just tweaking a few settings. We'll be using a built-in feature, which means no complicated downloads and no messy installations. Prepare to be amazed at how straightforward this process can be! Think of it as a digital upgrade, a modern marvel powered by…well, not so modern technology.
3. What You'll Need: The Arsenal of Connectivity
Before we get down and dirty, let’s gather our tools of the trade. You won't need much, which is part of the fun!
- A Windows XP Laptop: Obviously! Make sure it has a working WiFi card. (Most do, unless it's one of those super-old machines that predate WiFi as we know it).
- An Internet Connection: This could be from an Ethernet cable, another WiFi network (if you have access to one), or even a mobile hotspot on your phone (if you have data to spare).
- Patience and a Pinch of Curiosity: We’re going to make this a fun adventure, so a positive attitude is key!
4. The Magic: Setting Up the Ad-Hoc Network
This is where the magic happens. We're going to be creating an ad-hoc network on your XP laptop. Ad-hoc networks are like temporary, peer-to-peer WiFi setups. Think of them as secret little WiFi parties.
Here's a step-by-step guide, broken down like explaining it to a friend:
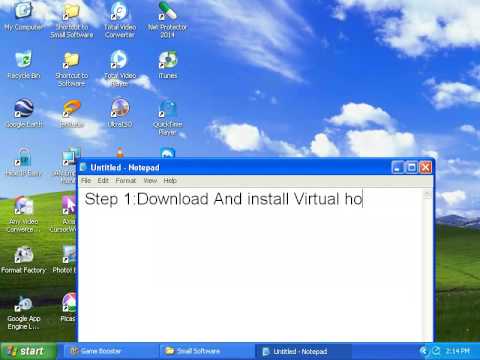
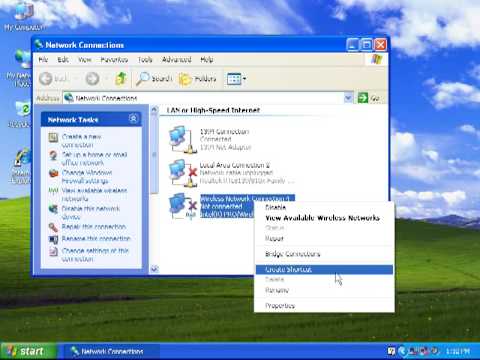
- Step 1: Open Network Connections. Click on your Start Menu, then go to Control Panel. Inside Control Panel, find “Network Connections.”
- Step 2: Create a New Connection. If you're using the classic view, this might look a little different. But find an option that says something like "Create a new connection."
- Step 3: Set Up a Home or Small Office Network. Select this option and click "Next."
- Step 4: Choose "Set up a home or small office network." Again, click "Next."
- Step 5: Name Your Network. This is where you enter the name for the WiFi network other devices will see. Choose a name that's memorable (and maybe a little fun!). You can also select a security type here. WEP is likely the only option for XP, but it’s better than nothing!
- Step 6: Select Connection Sharing. This is super important. Choose the internet connection your XP laptop is currently using to access the internet (e.g., Ethernet, another WiFi network). Enable "Internet Connection Sharing."
- Step 7: Finish! Click "Finish," and you should be good to go!
5. Security First: Protecting Your WiFi Fortress
Ah, the inevitable security question. When setting up ad-hoc networks on XP, your options for security are, let's say, limited. WEP is your likely option, and it's… well, it's not the most secure. But you can still take steps to improve security:
- Use a Strong Network Name (SSID). Avoid anything obvious like "MyFreeWiFi" or your own name.
- Password Protect the Network. Even WEP is better than nothing. Set a strong password.
- Be Mindful of What You Share. While your network is active, avoid transmitting sensitive information.
- Consider a Hardware Firewall. If you're really concerned, a dedicated firewall can provide an extra layer of protection.
6. Connecting Your Devices: The WiFi Fiesta
Now for the fun part! Grab your phone, tablet, or any other device you want to connect to the internet.
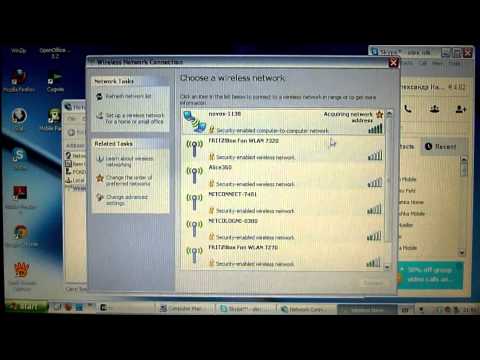
- Scan for Networks. On the device you want to connect, scan for WiFi networks.
- Select Your Network. Look for the network name you created in Step 5 of the setup.
- Enter the Password. Enter the security key you provided in Step 5.
- Connect and Enjoy! You should now be connected to the internet through your XP laptop’s newly created hotspot.
7. Troubleshooting Troubles: When Things Go Wrong (and How to Fix Them)
Things don't always go smoothly. Here are some common issues and how to resolve them:
- Devices Can't Find the Network. Double-check your network name and password. Make sure your XP laptop's WiFi card is enabled.
- Connecting, But No Internet. Check your XP laptop's internet connection first (Ethernet, other WiFi). Ensure you've enabled Internet Connection Sharing in the network settings. Reboot your XP laptop after connection sharing.
- Slow Speeds. WiFi speeds can be affected by distance, interference, and the age of your hardware. Try moving closer to the XP laptop, and check for potential sources of interference (microwaves, other electronics).
8. Limitations: Knowing Your XP's Limits
Let's be realistic. Your XP laptop isn't going to be a WiFi powerhouse. Expect some limitations:
- Speed: The WiFi card in your XP laptop is likely not the fastest. Don't expect blazing-fast speeds. This is primarily for light web browsing, email, and perhaps some basic streaming.
- Range: The range of the WiFi signal might be limited. Keep your connected devices relatively close to the XP laptop.
- Security: As mentioned, security is a concern with XP and WEP.
- Device Compatibility: Some newer devices might have trouble connecting to the older ad-hoc network, so check your device's compatibility.
9. The Power of Repurposing: Beyond Just WiFi
This isn’t just about WiFi. It’s about extending the life of your old technology. Think about it:
- It Saves Money: No need to pay for a separate WiFi router or hotspot.
- It's Eco-Friendly: Reduce electronic waste by giving your laptop a second life.
- It's a Fun Project: Get your hands dirty and learn something new! Plus, it's a cool party trick.
10. Boosting the Signal: Tips for Better Reception
Want to squeeze every ounce of performance out of your hotspot? Try these tips:
- Position Matters: Place your XP laptop in a central location, away from walls and potential interference sources.
- Antenna Angle: If your XP laptop has an external antenna, experiment with positioning it for better signal strength.
- Minimize Interference: Move away from microwaves, Bluetooth devices, and other electronics.
- Keep it Updated: Ensure your XP laptop has the latest drivers for your WiFi card, if possible.
11. Advanced Tweaks: Taking Your Hotspot to the Next Level (If You Dare!)
For the tech-savvy folks, there are a few advanced tweaks you can consider, but be warned: these involve some more technical know-how.
- Driver Updates: Try to find the latest WiFi driver for your model.
- Channel Selection: You might be able to change the WiFi channel to improve reception.
- Third-Party Software: Some third-party software can enhance your WiFi hotspot capabilities (but proceed with caution and vet any software.
12. The Moral of the Story: Freedom and Flexibility
The biggest takeaway? You've taken an old piece of technology and turned it into a tool of freedom. You can create a connection wherever you are, keeping you connected when other options fail.
13. Alternatives to Consider: Other Options in the WiFi World
Of
iPhone to Laptop WiFi: The Secret Trick You NEED to Know!Create Hotspot in Windows xp
By isoft Developer Create Hotspot in Windows xp by isoft Developer
How to connect Windows XP to your wireless network
By NetComm How to connect Windows XP to your wireless network by NetComm
Wi-Fi Hotspot in Windows XP Step by Step
By alexn1138 Wi-Fi Hotspot in Windows XP Step by Step by alexn1138

Title: How to Setup Wifi in Windows XP
Channel: Etechlic
How to Setup Wifi in Windows XP by Etechlic
Laptop Wifi Connect
Unlock Your XP Laptop's Hidden Hotspot: Free WiFi Now!
Once upon a time, a trusty companion, your Windows XP laptop, sat quietly in the corner, a relic of a bygone digital era. Forgotten, perhaps, or relegated to dust-collecting duties. Yet, beneath its familiar shell, a potent secret slumbered: the ability to transform into a WiFi hotspot, capable of breathing new life into your surrounding gadgets. This guide unveils that hidden potential, resurrecting your XP laptop and turning it into a beacon of free WiFi for your modern devices. Prepare to be pleasantly surprised by how straightforward this process is, and by the liberation it offers.
Understanding the XP WiFi Hotspot Revelation
Before diving into the practical steps, let us clarify the fundamental principle behind this transformation. Your XP laptop, equipped with a wireless network adapter, possesses the inherent capability to share its wired or, if connected, a wireless internet connection with other devices. It is like a digital bridge, connecting your laptop to the external internet and then distributing that connection wirelessly to the devices around it. This is accomplished using a software-based access point. It is important to note that this is distinct from a traditional router, but achieves a similar outcome. The utility provided by your XP machine is not a replacement for a proper router, but rather a versatile capability that can provide an immediate WiFi solution in numerous scenarios.
Hardware Prerequisites: Ensuring Connectivity
The first step is confirming your XP laptop is suitably equipped. The most critical piece of hardware is, undoubtedly, a functional wireless network adapter. Almost all XP laptops possess this already. However, should yours be missing, it must be installed. Once installed, it is vital to confirm the adapter is appropriately configured. This can be achieved by checking with the device manager. Look for a "Network adapters" section. Expanding this option will reveal a list of installed network adapters. The name of your wireless adapter will vary; a common example would be "Wireless Network Adapter", or something similar. Verify there are no yellow exclamation marks or red Xs next to the adapter's name, which would indicate driver problems. If issues are found, you should reinstall the correct drivers or drivers.
Software Essentials: Installing the Right Tools
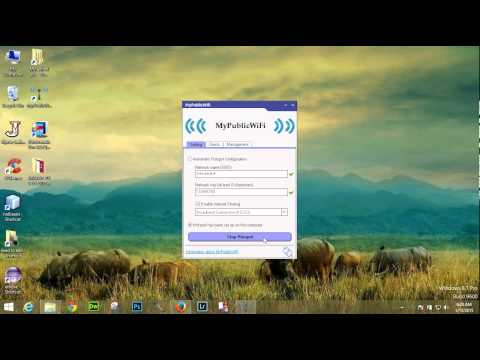
While Windows XP itself lacks native hotspot functionality, several third-party applications seamlessly fill the gap. We will focus on a free and highly effective option.
- Download and Install Connectify: This software simplifies the process of creating a WiFi hotspot, turning your laptop into a functional access point. Download the free version of Connectify from their website, ensuring you're installing a version compatible with Windows XP.
- Installation Process: Run the downloaded installer. Follow the on-screen prompts to complete the installation. This usually involves accepting the license agreement and selecting the installation location.
- Reboot: After the installation process, the installer may prompt you to restart your computer. It is important to restart your system.
Configuring Your Connectify Hotspot: The Crucial Steps
Once Connectify is installed, it is time to configure your hotspot.
- Launch Connectify: Locate the Connectify icon on your desktop or in the Start menu and launch the application.
- Choose Your Internet Connection: Within the Connectify interface, you will see a dropdown menu labeled "Internet to Share." Select the internet connection your XP laptop utilizes; this could be a wired Ethernet connection or, if available, a secondary WiFi connection.
- Name Your Hotspot: In the "Hotspot Name" field, type the desired name for your WiFi hotspot. Choose something unique and memorable.
- Set a Password: Connectify provides a critical security step. In the "Password" field, enter a strong password. This protects your hotspot from unauthorized access. Ensure your chosen password is difficult to guess.
- Check the Sharing Mode: Select the "Sharing mode". This is an important step. The program typically presents this in multiple modes. You want to ensure you choose the appropriate sharing mode.
- Start the Hotspot: Click on the "Start Hotspot" button. Connectify will now configure the hotspot and begin sharing your internet connection.
Connecting Devices: Joining the WiFi Network
With your hotspot active, it is time to connect your other devices.
- Enable WiFi on Your Device: Activate the WiFi functionality on your smartphone, tablet, or other devices.
- Search for Available Networks: Your device should automatically scan for available WiFi networks.
- Select Your Hotspot: Locate and select the hotspot name you created.
- Enter the Password: Enter the password you set within Connectify.
- Connect: The device should now connect to your XP laptop's WiFi hotspot.
Troubleshooting Common Issues: Navigating Potential Hurdles
While creating a WiFi hotspot on your XP laptop is generally straightforward, you may encounter difficulties. Here is a troubleshooting guide.
- No Internet Connection on Connected Devices: Ensure your XP laptop has an active and working internet connection, either through an Ethernet cable or its own WiFi connection. Check the Connectify interface to verify this.
- Connection Errors: Double-check that you have entered the correct password on the connecting device. Make sure that the sharing mode is set up correctly.
- Driver Issues: If your wireless adapter is not functioning correctly, reinstall the appropriate drivers. Visit the manufacturer's website for the latest drivers.
- Firewall Considerations: Your XP laptop's firewall or other security software may interfere with the hotspot. Temporarily disable or configure firewall rules to allow Connectify to function properly.
- Conflicting Software: Some other forms of software may be blocking the connection. Check for other installed software on your machine.
Maximizing Your Hotspot's Performance: Optimizing for Speed and Stability
To ensure the best possible performance from your XP laptop's hotspot, consider the following tips.
- Placement: Position your laptop in a central location to maximize WiFi signal coverage throughout your desired area. Avoid placing your laptop near obstructions like walls or large metal objects, which can interfere with the signal.
- Channel Selection: Connectify may allow you to select a specific WiFi channel. Consider trying different channels to minimize interference from other nearby WiFi networks for optimal speed.
- Bandwidth Management: Be mindful of bandwidth consumption. Extensive streaming or large file downloads on connected devices can slow down the connection for everyone.
- Keep Your XP Laptop Updated: Ensure your XP laptop is up-to-date with the latest security patches and software updates, if possible, to improve performance and stability.
- Limit Connected Devices: The more devices connected to your hotspot simultaneously, the more the available bandwidth will be divided. Consider limiting the number of connected devices for optimal transfer rates.
Beyond the Basics: Advanced Applications
The XP laptop WiFi hotspot is more than just a way to connect devices to the internet. It reveals a range of advanced applications.
- Guest Network: Use the hotspot to provide guest access to your network without sharing your primary network details.
- LAN Gaming: Create a local area network (LAN) for playing multiplayer games with other devices.
- File Sharing: Share files and resources between devices connected to the hotspot.
- Troubleshooting: Diagnose internet connectivity issues on other devices by comparing their connection speeds.
Security Best Practices: Protecting Your XP Hotspot
Securing your WiFi hotspot is paramount to protect yourself and your data.
- Strong Password: Create a strong, unique password for your hotspot. Use a complex combination of letters, numbers, and symbols. Avoid obvious passwords.
- Network Encryption: Ensure that your hotspot uses WPA2 or WPA3 encryption for secure communication. Avoid using outdated encryption methods, which are easier to crack.
- Monitor Connected Devices: Regularly monitor the devices connected to your hotspot. Remove any unauthorized devices. Review devices listed within Connectify.
- Keep Software Updated: Regularly update Connectify and your XP laptop's operating system to patch security vulnerabilities.
- Enable Firewall: Ensure that your XP laptop's firewall is enabled to prevent unauthorized access to your system.
The Enduring Legacy: Embracing the XP Transformation
Your Windows XP laptop, once considered obsolete, now takes on a new role. By following the steps outlined in this guide, you have transformed it into a powerful WiFi hotspot. This ability offers convenience and practicality in a variety of scenarios; from those needing free WiFi access, to creating temporary networks, to troubleshooting connectivity issues. This transformation breathes new life into an old machine, proving that even the most seemingly outdated technology can still offer value and functionality. Embrace the possibilities, and enjoy the newfound freedom of wireless connectivity, courtesy of your revitalized XP laptop.
