how to connect wifi hotspot to laptop windows 8.1

Title: How to Connect to WiFi on Windows 8
Channel: HOWTECH
How to Connect to WiFi on Windows 8 by HOWTECH
Unlock Your Laptop's WiFi Hotspot: Windows 8.1 Secret Revealed!
Unleash the Wireless Power Within: Your Windows 8.1 Hotspot Adventure Begins!
The digital age offers connectivity. We thrive on it. However, have you ever felt trapped? Perhaps your phone's data plan is dwindling. Or maybe you're far from a reliable Wi-Fi source. You're in luck. Your Windows 8.1 laptop holds a secret weapon. It's a powerful, yet often overlooked, Wi-Fi hotspot. Let’s delve into how you can activate it. Prepare to transform your laptop into a personal wireless hub.
The Hidden Power of Hosted Networks
For years, laptops have possessed the ability to share their internet connection. This capability remains largely hidden. Windows 8.1 includes a built-in functionality. It allows your laptop to become a wireless access point. This transforms your device. It essentially broadcasts its internet connection. This is incredibly valuable. Think of it as your own portable Wi-Fi router. You can share your wired or wireless connection. Ultimately, it is with other devices.
A Step-by-Step Guide to Wi-Fi Hotspot Mastery
Getting started is straightforward. First, we need to access the "Command Prompt." To do this, search for "cmd" in the Windows search bar, located in the bottom left corner of your screen. Right-click on "Command Prompt." Select "Run as administrator." This is crucial for the next steps.
Next, we're going to use a command. Type the following and press Enter: netsh wlan set hostednetwork mode=allow ssid="YourHotspotName" key="YourPassword". Replace "YourHotspotName" with your desired network name. Choose a strong password for "YourPassword." Make it at least eight characters long. This protects your hotspot.
Once you've executed this command, you’ve laid the groundwork. Now, type netsh wlan start hostednetwork and press Enter. This activates your hotspot. You have officially created your hotspot.
Sharing Your Internet: The Final Piece
The process doesn't stop there. You need to share your internet connection. Go to the "Network and Sharing Center." You’ll find this in the Control Panel. Click "Change adapter settings." Locate your primary internet connection. This could be Ethernet or Wi-Fi. Right-click on it. Select "Properties."
Navigate to the "Sharing" tab. Check the box that says "Allow other network users to connect through this computer's Internet connection." Select your hosted network from the "Home network connection" dropdown menu. Click "OK." Now your devices will connect. Your hotspot is now fully functional.
Troubleshooting Common Wi-Fi Hotspot Hurdles
Sometimes, things don't go as planned. Here are some common issues. They also include their solutions.
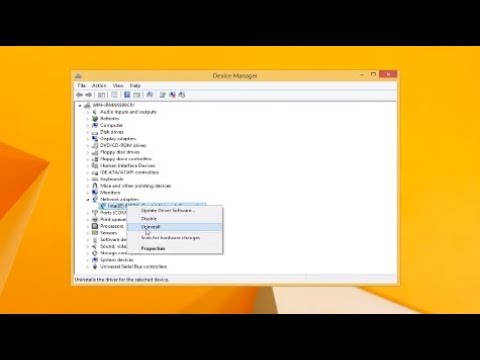
"The hosted network couldn't be started.": This often stems from updated or corrupted drivers. Update your wireless adapter drivers through Device Manager. Restart your computer. This usually fixes the issue.
No Internet Connection: Ensure you are connected to the internet on your laptop. Also, verify that you have properly shared your internet connection settings. Double-check the steps in the "Sharing Your Internet" section.
Slow Speeds: The performance of your hotspot may be influenced by your internet connection speed. Also, be mindful of how many devices are connected. They share the bandwidth.
Beyond the Basics: Customizing Your Connection
You can further customize your hotspot. Return to the Command Prompt. Use the command netsh wlan show hostednetwork to view its status.
This displays important information. This includes the SSID, authentication, and cipher. You can even stop the hosted network. Use the command netsh wlan stop hostednetwork. This can be helpful for troubleshooting. It is also useful when you no longer need the connection. You can also adjust your settings. This includes the network name and password as needed.
Security First: Protecting Your Hotspot
Always use a strong password. This is paramount. It prevents unauthorized access to your internet connection. Consider the devices that connect. Periodically change your password. This is for added security. Also, be aware of the data usage. Regularly monitor the devices connected to your hosted network.
Embrace the Freedom of Wireless Connectivity
Windows 8.1 comes with hidden features. This includes the ability to create your own Wi-Fi hotspot. It's a simple process. Moreover, it is incredibly practical. You can share your internet with other devices. Ultimately, enjoy the ease of wireless. This secret is useful. So, unlock the power. Share your Wi-Fi. Your hotspot adventure starts now.
Laptop Lightning Deal: Intel Core i5, 8GB RAM, 128GB SSD!Unlock Your Laptop's WiFi Hotspot: Windows 8.1 Secret Revealed!
Hey everyone! Ever wished you could share your laptop's internet connection without having to lug around a separate router? Maybe you're stuck at a hotel with spotty Wi-Fi, or perhaps you're just trying to connect your tablet or phone when a dedicated Wi-Fi network isn't available. Guess what? Windows 8.1 has a secret weapon for you: a built-in, hidden hotspot feature! We're pulling back the curtain today to reveal how to unlock this fantastic functionality. It's like your laptop secretly morphs into a portable Wi-Fi router, ready to share the internet love. Let's dive in!
1. The Hidden Gem: Why Windows 8.1's Hotspot Matters
Think of your laptop as a powerful internet Swiss Army knife. It can browse the web, stream movies, and now, thanks to this secret, distribute its internet connection to other devices. This is especially handy when you're traveling, working remotely, or simply want to share your Wi-Fi with friends and family. Believe me, I've been there, stuck on a train with terrible data, and the ability to create a hotspot from my laptop saved the day! It’s like having a personal internet lifeline right in your bag.
2. Before We Begin: What You'll Need
Before we get techy, let's make sure you’re properly equipped. You’ll need a Windows 8.1 laptop (obviously!), an active internet connection on your laptop (either through Ethernet, Wi-Fi, or a mobile broadband connection), and the patience of a saint (just kidding… it’s super easy!). Seriously, the setup is quicker than making a cup of coffee.
3. Unveiling the Secret: Accessing the Mobile Hotspot Feature
Okay, here's the big reveal. Windows 8.1 hides this feature, but it's accessible through the command line. Don't let the "command line" scare you! It's far less intimidating than it sounds. Think of it as the secret handshake that unlocks the magic.
4. Step-by-Step: The Command Line Magic
Here's the ritual, the incantation, the… well, you get the idea!
Open the Command Prompt: Click the Windows key, type "cmd" in the search bar, and then right-click on "Command Prompt" and select "Run as administrator." This gives the command the necessary permissions. Think of it as giving the key the master key to the data center.
Check Your Adapter: Type
netsh wlan show driversand press Enter. This will show your network adapter's capabilities. Look for a line that says "Hosted network supported : Yes." If it does, you're golden! If it says "No," unfortunately, your network adapter doesn't support this feature.Set Up Your Hotspot: Type the following, modifying
<ssid>(your network name) and<password>(your password) to your liking:netsh wlan set hostednetwork mode=allow ssid="<ssid>" key="<password>"For example,netsh wlan set hostednetwork mode=allow ssid="MyHotspot" key="MySecretPassword"This is like telling your laptop, "Hey, I want you to turn into a Wi-Fi transmitter, and here's what I want to call you and how to keep people from eavesdropping."Start the Hotspot: Type
netsh wlan start hostednetworkand press Enter. This is the magic button. It starts the hotspot.
5. Connecting Your Devices
Now for the fun part! Open the Wi-Fi settings on your phone, tablet, or another laptop. You should see your newly created hotspot ("MyHotspot" in our example) listed. Select it, enter the password you created, and boom – you're connected! It's like inviting friends to a virtual Wi-Fi party.
6. Troubleshooting: Common Hurdles and How to Conquer Them
Sometimes things don't go as planned. Don't worry; even tech heroes need a little help sometimes. Here are a few common problems and how to fix them:
- "Hosted network supported : No": As mentioned before, your Wi-Fi adapter may not support the feature. Time for an upgrade!
- Can't Connect: Double-check your password! Also, ensure your laptop has an active internet connection.
- Slow Speeds: The speed of your hotspot depends on your laptop's internet connection and the number of devices connected. Try closing unnecessary tabs or apps.
7. Customizing Your Hotspot: Beyond the Basics
You can tinker with your hotspot settings. For example, you can change the security type (though WPA2-Personal is generally recommended for security). You can also stop the hotspot by typing netsh wlan stop hostednetwork. This gives you control over when the hotspot is active.
8. Automating the Process: Creating a Shortcut
Tired of typing the commands every time? Let’s create a shortcut for convenience.
- Create a Text File: Open Notepad.
- Add Commands: Paste the following into the Notepad:
@echo offnetsh wlan start hostednetworkpause - Save the File: Save the file as a
.batfile (e.g., "start_hotspot.bat") on your desktop. - Run as Administrator: Right-click the
.batfile and select "Run as administrator."
9. Security First: Protecting Your Hotspot
Always use a strong password! Consider it the lock on your digital front door. Also, be mindful of whom you share your hotspot with.
10. Limitations: What You Need to Keep in Mind
Windows 8.1's hotspot is a great feature, but it has limitations. It can only share the internet connection that is active on your laptop. Also, your laptop's Wi-Fi adapter is handling both receiving and transmitting Wi-Fi signals, which can sometimes slow it down, especially with multiple connected devices.
11. Why This is Better Than a Dedicated Router (Sometimes)
Sure, a dedicated router is more robust, but a laptop hotspot offers undeniable convenience. It is excellent for temporary situations where setting up a physical router is impractical. It's perfect for travel, emergencies, or quick sharing needs.
12. The Ethical Considerations: Be a Good Digital Citizen
Always respect the terms of service of your internet provider. Avoid excessive data usage and ensure you have a plan that allows for sharing your connection. Be a responsible netizen!
13. Beyond Windows 8.1: This Trick's Relevance Today
While this guide is specifically for Windows 8.1, the core concepts are similar to newer Windows versions. The fundamental principles of creating a hotspot from your laptop remain constant.
14. Advanced Tweaks: Speed, Range, and More
For those feeling adventurous, you can delve deeper into tweaking the settings. Experiment with different Wi-Fi channels (though usually, auto is fine) and explore options for boosting range if needed. But remember, keep it simple if you're not a tech whiz!
15. Windows 8.1's WiFi Hotspot: Still Relevant?
Absolutely! While Windows 8.1 is older, it's still found on many devices and the built-in hotspot feature remains a clever way to share your internet connection when you need it. It's a reminder that even older tech can still surprise us with its capabilities.
Wrapping Up: Unleash the Power of Your Laptop!
And there you have it, folks! You've successfully unlocked the secret of your Windows 8.1 laptop's Wi-Fi hotspot. Now you can share your internet connection with the world (or at least your friends and family!). It's a simple trick with a big impact, transforming your laptop into a mobile internet hub. Go forth and connect!
FAQs
1. Is this feature secure?
Yes, as long as you set a strong password! WPA2-Personal is the recommended security setting.
2. Does this use a lot of battery?
Yes, running a hotspot consumes more power than regular usage. Be sure to plug in your laptop when using it for extended periods.
3. Can I use this to share my mobile data connection?
Yes, if your laptop has a mobile broadband connection (e.g., from a USB dongle), you can share that connection via the hotspot.
4. What if I forget my password?
You can find your password by typing netsh wlan show hostednetwork in the command prompt. Look for the "Key" field.
5. Is this the same as "Mobile Hotspot" in newer Windows versions?
The underlying principle is similar (sharing your internet connection), but the user interface is more streamlined in later Windows versions. But this method works great for Windows 8.1!
1) Principal Keywords: Windows 8.1 Hotspot, WiFi Connect
2) SEO Headline: Windows 8.1 Hotspot: Secrets to WiFi Connectivity Revealed!
3) Pathway: Windows-8.1-Hotspot
4) Meta Summary: Unlock your Windows 8.
Windows 8 WiFi Nightmare? Solved in 60 Seconds!Turn your Windows 8 Laptop into Wifi Hotspot

By Tricks That Make you Smart Turn your Windows 8 Laptop into Wifi Hotspot by Tricks That Make you Smart
Turn Windows 8 Laptop into WiFi HotSpot How To

By TechEmpty Turn Windows 8 Laptop into WiFi HotSpot How To by TechEmpty
Make a Wi fi Hotspot Using your Windows 8 Laptop

By Syed Shah Zahurullah Hussaini Make a Wi fi Hotspot Using your Windows 8 Laptop by Syed Shah Zahurullah Hussaini
Title: Windows 8.1 - No Internet Connection Available
Channel: MDTechVideos
Windows 8.1 - No Internet Connection Available by MDTechVideos
My Laptop Work
Unlock Your Laptop's WiFi Hotspot: Windows 8.1 Secret Revealed!
Introduction: Transforming Your Laptop into a Personal WiFi Hub
In today's interconnected world, the ability to share your internet connection seamlessly is paramount. Whether you're navigating a crowded coffee shop, traveling on a train, or simply seeking a backup solution for your home network, creating a WiFi hotspot from your Windows 8.1 laptop offers unparalleled convenience. This detailed guide will illuminate the often-overlooked capabilities within Windows 8.1, revealing the precise steps to transform your laptop into a fully functional wireless access point, allowing you to share your internet connection with multiple devices effortlessly. Forget clumsy workarounds or the need for external devices; we’ll unlock the built-in potential already residing within your operating system.
Understanding the Foundation: Requirements and Considerations
Before we embark on this digital transformation, it's vital to establish a solid understanding of the prerequisites. First and foremost, you require a Windows 8.1 operating system installed and running on your laptop. Beyond this fundamental need, a working internet connection is indispensable. This connection can be established via an Ethernet cable, a pre-existing WiFi network, or a mobile broadband connection via a USB dongle, depending on the setup. Additionally, your laptop must possess a functional wireless network adapter. This adapter will serve as the broadcast point for your new WiFi hotspot, enabling other devices to connect. Before proceeding, verify that your wireless adapter is enabled; consult your laptop's documentation or device manager, if necessary.
Method 1: Leveraging the Built-in "Mobile Hotspot" Feature
Windows 8.1 offers a surprisingly intuitive and powerful feature, cleverly named "Mobile Hotspot," that facilitates the creation of a WiFi hotspot with ease. This feature is designed to be user-friendly, streamlining the process and minimizing the need for complex configurations. Here’s how to harness its power:
- Accessing the Settings: Begin by navigating to the Windows Settings panel. You can access this panel by simultaneously pressing the Windows key and the "I" key, or by clicking the gear icon within the Start Menu. Within the Settings menu, locate and select the "Network and Internet" option.
- Enabling the Mobile Hotspot: Within the "Network and Internet" settings, select the "Mobile hotspot" tab, usually found on the left-hand side menu. You’ll be presented with options to define the name of your hotspot and the password devices will use to connect.
- Configuring Your Network: You will encounter options to configure your network. It’s recommended to set a strong password for your hotspot to ensure your network’s security. Consider using a combination of uppercase and lowercase letters, numbers, and symbols. This will protect your data from unwanted access as guests connect to your network.
- Sharing Your Connection: Beneath the settings where you named your network and set a password, there will be a dropdown menu labeled "Share my Internet connection from." Choose the network adapter through which your laptop is currently connected to the internet. If you are connected via Ethernet, select "Ethernet." If connected via WiFi, select the network you are presently connected to.
- Turning on the Hotspot: Once all the fields are completed, you can toggle on the "Share my Internet connection with other devices" to activate your freshly created WiFi hotspot.
- Connecting Devices: Finally, on the devices you wish to connect to the hotspot, locate your laptop's network name in the list of available WiFi networks. Enter the password you previously set to establish a secure connection.
Method 2: Utilizing the Command Prompt for Advanced Customization (Optional)
For those seeking more granular control over their WiFi hotspot, the Command Prompt offers a powerful alternative. This method allows for advanced customization and network shaping, catering to more specific needs. However, it does require some technical proficiency.
- Opening the Command Prompt: Open the Command Prompt as an administrator. You can do this by searching for "cmd" in the Start Menu, right-clicking on "Command Prompt," and selecting "Run as administrator."
- Setting up the Hosted Network: Type the following command and press Enter:
netsh wlan set hostednetwork mode=allow ssid="YourHotspotName" key="YourPassword". Replace "YourHotspotName" with the name you wish to give your hotspot, and replace "YourPassword" with your desired passphrase. - Starting the Hosted Network: To initiate the hotspot, run this command, then press Enter:
netsh wlan start hostednetwork. - Sharing Your Internet Connection: Navigate to the Network Connections window. You can access this by searching for "network connections" in the Start Menu. Locate the adapter through which you are connected to the internet (e.g., Ethernet or your primary WiFi connection). Right-click on the connection and select "Properties."
- Enabling Internet Connection Sharing: In the Properties window, click on the "Sharing" tab. Check the box that says "Allow other network users to connect through this computer's Internet connection." Under "Home networking connection," select the name of the virtual WiFi adapter you want to share the connection with. This adapter will typically be labeled something similar to “Microsoft Hosted Network Virtual Adapter." Click "OK" to save the changes.
- Verifying the Setup: After the changes have been applied, return to the command prompt. You should now also be able to connect your other devices using the SSID and password specified previously.
- Stopping the Hosted Network: Should you wish to stop the hosted network, type
netsh wlan stop hostednetworkin the Command Prompt and press Enter.
Troubleshooting Common Issues
Occasionally, you might encounter a few challenges when setting up your WiFi hotspot. The following tips will assist you in overcoming common roadblocks:
- Hotspot Not Showing Up: If your hotspot doesn't appear on other devices, double-check that the hotspot is active within the settings, and that the SSID name is correctly entered on the connecting devices. Review your wireless adapter drivers, as outdated drivers can cause connectivity issues.
- Internet Connection Issues: If devices connect to the hotspot but cannot access the internet, verify that the "Share my Internet connection from" option within the Mobile Hotspot settings is correctly configured to the active internet source your laptop is using. If using the Command Prompt method, double-check the Internet connection sharing setup again and apply the correct settings.
- Password Problems: Ensure you're entering the correct password for the hotspot. The password is case-sensitive, so check that the capitalization is correct. If you're using the Command Prompt method, ensure you haven’t mistyped the password command.
- Driver Conflicts: Outdated or corrupted network adapter drivers are another common culprit. To resolve this, go to Device Manager (search for it in the Start Menu). Expand the "Network adapters" section. Right-click on your wireless adapter and select "Update driver." Choose “Search automatically for drivers”. If that doesn't work, manually download the newest drivers from your laptop manufacturer’s website or the wireless adapter manufacturer’s website and install them.
Optimizing Your Hotspot for Peak Performance
To ensure an optimal WiFi hotspot experience, considering a few key additional steps is essential:
- Positioning Your Laptop: The position of your laptop is crucial. Place your laptop in a central location to maximize the signal range. Avoid obstructions such as walls or metal objects, as these can interfere with the signal.
- Monitor Connected Devices: Monitor the number of devices connected to your hotspot, as each connected device consumes bandwidth. The more devices, the more likely the internet speed will be compromised.
- Prioritize Bandwidth: If you have multiple devices connected, consider prioritizing certain devices or applications that require greater bandwidth. Most routers have Quality of Service (QoS) settings, but those typically aren't available on an ad-hoc hosted network.
- Regular Security Reviews: Periodically review your hotspot's security settings. Ensure the password remains strong, and consider changing it regularly to minimize unauthorized access.
- Update Your Wireless Adapter Drivers: Keep your wireless network adapter drivers up-to-date for optimal performance and security.
Conclusion: Unleashing the Power of On-Demand Connectivity
By following these meticulously detailed instructions, you can readily unleash the power of your Windows 8.1 laptop, transforming it into a pocket-sized WiFi hotspot. Whether you're seeking to share your internet connection with friends, colleagues, or multiple devices, the methods outlined here provide a seamless and efficient solution. Enjoy the freedom of on-demand connectivity, wherever your digital adventures may take you. With a little bit of setup, you can ensure constant connectivity and always remain linked with family and friends.
