can i use my laptop as a wifi router

Title: Use Your Computer As WiFi Router Without Any Software
Channel: A2MTech
Use Your Computer As WiFi Router Without Any Software by A2MTech
can i use my laptop as a wifi router, can i use my laptop as a wifi hotspot, can i use laptop as wifi router, can i use my laptop as a router, how to use laptop as wifi router
Laptop as WiFi Hotspot? This SHOCKING Trick Works!
Unlock Wi-Fi Freedom: Your Laptop's Hidden Hotspot Power
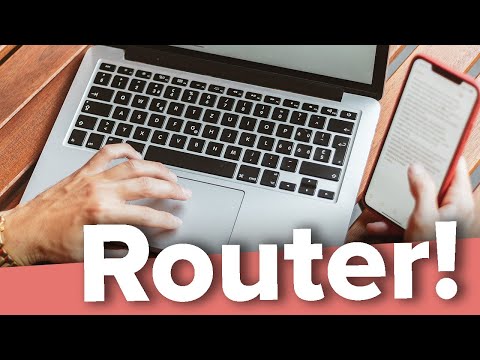
Ever dreamt of internet access anywhere, anytime? The answer, my friend, might be closer than you think. Your trusty laptop could be the key. It holds a surprising secret: the power to become a Wi-Fi hotspot. This isn't some techie fantasy. It is a readily achievable reality.
Untangling the Wi-Fi Web: The Hotspot Revelation
Consider this scenario. You’re on a train, miles from your home Wi-Fi. You desperately need to check emails, yet the signal is weak. Your phone's hotspot could help, but data is precious. What if your laptop could step in? Incredibly, it can. It's a game-changer.
The Hidden Potential: Laptop as a Wi-Fi Extender
Think of your laptop as a Wi-Fi amplifier. It subtly extends connectivity. It takes an available internet source and shares it. Think of it as your personal Wi-Fi guardian. The setup is straightforward. It's also remarkably effective.
Setting the Stage: Essentials for Hotspot Success
First, you’ll need a laptop with Wi-Fi capabilities. Nearly every modern laptop fits the bill. Next, you need an internet source. This could be your home Wi-Fi. Equally, it could be a wired Ethernet connection. Finally, you'll need the right operating system (OS). Windows and macOS both offer built-in hotspot features.
Windows Warriors: Unleashing the Built-In Hotspot
Windows makes the process remarkably easy. You begin by accessing your settings. Next, head to 'Network & Internet.' Find the 'Mobile Hotspot' option. Flip the switch to 'On'. Then, customize your network name (SSID) and password. Select your internet source. That is if you want to connect. And that's it. You're ready to rock.
Mac Mavericks: Sharing Your Wi-Fi Signal
macOS similarly simplifies the process. First, open 'System Preferences.' Click on 'Sharing.' Check the box next to 'Internet Sharing'. Then, select the internet source you wish to share. From the 'Share your connection from:' dropdown. Choose Wi-Fi. Next, configure your Wi-Fi options. You will define a network name and password. Finally, enable internet sharing.
Beyond the Basics: Tweaking for Optimum Performance
Fine-tuning your hotspot enhances its performance. Consider these factors. First, location matters. Place your laptop in a central location. This ensures the widest Wi-Fi range. Second, manage connected devices. Limit the number of devices utilizing the hotspot. This preserves bandwidth. Keep an eye on your data usage. You want to prevent those overage charges.
Troubleshooting Troubles: Solving Common Snags
Encountering issues is normal. Here's a quick troubleshooting guide. If devices cannot connect, double-check password. Confirm your internet source is active. Firewall settings might impede connections. Temporarily disable your firewall. Lastly, restart your laptop. This solves many minor glitches.
The Unseen Benefits: Beyond the Obvious
A laptop hotspot offers diverse advantages. It’s invaluable for travel. Access internet on the go when you need it. Share your internet with friends and family. Create your own little Wi-Fi haven. Moreover, it serves during emergencies. Keep connected when traditional sources fail.
Security Savvy: Safeguarding Your Hotspot Signal
Security is paramount when creating a hotspot. Always use a strong password. Encrypt your network connection using WPA2 or WPA3. Regularly monitor connected devices. Be vigilant against unauthorized access.
Embrace the Freedom: Taking Control of Your Connection
Your laptop is more than just a tool. It's a portable command center. As a Wi-Fi hotspot, it empowers you. It provides unprecedented connectivity. So, take control of your Wi-Fi. Experience the liberating power of a portable hotspot. Now you can stay connected.
Tether Your Laptop to WiFi: The SHOCKING Secret Hack You NEED!Laptop as WiFi Hotspot? This SHOCKING Trick Works!
Hey everyone! Ever been stranded with a dire need for internet access? Maybe you're on a road trip, stuck in a hotel with terrible Wi-Fi, or desperately trying to finish that crucial presentation at a coffee shop with spotty service. We've all been there, right? The frustration of a weak or non-existent internet connection can be absolutely maddening. But what if I told you there's a secret weapon, a hidden trick up your sleeve, that lets your laptop become your own personal Wi-Fi hotspot? Sound impossible? Well, prepare to be amazed, because it’s totally doable, and the results are nothing short of… well, shocking!
1. The Internet Black Hole: Why You Need This Trick
Think about it: our lives are utterly intertwined with the internet. From streaming our favorite shows to sending important emails, from navigating with GPS to simply staying connected with loved ones – it’s an essential part of modern life. Losing that connection feels like being thrown into an internet black hole. This trick is your lifeline! It’s like having a portable emergency internet kit, always at the ready. Trust me, knowing how to turn your laptop into a hotspot is a game-changer, offering you freedom and flexibility you never thought possible. It’s incredibly empowering to overcome those internet connectivity emergencies!
2. Unveiling the Secret Weapon: What You'll Need
So, what’s the magic formula? The good news is, you probably already possess most of the necessary ingredients! You'll need:
- A Laptop: Running either Windows or macOS. (We'll cover both!)
- An Internet Connection: This could be from an Ethernet cable, a cellular data connection (if you have a built-in or external modem), or even a public Wi-Fi network that you can legally access.
- A Little Patience: (Don't worry, the process is simpler than assembling IKEA furniture!)
3. Windows Wonderland: Your Laptop's Hotspot Debut
Let's dive into the windows world first. Here’s the step-by-step process to turn your Windows laptop into a Wi-Fi hotspot:
- Step 1: Open Settings: Click the Windows Start button (the little Windows logo in the bottom left corner) and look for the "Settings" icon – it's usually a gear-shaped symbol.
- Step 2: Network & Internet: Inside Settings, find the "Network & Internet" option and click on it.
- Step 3: Mobile Hotspot: On the left-hand side, you'll see a menu. Click on "Mobile hotspot."
- Step 4: Turn on the Switch: You will typically have a toggle button to enable the hotspot. Flip the switch to "On."
- Step 5: Customize Your Hotspot: (Optional but recommended!) Click "Edit" under "Mobile hotspot" to customize your network name (SSID) and password. Choose a strong, memorable password. The default settings are generally okay, but for security purposes you may wish to create your own.
- Step 6: Connect Your Devices: Now, grab your other devices (smartphone, tablet, etc.) and search for Wi-Fi networks. Your laptop's hotspot should appear in the list. Select it, enter your password, and voila! You’re connected!
4. macOS Magic: Turning Your MacBook into a Wi-Fi Beacon
Mac users, don’t worry! We haven’t forgotten about you. Here’s how to create a hotspot on your MacBook:
- Step 1: System Preferences: Click the Apple menu (the Apple logo in the top left corner of your screen), and select "System Preferences."
- Step 2: Sharing: Click on the "Sharing" icon.
- Step 3: Internet Sharing: In the menu on the left, find the "Internet Sharing" option and click it.
- Step 4: Share Your Connection From: From the drop-down menu next to “Share your connection from:”, select the internet connection you wish to share (e.g., Wi-Fi, Ethernet, etc.)
- Step 5: To Computers Using: Check the box next to “Wi-Fi”.
- Step 6: Wi-Fi Options: Click “Wi-Fi Options…” to customize your network name (SSID) and password. Again, pick something strong and memorable.
- Step 7: Start the Sharing: Check the box next to “Internet Sharing” at the top of the panel. Then, click "Start" to activate your hotspot.
- Step 8: Connect Your Devices: Now, your other devices can connect to your MacBook's hotspot by selecting the network name and entering the password you chose.
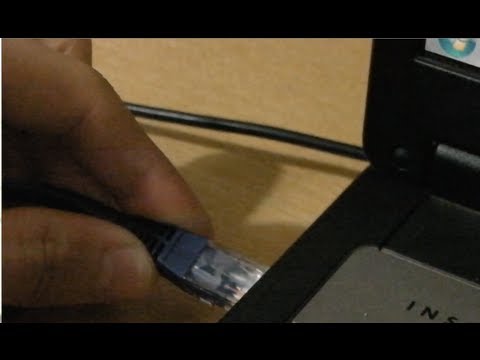
5. The Wired Advantage: Using an Ethernet Connection
Did you know you can also share an Ethernet connection? This may be the only internet option you have. If your laptop is connected to the internet via an Ethernet cable, sharing that connection is equally simple on both Windows and macOS. Just select "Ethernet" as the connection to share in the respective settings for each operating system. It transforms your laptop into a wired-to-wireless bridge, giving other devices access to the internet even without Wi-Fi.
6. Troubleshooting Troubles: Common Hiccups and Quick Fixes
Sometimes, things don't go perfectly. Don’t worry! Here are some common troubleshooting tips:
- Check Your Internet Connection: Ensure your laptop actually has an active internet connection before trying to share it.
- Firewall Issues: Your firewall might be blocking the hotspot. Temporarily disable your firewall (or create a rule to allow hotspot traffic) to see if that resolves the problem. Important: only disable the firewall temporarily to test the connection, and then make sure to re-enable it for security.
- Network Adapter Problems: Make sure your Wi-Fi adapter is enabled and working correctly. Check your device manager (Windows) or network settings (macOS).
- Password Problems: Double-check that you are entering the correct password on your other devices.
- Restart Your Laptop: A simple restart often works wonders!
7. Security First: Protecting Your Hotspot
Security is paramount! Here are some things to keep in mind:
- Strong Passwords: Always use a strong, unique password for your hotspot.
- Avoid Public Networks: Only share your internet connection if you trust the network you're using. Don’t share your mobile hotspot with anyone you don’t know..
- Monitor Connected Devices: Keep an eye on which devices are connected to your hotspot. If you see any unfamiliar devices, disconnect them immediately.
- Consider Encryption: Use WPA2 or WPA3 encryption for maximum security. It is usually the default, but a good double check is always wise.
8. Bandwidth Basics: Understanding Limitations
Be mindful of your data usage! Sharing your internet connection also shares your bandwidth. Video streaming, large file downloads, and multiple connected devices will consume more data. You want to always be aware of your own data allowance. Consider the following:
- Data Caps: If you're using a cellular data connection, be aware of any data caps.
- Prioritize Tasks: Limit bandwidth-intensive activities if you're on a metered connection.
- Monitor Usage: Keep an eye on your data usage to avoid overage charges.
9. Mobile Hotspot Vs. Dedicated Router: The Pros and Cons
While creating a hotspot from your laptop is incredibly convenient, it’s not always the best solution. Here’s a quick comparison:
Laptop Hotspot:
- Pros: Free, readily available, easy to set up. Doesn’t require any extra hardware
- Cons: Drains laptop battery, can be less stable, limited range.
Dedicated Router:
- Pros: More stable connection, wider range, better battery life for other devices
- Cons: Requires purchasing a router, can be more complicated to set up.
10. Battery Life Blues: Optimizing for Hotspot Use
Using your laptop as a hotspot can drain your battery quickly. Here’s how to maximize battery life:
- Plug In: Whenever possible, plug your laptop into a power outlet.
- Dim Your Screen: Lower your screen brightness to conserve energy.
- Close Unnecessary Apps: Shut down any programs you're not using to reduce power consumption.
- Enable Power Saving Mode: Use your laptop’s power-saving features.
11. Beyond the Basics: Advanced Hotspot Settings
For the tech-savvy, there are some advanced settings to explore. Both Windows and macOS offer customization options for your hotspot, such as:
- Channel Selection: Choose a Wi-Fi channel to avoid interference from other networks.
- Connection Type: Select the appropriate connection type (e.g., Wi-Fi 4, Wi-Fi 5, etc.)
- MAC Address Filtering: Restrict access to your hotspot to specific devices.
12. When This Trick Saves the Day: Real-Life Scenarios
Think about the countless situations where this trick can save the day:
- **Travel
Use Your PC or Laptop as a Wireless Router
By Guiding Tech Use Your PC or Laptop as a Wireless Router by Guiding Tech
Use your Laptop as a Router
By allanisallan Use your Laptop as a Router by allanisallan
How to make any Windows computer or laptop as WiFi Repeater or WiFi Extender

By UniqueTutorials How to make any Windows computer or laptop as WiFi Repeater or WiFi Extender by UniqueTutorials

Title: His Ethernet is SLOWER than WiFi
Channel: Zach's Tech Turf
His Ethernet is SLOWER than WiFi by Zach's Tech Turf
Wifi Not Found
Laptop as WiFi Hotspot? This SHOCKING Trick Works!
Unveiling the Untold Secrets of Laptop-Based WiFi Hotspots: Transform Your Device into a Powerful Connectivity Hub
In today's hyper-connected world, the ability to access the internet on the go is no longer a luxury; it's a necessity. We rely on constant connectivity for work, communication, entertainment, and information. But what happens when your primary WiFi source fails, or you find yourself in a location without readily available internet access? The solution lies in harnessing the often-overlooked power of your laptop: creating a personal WiFi hotspot. This seemingly simple function holds the key to unlocking a world of on-demand connectivity, and the "shocking trick" is far less complicated than you might imagine.
Understanding the Fundamentals: How Laptops Become WiFi Hotspots
At its core, transforming your laptop into a WiFi hotspot is about sharing its internet connection with other devices. This shared connection can originate from a variety of sources: an Ethernet cable plugged directly into a modem, a pre-existing WiFi network, or even a mobile broadband connection via a cellular data plan. The laptop acts as a central distribution point, broadcasting a WiFi signal that other devices, such as smartphones, tablets, and other laptops, can connect to. This process, while technically straightforward, introduces the critical element of configuration and understanding the nuances of your operating system.
Windows 10 and 11: The Built-In Mobile Hotspot Feature – Your Gateway to Instant Connectivity
Microsoft has streamlined the process of creating a WiFi hotspot within Windows 10 and 11, providing an intuitive and user-friendly interface. This built-in feature eliminates the need for third-party software in most cases, simplifying setup and management.
Step-by-Step Guide: Activating the Windows Mobile Hotspot
Accessing the Settings Menu: Begin by clicking the Start button (usually represented by the Windows logo) and then select the "Settings" gear icon. Alternatively, you can press the Windows key + I keyboard shortcut to open Settings directly.
Navigating to Network & Internet: In the Settings window, locate and click on "Network & Internet." This section houses all network-related configurations.
Enabling the Mobile Hotspot: Within the Network & Internet settings, select "Mobile hotspot" from the left-hand menu. Here, you'll find the main controls for your hotspot.
Sharing Your Internet Connection: Under the "Share my internet connection from" dropdown, select the source of your internet. This could be your active WiFi connection, an Ethernet connection, or, if applicable, your cellular data connection. Choose the appropriate source based on your current setup.
Configuring Your Hotspot: Click the "Edit" button beneath the "Properties" section. This is where you customize your hotspot’s settings.
- Network Name: Choose a unique and memorable name (SSID) for your hotspot. This is what other devices will see when searching for available WiFi networks.
- Network Password: Select a strong and secure password to protect your hotspot from unauthorized access. This is crucial for maintaining the security of your connection and preventing potential data breaches.
- Band: Select the wireless band. Usually, you will be able to choose from 2.4 GHz or 5 GHz.
Turning on the Hotspot: Toggle the "Share my internet connection with other devices" switch to the "On" position. Your laptop will now begin broadcasting a WiFi signal, ready for other devices to connect.
Connecting Your Devices: On the devices you want to connect, scan for available WiFi networks. Your hotspot’s name will appear in the list. Select it, enter your password if prompted, and establish a connection.
Troubleshooting Common Issues: Ensuring a Smooth Hotspot Experience
Even with the built-in mobile hotspot feature, you might encounter some hiccups. Here's how to address them:
- Hotspot Not Appearing: Verify that your laptop's wireless adapter is enabled and functioning correctly. Check your network adapter settings within Device Manager (search for "Device Manager" in the Windows search bar). Make sure the adapter is not disabled.
- Slow Connection Speeds: The speed of your hotspot is directly related to the speed of your internet connection. If your primary internet source is slow, the hotspot will also be slow. Consider the number of devices connected and their data usage.
- Limited Data Allowance (if using cellular data): If you’re using your cellular data, be mindful of your data plan limits. Excessive usage can lead to overage charges.
- Interference: Wireless signals can be affected by other devices, such as microwaves and Bluetooth devices. Try moving your laptop to a different location to minimize interference.
- Firewall Blocking Connection: Windows Firewall, or any third-party firewall, might be blocking the connection. Ensure your firewall settings allow hotspot access.
macOS: Sharing Your Internet Connection with Ease
macOS, like Windows, offers a simple way to create a WiFi hotspot directly from your laptop. This method is called "Internet Sharing."
Setting Up Internet Sharing on macOS
Open System Preferences: Click the Apple icon in the top-left corner of your screen and select "System Preferences".
Navigate to Sharing: In System Preferences, click on the "Sharing" icon.
Select Internet Sharing: In the left sidebar of the Sharing window, check the box next to "Internet Sharing."
Choose 'Share your connection from': Use the "Share your connection from" dropdown menu to select the source of your internet connection. This will typically be your pre-existing WiFi or Ethernet connection.
Select 'To computers using': In the "To computers using" list, check the box next to "Wi-Fi."
Configure WiFi Options (if not already configured): Click the "Wi-Fi Options…" button.
- Network Name: Enter a name for your hotspot.
- Channel: Choose a channel for your hotspot. (Consider leaving it on "Automatic" unless you have specific reasons to change it.)
- Security: From the dropdown menu, select the type of encryption you want to use for your network (WPA2 Personal is usually recommended).
- Password: Enter a strong password for your hotspot.
Start the Hotspot: Click the "Start" button to enable Internet Sharing and begin broadcasting your WiFi hotspot.
Connect your devices: On your other devices, search for the WiFi network you created and connect using the password you set.
Addressing Potential Issues on macOS
- Internet Sharing Not Working: Ensure your internet source is active and functioning properly. Verify that the "Internet Sharing" box is checked in the Sharing preferences.
- No Internet Access on Connected Devices: Double-check the security settings for your WiFi connection. Ensure that the correct password is used.
- Slow Speeds: Like Windows, the speed of your hotspot is limited by the source internet's speed. Consider moving closer to your router. Also, reduce the number of devices using the connection simultaneously.
Leveraging Third-Party Software: Expanding Functionality and Control
While the built-in methods are perfectly adequate for most users, third-party software can provide advanced features and greater customization. Some popular options include:
- Virtual Router Plus: a free and open source program that allows you to create a WiFi hotspot on Windows. It is lightweight and easy to use.
- Connectify Hotspot: a paid application that offers advanced features like ad blocking, file sharing, and network monitoring. It's known for its user-friendly interface.
Important Considerations: Security, Data Usage, and Best Practices
Creating a laptop-based WiFi hotspot requires you to prioritize security. Without proper precautions, you risk exposing your internet connection and potentially your data to unauthorized access.
- Strong Passwords: Always use a strong, unique password for your hotspot. Avoid easily guessable passwords like "password" or common personal information.
- Encryption: Ensure your hotspot uses a secure encryption protocol. WPA2 Personal or WPA3 are the recommended options.
- Firewall: Keep your laptop's firewall enabled to protect against malicious attacks.
- Monitor Data Usage: Be mindful of your data usage of your primary internet source, especially if using cellular data.
- Update Your Software: Regularly update your operating system and any hotspot-related software to patch security vulnerabilities.
- Turn it Off When Not in Use: Disable your hotspot when you are not actively using it to prevent unauthorized access and conserve battery life.
The Bottom Line: Unlock Seamless Connectivity Wherever You Go
Transforming your laptop into a WiFi hotspot is a remarkably powerful and practical skill. By mastering the steps outlined above, you can ensure that you are always connected. Whether you’re traveling, working remotely, or simply in a location without reliable internet access, your laptop can become your personal portal to the digital world. Embrace the ability to create a personal WiFi hotspot, and experience a new level of freedom and control over your connectivity. The "shocking trick" is not a trick at all; it's a testament to the versatility of your laptop.
