how to make my laptop windows 7 a wifi hotspot

Title: How to Create a WiFi Hotspot with Windows 7
Channel: 1stepatatime
How to Create a WiFi Hotspot with Windows 7 by 1stepatatime
how to turn your windows 7 laptop into a wifi hotspot, how to connect my windows 7 to wifi hotspot
Turn Your Windows 7 Laptop into a WiFi Hotspot: The SHOCKINGLY Easy Trick!
Unleash the Wireless Wonder: Transform Your Windows 7 Laptop into a WiFi Hotspot!
Remember those days when you were tethered to a cable, yearning for the freedom of wireless internet? Well, that era is long gone. You can cast off the shackles of wired connections. Your Windows 7 laptop holds a secret. It’s a secret to becoming a WiFi hotspot. It's shockingly easy. Prepare to be amazed; the simplicity of this trick borders on unbelievable.
The Wireless Freedom Frontier: Setting the Stage
First and foremost, let’s paint a picture. Imagine this: You're stranded with zero internet access. Your phone's data plan is dwindling. But you have a trusty Windows 7 laptop. It’s also armed with a working internet connection. Suddenly, a brilliant idea strikes you. You can transform your laptop into a WiFi hotspot. This way, you can share your wired or wireless connection. Isn't that a lifesaver? So many scenarios become manageable with a WiFi hotspot. Think of it for traveling, or in situations where you need extra devices online. This setup proves incredibly useful.
Forging the Connection: The Magic of the Hosted Network
Now, the technical details are remarkably straightforward. Windows 7 has a built-in feature, often overlooked, that allows this. It's the magic key. It’s called the “Hosted Network.” It's a command-line feature. So, don't let that intimidate you. Don't worry; we’ll guide you through it. The process isn't difficult at all.
To kick things off, you need to open the Command Prompt. You can find it by searching for “cmd” in the Start menu. Then, right-click on "Command Prompt" and choose "Run as administrator." That's crucial. This is how you'll begin the process.
The Incantation: Entering the Commands
Next, prepare to type in some simple commands. These are the mystical words that activate the transformation. Take a deep breath, and type the following commands carefully:
netsh wlan set hostednetwork mode=allow ssid="YourNetworkName" key="YourPassword": Replace "YourNetworkName" with the name you want your WiFi network to have. Choose something memorable. Replace "YourPassword" with a strong password of your choosing. This password protects your network. It also keeps unwanted guests out.
netsh wlan start hostednetwork: This command officially starts the hosted network.
After entering these commands, you're one step away. You are creating your hotspot. The process is truly effortless. It is a testament to how Windows 7 simplifies tasks.
Sharing the Spoils: Letting Others Connect
Here’s the final touch. This is where you allow others to enjoy the fruits of your labor.
Open the "Network and Sharing Center." You can find this in the Control Panel.
Click on “Change adapter settings.”
You should see all of your network adapters listed. Find the network that has an active internet connection. Right-click on it. Choose "Properties."
Go the "Sharing" tab.
Check the box that allows other network users to connect through this computer's internet connection. In the "Home network connection" dropdown, select the hosted network you just created.
Click "OK."
And just like that, you're done! Other devices should now be able to find and connect to your new WiFi hotspot. They simply need to search for your network name. Then, they can enter the password you established. The process is complete. From there, they can benefit from your internet connection.
Troubleshooting Troubles: When Things Go Awry
Sometimes, a hiccup may occur. Perhaps the hotspot refuses to start. Or, maybe devices can't connect. Don't panic! Troubleshooting is easy.
- Check your network adapter drivers: Ensure your wireless network adapter drivers are up-to-date. Outdated drivers can prevent proper functionality.
- Verify Firewall Settings: In some cases, your firewall may block the hosted network. Then, you need to adjust your firewall settings. Allow the necessary connections.
- Restart Your Laptop: Sometimes, a simple restart solves the problem. It’s a classic troubleshooting technique.
- Double-Check Your Commands: Carefully check for any typos in the commands. Accuracy is key.
The Unveiling: The Simple Truth
So, there you have it. You did it! Transforming a Windows 7 laptop into a WiFi hotspot. It is simpler than you imagined. It's not overly complicated, not at all. You can share your internet connection. It's a practical skill. It’s also an empowering one.
Concluding the Adventure: Embrace the Possibilities
In conclusion, this seemingly complex task is incredibly manageable. It showcases the hidden potential of your Windows 7 laptop. Moreover, you now have a valuable tool at your disposal. Hence, explore the possibilities. Share your internet with friends. Stay connected on the go. Furthermore, the ability to create a WiFi hotspot opens doors. It makes life easier. Enjoy the freedom of wireless connectivity, wherever you go! You’ve become a WiFi wizard. Finally, you are ready to embark on a world of seamless internet access. Now go forth and connect!
Laptop's 5GHz Wifi: Blazing-Fast Speed or Total Disaster?We are ready to dive in!
Turn Your Windows 7 Laptop into a WiFi Hotspot: The SHOCKINGLY Easy Trick!
Hey everyone, ever been in a situation where your phone’s data is dwindling faster than a free donut at a meeting? Or maybe you’re stuck in a hotel with ridiculously overpriced Wi-Fi, and your other devices are begging for connection? Well, buckle up, because we’re about to unleash a little-known superpower: turning your old (but trusty) Windows 7 laptop into a WiFi hotspot, and trust me, it’s easier than making instant ramen. We're talking about a solution that can save you from internet desperation, and best of all, it's completely free!
1. The Era of Windows 7: Still Relevant? Absolutely!
Before we jump in, some might ask, "Wait, Windows 7? Isn't that… old?" And the answer is, yes, it's a classic, like a vintage vinyl record. But don't let its age fool you; it’s still perfectly capable of acting as a Wi-Fi hotspot, saving the day (and your data allowance) in a pinch. This article is for those of you who still have a Windows 7 laptop kicking around, or perhaps the dedicated few who continue to use it as their primary machine. We're not here to judge; we're here to empower!
2. Why Bother? The Benefits of Laptop Hotspotting
Let’s face it: tethering your phone to your laptop is fine, but it drains your battery faster than a politician promises to fix things. Turning your laptop into a hotspot offers a more stable and often faster connection for multiple devices. Think of it like this: your laptop is the central hub, distributing the internet love to all your Wi-Fi-enabled gadgets – your tablet, your other phone, even your smart TV (if you're lucky!).
- Cost Savings: Avoid expensive hotel Wi-Fi or data overages.
- Convenience: Connect multiple devices simultaneously.
- Greater Control: Monitor data usage and manage connections.
- Potential Speed Boost: Depending on your connection, a laptop-generated hotspot can sometimes be faster than tethering.
3. The Simple Truth: Your Laptop is Already Equipped!
The best part? You don’t need to download any fancy, complicated software (unless you want to… we'll touch on that later). Windows 7 has a built-in feature that lets you create a wireless network, right from the operating system. It's like finding a hidden compartment in your car – you didn't know it was there, but once you find it, you’re golden!
4. Unveiling the "Hosted Network" Secret
This built-in feature leverages something called a "hosted network." Essentially, your laptop acts as a Wi-Fi router, broadcasting a signal that other devices can connect to, just like your home router does.
5. Step-by-Step: The SHOCKINGLY Easy Setup Process
Alright, let's get down to the nitty-gritty. Here’s how to transform your laptop into a hotspot, step by shockingly easy step:
Step 1: Open the Command Prompt (Admin Edition). Click the Start button, type "cmd" in the search box, and then right-click on "Command Prompt" and select "Run as administrator." You have to run it as an admin so that you can make changes.
Step 2: The Magic Command (Copy and Paste, My Friend!) In the Command Prompt window, type (or, even better, copy and paste!) the following command, then hit Enter:
netsh wlan set hostednetwork mode=allow ssid="YourHotspotName" key="YourPassword"- "YourHotspotName": Replace this with the name you want your hotspot to have (e.g., "MyLaptopWiFi").
- "YourPassword": Replace this with the password you want your devices to use to connect to the hotspot (make it strong!). Remember this is your password to get into your hotspot. Nobody wants to be using their internet.
- Example:
netsh wlan set hostednetwork mode=allow ssid="AwesomeLaptop" key="StrongPassword123"
Step 3: Starting the Hosted Network. Type (or copy and paste) the following command and press Enter:
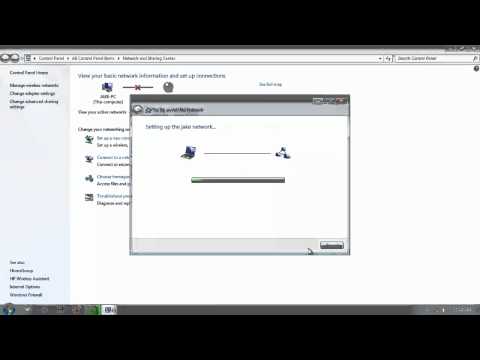
netsh wlan start hostednetworkStep 4: Sharing Your Internet Connection. This is the final step but don't skip it!
- Go to "Network and Sharing Center" (you can find it in the Control Panel or by right-clicking the network icon in your system tray).
- Click on "Change adapter settings" in the left panel.
- Identify your internet connection (Ethernet or Wi-Fi). Right-click on it and select "Properties."
- Go to the "Sharing" tab.
- Check the box that says "Allow other network users to connect through this computer's Internet connection."
- In the "Home networking connection" dropdown, select the "Microsoft Virtual Network" (this sounds fancy, but it's your hosted network!).
- Click "OK."
Congratulations! You have created a hotspot!
6. Troubleshooting: When Things Don't Go Smoothly
Sometimes, things don't work perfectly the first time. Here are a few potential hiccups and how to fix them:
- "The hosted network couldn't be started" Error: This can be caused by a driver issue. Try updating your wireless network adapter drivers.
- No Internet Connection on Connected Devices: Double-check that you properly enabled internet connection sharing (Step 4 above).
- "Limited Access" Error: Ensure that your security software (firewall, antivirus) isn't blocking the connection.
7. The Power of Third-Party Software (Optional, but Helpful)
While Windows 7's built-in feature is great, some software can offer more advanced features and a more user-friendly interface. Consider exploring options like Connectify Hotspot or Virtual Router Manager. However, the built in program will do the trick.
8. Security First: Protecting Your Hotspot
Just like your home Wi-Fi, your laptop hotspot needs security.
- Strong Password: Use a complex password with a mix of letters, numbers, and symbols.
- WPA2/WPA3 Encryption: Ensure your hotspot uses robust encryption protocols. Windows 7 defaults to WPA2, which is fine.
- Monitor Connected Devices: Keep an eye on who's connected to your hotspot and disconnect any unwanted users.
9. Data Usage Awareness: Don't Get Bill Shock!
Be mindful of your data usage, especially if you have a limited data plan. Streaming videos, downloading large files, and automatic software updates can quickly eat up your allowance. Consider:
- Monitoring Data Usage: Your connected devices will consume data. Take note of which of your devices consume the most data.
- Limiting Background Data: Turn off background app refresh on your devices.
- Downloading Offline Content: Download movies, music, and articles for offline viewing.
10. Laptop Battery Life: A Consideration
Creating a hotspot drains your laptop's battery faster. Keep this in mind, especially if you're away from a power outlet. Consider:
- Charging Your Laptop: Plug your laptop into a power source whenever possible.
- Power Saving Mode: Activate your laptop's power-saving mode.
- Minimize Usage: Limit your usage of data-intensive applications to maximize battery life.
11. The "What If" Scenarios: When This Trick Shines
Think about the times this trick will come in handy:
- Traveling: Staying in a hotel with expensive Wi-Fi? No problem!
- Emergency Situations: Your home internet is down? You're covered.
- Sharing with Friends: Help out a friend in need and share your connection!
12. Speed Demons: Will It Be Speedy?
The speed of your hotspot depends on your laptop's Wi-Fi card, your internet connection, and the number of devices connected. It might not be as fast as a dedicated router, but it's usually perfectly adequate for browsing, email, and basic streaming.
13. The Future of Hotspots: Beyond Windows 7
While this article focuses on Windows 7, the principles are transferable. Newer versions of Windows have similar functionalities, albeit with slightly different interfaces. However, this still works! Technology never stops evolving. Be prepared to learn new tricks.
14. Beyond the Basics: Customization & Advanced Settings
You can customize your hotspot experience further:
- Change the Channel: In the Command Prompt, you can often change the Wi-Fi channel to improve performance. Search online for guides on this.
- Limit Bandwidth: Some third-party apps allow you to limit bandwidth usage per device.
15. The Perfect Time Saver: A Recap and The Big Picture
So, there you have it! Turning your Windows 7 laptop into a Wi-Fi hotspot is a shockingly easy way
Unlock Blazing-Fast Xfinity WiFi on Your Laptop: The Secret Trick!Turn Your Windows 7 Laptop into a WiFi Hotspot

By AvoidErrors Turn Your Windows 7 Laptop into a WiFi Hotspot by AvoidErrors
Create a laptop WiFi hotspot in under 30 seconds Windows 7
By jacobspeeds Create a laptop WiFi hotspot in under 30 seconds Windows 7 by jacobspeeds
How to make your Windows 7 PC, a Wi-Fi hotspot
By Tech Raj How to make your Windows 7 PC, a Wi-Fi hotspot by Tech Raj

Title: How to turn your Windows 7810 Laptop or PC into a WiFi Hotspot UpdatedHD
Channel: iTech
How to turn your Windows 7810 Laptop or PC into a WiFi Hotspot UpdatedHD by iTech
Working With Laptop
Turn Your Windows 7 Laptop into a WiFi Hotspot: The SHOCKINGLY Easy Trick!
Ah, the ubiquitous need for internet connectivity! We've all been there: needing to share a connection, perhaps for a phone, a tablet, or even another laptop, and finding ourselves tethered to a wall outlet or a paid public WiFi service. But what if you could transform your trusty Windows 7 laptop into a personal WiFi hotspot, extending your internet access to all your devices, anytime, anywhere? Forget cumbersome routers and complicated setups. Prepare to be amazed by this remarkably simple, yet often overlooked, trick.
Why Create a WiFi Hotspot? The Benefits Unveiled
The advantages of creating a WiFi hotspot from your Windows 7 laptop are numerous and compelling. Consider these scenarios:
Internet Access for Multiple Devices: You might be traveling, and you only have one wired internet connection, but you have multiple devices that need internet. Your laptop, acting as a hotspot, can beam that connection to your other devices, like your phone, tablet, or even another laptop.
On-the-Go Connectivity: Stuck in a hotel room with notoriously bad or expensive WiFi? Your laptop can become your private, secure gateway. Similarly, during road trips, when you have a mobile broadband connection via a USB dongle, you can share that connection with the entire car!
Guest Access Management: Hosting friends or family? Instead of sharing your primary WiFi password, you can create a temporary, secure hotspot using your laptop, limiting their access to your network while maintaining your privacy and security.
Troubleshooting and Diagnostics: In some instances, setting up a hotspot can help you diagnose network problems. If your other devices connect to laptop's hotspot, but not the primary WiFi, you know the issue is with the main WiFi network. This isolates the cause and simplifies troubleshooting.
The Surprisingly Simple Method: Hosted Network Magic
The good news? Creating a WiFi hotspot on Windows 7 is less about technical wizardry and more about utilizing a built-in feature. We are going to employ the command line to activate the "Hosted Network" feature of Windows 7. Don't let the command prompt intimidate you; it's remarkably straightforward. Follow these steps:
Step 1: Open the Command Prompt with Superuser Privileges
Click the "Start" button and type "cmd" in the search bar. Instead of simply pressing Enter, right-click on "cmd.exe" from the search results and select "Run as administrator." This is vital; otherwise, the subsequent commands will not work. A black window will appear; we're ready to proceed.
Step 2: Activate the Hosted Network and Set Basic Parameters
In the command prompt window, type the following command and press Enter:
netsh wlan set hostednetwork mode=allow ssid=YourHotspotName key=YourPassword
Replace "YourHotspotName" with the desired network name (the name that will appear when devices search for a WiFi network) and "YourPassword" with a strong password (at least eight characters). For example, a good command would be:
netsh wlan set hostednetwork mode=allow ssid=MyLaptopHotspot key=MySecretPassword123
This command does three things:
mode=allow: Enables the hosted network.ssid=YourHotspotName: Sets the network name.key=YourPassword: Sets the WiFi password.
Step 3: Start the Hosted Network
After successfully setting the parameters, we need to actually start the hotspot. Type and enter this command in the command prompt:
netsh wlan start hostednetwork
You should see a confirmation message indicating that the hosted network has started. If you encounter an error, double-check the previous steps, especially step one and make sure you ran it as an administrator.
Step 4: Share Your Internet Connection
The hotspot is now active, but it's not yet sharing your internet connection. To do this, we need to share your existing internet connection via the network adapter. Follow these steps:
- Open the "Network and Sharing Center." You can usually find this by right-clicking the network icon in the system tray (bottom right of your screen) and selecting "Open Network and Sharing Center."
- Click on "Change adapter settings" in the left-hand pane. This will open the Network Connections window.
- Identify the network adapter that is currently providing your internet connection. This might be labeled "Ethernet" (if you're connected via a wired connection) or "Wireless Network Connection" (if you're using a WiFi connection to connect to the internet).
- Right-click on the correct network adapter, and select "Properties."
- In the "Sharing" tab, check the box for "Allow other network users to connect through this computer's Internet connection."
- In the "Home networking connection" dropdown menu, select "Microsoft Hosted Network Virtual Adapter." This represents the virtual WiFi adapter created by the hosted network.
- Click "OK" to save the settings.
Step 5: Connect Your Devices
Now, simply locate the WiFi network you named in Step 2 ("YourHotspotName") on your other devices. Enter the password ("YourPassword") when prompted, and you should be connected to the internet.
Troubleshooting Common Issues
While the process is generally straightforward, you might encounter a few road bumps. Here's how to resolve them:
- "The hosted network couldn't be started" error: This is often because of incorrect permissions. Ensure you are running the command prompt as an administrator (Step 1). Also, check your network adapter drivers are up-to-date.
- My device connects but there is no internet: Double-check the "Sharing" settings (Step 4). Ensure you have selected the correct network adapter that provides your internet connection. Also, make sure that the "Microsoft Hosted Network Virtual Adapter" is correctly selected in the "Home networking connection" dropdown menu. Restarting your laptop can sometimes resolve this.
- I can't find the hotspot on other devices: Verify that the "Hosted Network" is started (Step 3). Also, double-check that the network name (SSID) has been set correctly in (Step 2). Restart your laptop.
Enhancing Security and Performance
While this method is convenient, consider a few additional steps to enhance both the security and performance of your hotspot:
- Use a Strong Password: Never use an easily guessable password. Employ a combination of upper and lower case letters, numbers, and symbols. A strong password protects your connection from unwanted access.
- Monitor Connected Devices: Keep an eye on the devices connected to your hotspot. You can often see these listed in the Network and Sharing Center. If you notice any suspicious devices, block them by changing your hotspot's password.
- Update Your Drivers: Ensure your network adapter drivers are up-to-date. Outdated drivers can cause instability or slow performance. Driver updates can usually be found on the manufacturer's website.
- Consider Encryption: While the "key" parameter in the command sets the password, the security protocol is often WPA2-PSK by default in Windows 7. This is a secure protocol but you can change the type of encryption to something that is more robust in the adapter settings.
The Elegance of Simplicity: A Refined WiFi Solution
Creating a WiFi hotspot on your Windows 7 laptop is no longer a daunting task but rather a simple process that grants you flexibility and convenience. By following the steps outlined, you can transform your laptop into a powerful WiFi provider, providing internet access wherever you need it. Embrace this shockingly easy trick, and enjoy the freedom of ubiquitous connectivity!
