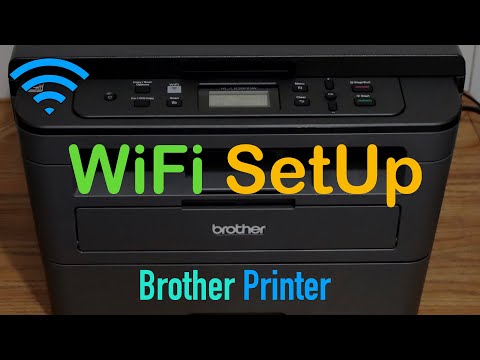
kết nối laptop với máy in brother qua wifi

Title: Brother printers wifi setup to mobile or laptoppc
Channel: yaswanth kiran bryk
Brother printers wifi setup to mobile or laptoppc by yaswanth kiran bryk
Brother Printer WiFi Setup: The Easiest Guide EVER!
Conquering Your Wi-Fi Woes: A Brother Printer Setup Odyssey
So, you've got a shiny new Brother printer. Fantastic! But is it singing the sweet song of wireless connectivity, or is it stuck humming a frustrating tune of connection errors? Fear not, fellow adventurer! Setting up Wi-Fi on your Brother printer doesn’t have to be a digital dragon to slay. Honestly, it can be a surprisingly smooth journey. We’re going to navigate the process together. Prepare for a stress-free setup experience.
Unboxing the Potential: Gathering Your Arsenal
Before we boldly venture forth, let’s gather our supplies. Think of it as preparing for a quest. First, you will need your Brother printer. Make sure it is powered on. Next, grab your Wi-Fi router. You should have access to your network's name (SSID) and password. That's vital. Finally, ensure you have a computer or mobile device. That will be your control center.
Decoding the Digital Scrolls: Understanding Your Printer's Interface
Most Brother printers have a control panel. It may have a touchscreen or physical buttons. These panels act as the gateway to your printer's inner workings. Therefore, you should become familiar with them. On the panel, look for a "Network," "Wi-Fi," or "Setup" option. It is usually represented by an icon. This is where the magic begins.
The Wireless Wizardry: Steps to Seamless Connection
Now, let's proceed with the Wi-Fi setup.
Option 1: The Touchscreen Tango (For Printers with Touchscreens)
- Access the Network Menu: Tap the "Network" or "Wi-Fi" icon.
- Select Wireless Setup Wizard: Locate the "Wireless Setup Wizard" option. Select it.
- Scan for Networks: The printer will scan for available Wi-Fi networks.
- Choose Your Network: Select your network's SSID from the list.
- Enter Your Password: Carefully enter your Wi-Fi password. This is crucial.
- Confirm and Connect: Tap “OK” or “Connect”. The printer will attempt a connection.
- Success! (Hopefully): If all goes well, your printer is connected.
Option 2: The Button Ballet (For Printers with Button Controls)
- Navigate the Menu: Use the arrow buttons to find the "Network" or "Wi-Fi" menu.
- Select Wireless Setup: Choose the "Wireless Setup" option.
- Start the Setup: You will be prompted to begin the setup process.
- Choose Your Network: Scroll through the list and select your network.
- Input Your Password: Use the numeric keypad and arrow keys to enter your password.
- Initiate Connection: Press "OK" or "Start" to initiate the connection.
- Cross Your Fingers: Be patient while it connects.
- Celebrate! (Hopefully): If the connection is successful, celebrate.
Troubleshooting Troubles: When Things Go Awry
Sometimes, the Wi-Fi gods don't smile upon us. Don't panic! A few hiccups are normal.
- Incorrect Password: Double-check your password. Case sensitivity matters.
- Router Issues: Restart your router. This can often resolve connectivity issues.
- Printer Placement: Ensure your printer is within range of your Wi-Fi signal.
- Network Conflicts: Check for other devices using the same IP address.
- Printer Restart: Try restarting your Brother printer.
- Consult the Manual: Refer to your printer's manual. It has specific troubleshooting steps.
- Firmware Updates: Make sure your printer's firmware is updated.
- Factory Reset (Last Resort): As a last resort, you might need to reset your printer to factory settings.
Claiming Your Victory: Printing from Anywhere
Once your printer is connected to Wi-Fi, the real fun starts. You can now print from your computer, smartphone, or tablet. You'll be able to print documents, photos, and more. You can set up your printer on all your devices. You can also install the Brother iPrint&Scan app. That app simplifies mobile printing.
The Final Word: Embrace the Wireless Freedom
Congratulations, intrepid printer pilot! You've successfully navigated the Wi-Fi setup. Now you can enjoy the freedom of wireless printing. You can print from anywhere in your home or office. So, embrace the convenience. Print with joy! Share your newly gained knowledge with others. After all, success is better when shared!
Laptop Wireless WiFi: The SHOCKING Truth You Need to Know!Brother Printer WiFi Setup: The Easiest Guide EVER!
Hey there, fellow tech enthusiasts! Let’s be honest, setting up a new printer can sometimes feel like navigating a labyrinth designed by a grumpy goblin. Especially when it comes to Wi-Fi! But fear not, because today, we’re tackling the Brother printer Wi-Fi setup process, and trust me, we're going to make it so easy you’ll be printing wirelessly in a matter of minutes. I’m talking a "piece of cake" kind of easy, folks. Forget the frustration, ditch the tangled cables, and let’s dive in!
1. Why Wireless? Embracing the Freedom of WiFi Printing
Before we get our hands dirty, let's talk about why we're even bothering with Wi-Fi. The answer? Freedom! Imagine a world where your printer isn't chained to a desk, where you can send documents from your smartphone, tablet, or laptop without wrestling with USB cables. Think of it as your printer finally breaking free from prison! Wireless printing opens up a whole new level of convenience, letting you print from virtually anywhere in your home or office. It's like having a magic portal that delivers your digital documents into the real world.
2. Preparing for Liftoff: What You'll Need
Okay, so you're ready to join the wireless revolution. Excellent! Before we launch into the setup, let’s gather our supplies. We'll need:
- Your Brother Printer: The star of the show, naturally.
- Your Wi-Fi Router: The gatekeeper of your home network.
- A Computer or Mobile Device: This will be your control center for the setup. (A laptop is usually easiest, but a smartphone or tablet will work too.)
- Your Wi-Fi Network Name (SSID) and Password: Crucial information for connecting to your Wi-Fi. Make sure you know these! It's like having the secret handshake to the digital world.
- The Printer's Instruction Manual (Optional, but Helpful): We'll cover everything here, but the manual might offer specific tips for your particular model.
3. Powering Up and Getting Connected: The First Steps
Alright, let's get started! First, plug in your Brother printer and turn it on. Let it awaken from its slumber and prepare for action. Once it's booted up, we need to get it connected to your Wi-Fi network. Here’s where things can vary slightly depending on your printer model, but the general principles are the same.
4. The Control Panel Odyssey: Navigating Your Printer's Menu
Most Brother printers have a small control panel with a screen and buttons. This is where you'll be doing most of the work. The exact layout and options will differ based on your model, so consult your manual if you get lost, but generally, you'll be looking for a "Network" or "Wi-Fi" setting. Think of the control panel as the command center of your printing spaceship!
5. Selecting Your Wi-Fi Network: The SSID Search
Once you’re in the network settings, you'll need to select your Wi-Fi network. The printer will usually scan for available networks and display them on the screen. Find your network name (SSID) – it'll probably have a familiar name, like “MyHomeNetwork” or something similar. If you have multiple networks, make sure you choose the correct one! It's like finding the right door to your online kingdom.
6. Entering Your Wi-Fi Password: The Security Key
After selecting your network, the printer will prompt you to enter your Wi-Fi password. This is the key that unlocks access to your network, so make sure you type it correctly! Use the on-screen keyboard to carefully enter the password. Double-check for capitalization and any special characters – a single mistake can block the entire process.
7. The Connection Tango: Waiting for the Printer to Join
Once you've entered your password, the printer will attempt to connect to your Wi-Fi network. This process might take a few seconds – the printer is like a little dancer, trying to waltz into the online party. Watch the screen for a status update. You might see a progress bar or a message saying "Connecting" or "Setting up network."
8. Success! Confirming a Successful Connection
If everything goes according to plan (and it will!), the printer screen will display a confirmation message, something like "Connected" or "Wi-Fi Ready." Hurray! You've successfully connected your Brother printer to your Wi-Fi network. Now you can do a little happy dance, you deserve it.
9. Installing the Printer Drivers: Preparing for Printing
Now that your printer is connected to the network, you’ll need to install the printer drivers on your computer or mobile device. The drivers are like translators, allowing your computer to communicate with your printer. Luckily, Brother makes this process easy.
10. Downloading the Drivers: Finding the Right Software
You can typically find the printer drivers on the Brother website. Simply go to Brother's support page, search for your printer model, and download the appropriate drivers for your operating system (Windows, macOS, iOS, or Android). It is like downloading the instructions manual for your printer.
11. Installing the Drivers: A Simple Process
Once you've downloaded the drivers, run the installation program. The setup wizard will guide you through the process. You'll likely be asked to choose your printer model and select the Wi-Fi connection option. The wizard will usually detect your printer automatically once it's on the network. Just follow the on-screen prompts, and you'll be printing in no time.
12. Testing the Waters: The First Test Print
After installing the drivers, it’s time for the moment of truth: the test print! Open a document or a test page on your computer, select your Brother printer from the print options, and click "Print." Watch with bated breath as your document magically appears on your desk (hopefully!).
13. Troubleshooting Time: What If Things Go Wrong?
If you run into any snags during the setup, don't panic! Here are a few common troubleshooting tips:
- Check the Wi-Fi Name and Password: Double-check that you entered the correct Wi-Fi information on the printer.
- Restart Your Printer and Router: Sometimes a simple reboot can fix connection issues.
- Make Sure Your Printer is Close to the Router: Signal strength can be a factor.
- Consult the Brother Support Website: Brother’s website has a wealth of information and troubleshooting guides.
14. Mobile Printing: Unleash the Power of Your Smartphone
Once your printer is connected to your Wi-Fi network, you can set up mobile printing. This allows you to print directly from your smartphone or tablet using apps like Brother iPrint&Scan or AirPrint (for Apple devices). It's like having a personal printing concierge in your pocket!
15. Staying Connected: Keeping Your Printer Running Smoothly
Once your Brother printer is set up, the work is done. However, occasional updates for your printer's firmware or drivers are crucial ensure everything keeps running smoothly. Brother usually alerts you when updates are available. Think of it as giving your printer a yearly check-up.
Closing Thoughts: You're a WiFi Printing Master Now!
And there you have it! You've conquered the Brother printer Wi-Fi setup process. I told you it would be easy, didn't I? Now, go forth and print wirelessly! Enjoy the freedom and convenience of printing from anywhere in your home or office. You're officially a Wi-Fi printing pro!
FAQs
1. My printer isn't showing up on the list of available networks. What should I do?
First, make sure your Wi-Fi router is turned on and broadcasting a signal. Next, restart both your printer and your router. Also, check that your printer is within range of your Wi-Fi network. If it still doesn't appear, you might need to manually enter your network information on the printer's control panel. Consult your manual for instructions on how to do this.
2. I entered my Wi-Fi password correctly, but the printer still won't connect. What's the problem?
Double-check that you entered the correct Wi-Fi password, paying close attention to capitalization and special characters. Also, verify that your Wi-Fi router is using the correct security protocol, such as WPA2 or WPA3. Some older printers may not support the latest security protocols. If the issue persists, try restarting your printer and router, and then attempt the connection again.
3. Can I connect my Brother printer to Wi-Fi using WPS?
Many Brother printers support Wi-Fi Protected Setup (WPS), which simplifies the connection process. If your router also supports WPS, you can connect your printer by pressing the WPS button on both your printer and your router. Consult your printer's manual for instructions on how to use WPS.
4. I can print from my computer, but not from my smartphone. What's wrong?
Make sure that your smartphone is connected to the same Wi-Fi network as your printer. Then, ensure you have the Brother iPrint&Scan app installed on your smartphone and that your printer is added to the list of available printers within the app. Also, confirm that your
Laptop Public Wi-Fi: The SHOCKING Security Risks You NEED To Know!Pengaturan WiFi Printer Brother menggunakan Panel Kontrol.
By Copy Print Scan Pengaturan WiFi Printer Brother menggunakan Panel Kontrol. by Copy Print Scan
Cara mengatasi Laptop Tidak Bisa Tersambung ke Wifi di Windows 11 & Windows 10 tutorial internet

By Rifki Els Cara mengatasi Laptop Tidak Bisa Tersambung ke Wifi di Windows 11 & Windows 10 tutorial internet by Rifki Els
Solusi Daftar Wifi Laptop Tidak Muncul di Windows 11 dan Windows 10 tutorial Internet

By Rifki Els Solusi Daftar Wifi Laptop Tidak Muncul di Windows 11 dan Windows 10 tutorial Internet by Rifki Els

Title: Masalah Wifi Laptop Tidak Conect, Wifi Laptop tidak Jalan & Etc
Channel: Laptop Labs
Masalah Wifi Laptop Tidak Conect, Wifi Laptop tidak Jalan & Etc by Laptop Labs
Change Wifi Settings
Brother Printer WiFi Setup: Your Seamless Connection Guide
So, you've got yourself a shiny new Brother printer, and you're ready to make the leap into wireless printing bliss. Fantastic! Setting up your Brother printer's WiFi capability should be a straightforward process, and that's exactly what we're here to help you accomplish. Forget the tangled wires and frustration – we're going to walk you through the steps, ensuring you're printing wirelessly in no time. This guide is designed to be the ultimate resource, providing clear, concise, and practical instructions for a variety of Brother printer models. Let's get started!
Preparing for Wireless Setup: Before You Begin
Before you even think about pressing buttons, let's ensure we're perfectly prepped for a smooth setup. This preliminary stage is crucial for preventing those irritating roadblocks later on.
First, unboxing your printer. Carefully remove all packaging materials, including any protective tape or coverings. Ensure you locate the power cord and have plugged it into a working electrical outlet. Turn the printer on to confirm it's operational; you should see the control panel light up, signaling it’s ready for action.
Next, locate your WiFi network's credentials. You'll need your network name (SSID) and password. These are usually found on your router, either printed on a sticker or configured in your router's settings. If you're unsure, consult your internet service provider (ISP) or your router's documentation. Writing these credentials down before you begin will save time.
Finally, download the latest drivers and software. It's always best to have the most recent software version. Visit Brother's official support website (support.brother.com) and search for your specific printer model. Download the full software package, including the printer drivers and any utilities, for your operating system (Windows or macOS). We will walk through these options below.
Method 1: WiFi Setup With the Printer's Control Panel
This method is ideally suited for printers equipped with a built-in LCD or touchscreen display. This method is usually the most straightforward approach. However, individual navigation steps may vary depending on your exact model.
Step 1: Accessing the Wireless Setup Menu
Locate the "Settings," "Setup," or "Network" option on your printer's control panel. The exact wording might vary, but the icon or menu will guide you. Press the appropriate button or touch the corresponding icon.
Step 2: Selecting the Wireless Setup Option
Within the setup menu, look for an option clearly labeled "Wireless Setup," "WLAN Setup," or "WiFi Setup." Select this option. The printer will then begin searching for available WiFi networks.
Step 3: Connecting to Your Wireless Network
From the list of available networks, select your WiFi network (SSID). If your network is password-protected, you'll be prompted to enter your password using the control panel's on-screen keyboard (or using the number pad and direction keys, depending on your printer). Enter your network password precisely and confirm your entry.
Step 4: Confirming the Connection
Once you enter the password, the printer will attempt to connect to your WiFi network. The printer's screen will display a connection progress indicator. If the connection is successful, the screen will display a confirmation message, often accompanied by a WiFi signal icon. The icon confirms a successful connection.
If the connection is unsuccessful, review your password for any potential typos and try again. You might need to review your router's settings. If your printer and router are separated by a long distance or solid walls, you might experience signal strength issues.
Step 5: Testing the Wireless Connection
After a successful connection, it’s time to test your wireless setup. Print a test page from your printer's control panel. This will confirm the connection to your WiFi network is working. You should also be able to print from your PC or laptop, as you will have installed the most modern driver.
Method 2: WiFi Setup Using the Brother iPrint&Scan App
The Brother iPrint&Scan app offers a user-friendly alternative, especially when your printer is a newer model. This app is available for both iOS and Android devices.
Step 1: Downloading and Installing the App
Download the Brother iPrint&Scan app from your device's respective app store (App Store for iOS devices or Google Play Store for Android devices). Install the app.
Step 2: Connecting Your Printer to the Network
Open the iPrint&Scan app. Ensure your mobile device and your Brother printer are connected to the same WiFi network. The app should automatically detect your printer. If it doesn't, tap the option to add or search for your printer. Select your printer after it appears in the list.
Step 3: Following the App's Prompts
The app will guide you through the WiFi setup process. This usually involves selecting your WiFi network from a list and entering your network password. Follow the on-screen prompts carefully.
Step 4: Confirming the Connection and Testing
Once the setup is complete, the app will confirm the connection. You can then use the app to print a test page or scan a document. This provides a simple way to verify connectivity.
Method 3: WiFi Setup via WPS (Wi-Fi Protected Setup)
Wi-Fi Protected Setup (WPS) simplifies the wireless setup process. This method is convenient if your router and printer both support WPS.
Step 1: Locating the WPS Button
Find the WPS button on your router. It's usually located on the back or side of the router, often labeled with a WPS icon.
Step 2: Activating WPS on Your Brother Printer
On your Brother printer's control panel, locate the "WPS" or "WLAN" setup option. This may involve pressing a specific button or navigating through the printer's menu. Enable WPS mode on your printer.
Step 3: Pressing the WPS Button on Your Router
Within two minutes of activating WPS mode on your printer, press the WPS button on your router. Hold the button for about 2 seconds, until the WPS light flashes.
Step 4: Confirming the Connection
Both your printer and router will establish a secure connection with each other. The printer's display will confirm the connection when successful. After a few moments, the printer should be connected to your WiFi network.
Step 5: Testing the Connection
After successful connection, print a test page from your printer's control panel or computer to confirm the connection.
Troubleshooting Common WiFi Connection Issues
Even with the best instructions, hiccups can happen. Here are some troubleshooting tips to help you:
Problem: Printer Cannot Find the WiFi Network
- Solution: Double-check that your printer is within range of your router. Verify you've entered your WiFi network name (SSID) and password correctly. Restart your router and printer. Reboot your printer.
Problem: Incorrect Network Password
- Solution: Confirm your WiFi password is correct. The password is case-sensitive. Re-enter the password.
Problem: Printer is Connected to the WiFi Network, but Cannot Print.
- Solution: Check that your printer is set as the default printer in your computer's settings. Make sure the correct printer drivers are installed on your computer. Restart your computer and printer.
Problem: Printer Displays "Connection Error" Message
- Solution: Verify the internet connection on your router to ensure that the internet is working. Restart your router. Check the printer's IP address. Reconfigure the WiFi setup.
Problem: Printer is Not Printing Wirelessly from Your Smartphone or Tablet
- Solution: Download and install the Brother iPrint&Scan app. Ensure your mobile device and your printer are on the same WiFi network.
Advanced Setup and Configuration
For more advanced users, here some extra features that enhance usability.
Assigning a Static IP Address: (Network administrators will have a great advantage here.) You can assign a static IP address to your printer rather than relying on DHCP. Although the process varies slightly by printer model, the typical flow is: access the printer's control panel, go to network settings, select TCP/IP, and configure the address.
Checking and Changing Your Wireless Security Method Confirm your router's security type, like WPA2 or WPA3, is compatible with your printer. Ensure your network is properly secured.
Port Forwarding: In some cases, you may need to configure port forwarding on your router, depending on your specific network setup or firewall settings.
Maintaining Your Wireless Connection
Once you're connected, regular maintenance will ensure a smooth printing experience:
- Regular Firmware Updates: Check for and install the latest firmware updates for your printer to correct bugs and enhance performance. Visit your printer’s control panel.
- Keep Your Drivers Updated: Ensure your computer has the most recent printer drivers.
- Monitor Signal Strength: Keep an eye on the WiFi signal strength on your printer's control panel to make sure it remains strong.
- Troubleshoot Immediately: Address any issues promptly.
Conclusion: Your Pathway to Wireless Printing Freedom
You have successfully established the WiFi connection to your Brother printer. Embrace the freedom and ease of wireless printing! From now on, you can print from anywhere in your home or office without being tethered by cables. Enjoy your seamless printing experience!
