laptop wifi antenna windows 10 compatible

Title: The Power of USB Wifi Adapter
Channel: Teacher Kevin PH
The Power of USB Wifi Adapter by Teacher Kevin PH
Laptop WiFi Antenna Upgrade: Windows 10 Compatibility Guaranteed!
Unleash Your Laptop's Inner Beast: Supercharging WiFi and Bidding Farewell to Lag!
Do you find yourself wrestling with sluggish WiFi on your laptop? Are buffering videos and agonizing download speeds the bane of your existence? Then you're in the right place. Because, together, we're about to embark on a journey of WiFi liberation. We're talking about a significant upgrade. Your laptop will thank you for it.
The Wireless Wasteland: Recognizing the WiFi Weakness
Let's face it, built-in laptop WiFi antennas often leave much to be desired. They are usually small and tucked away. They're frequently battling for signal strength. Consequently, you experience frustrating connectivity issues. Think about it: dropped connections mid-video calls, dead zones in your own house, and the infuriating spinning wheel of doom. These are symptoms. They signal a need for change. You deserve better. So, we're going to make sure you have it.
Upgrading the Arsenal: Choosing the Right Antenna
The good news? This problem has a highly effective solution. A simple yet potent upgrade is waiting. It involves an external or internal WiFi antenna upgrade. You'll have to select the right one for your needs. Consider your laptop model and usage habits carefully. If you regularly move your laptop around, an external antenna with a USB connection is ideal. This gives you flexibility.
If you want a permanent solution, you can consider an internal antenna upgrade. You will need to open the laptop. So, determine your comfort level before you proceed.
- External Antennas: These plug directly into your laptop. They're easy to set up. They offer good performance improvements. You also have a wide range of choices.
- Internal Antennas: This requires you to open up your laptop. They often offer better performance. But, they require more technical skill.
Decoding the Compatibility Code: Windows 10's Whispers
Now, you might wonder about compatibility, especially with Windows 10. Worry not! Modern WiFi antennas are generally designed to work seamlessly. So you shouldn't experience any issues. In almost all cases, Windows 10 automatically recognizes the new hardware. The drivers install themselves, so you can get online faster.
However, it is always a good idea to check product specifications. Verify compatibility and make sure the antenna supports the latest WiFi standards. This ensures optimal performance. Always confirm.
Installation Adventures: From Zero to Hero
Let's consider the installation process. If you're opting for an external antenna, it's incredibly straightforward. Simply plug it into a USB port. Then, Windows 10 will do the rest.
Internal installations require a bit more effort, however. Turn off your laptop. Disconnect the power cord. Then, consult your laptop's manual or a reliable online guide. This will help you access the internal components. Carefully locate the existing WiFi antenna connectors. These will allow the new connections. Replace it and reassemble everything. It is that easy.
The WiFi Revelation: Experiencing the Difference
Prepare yourself for a revelation. Once your new antenna is in place, the difference will be immediately noticeable. Websites will load faster. Videos will stream smoothly, without any interruptions. Downloads will finish in a fraction of the previous time. You will finally enjoy the internet.
More importantly, you'll regain your productivity. You'll gain the freedom to work and play without constant connectivity frustrations. You will wonder why you didn't upgrade sooner.
Troubleshooting Troubles: Navigating the Unknown
While most upgrades are plug-and-play, occasional hiccups can occur. If you experience any problems, here's what to do:
- Check Connections: Ensure the external antenna is securely plugged in. For internal antennas, double-check all the connections.
- Driver Drama: In rare cases, you might need to update or install the correct drivers. Windows 10 usually handles this automatically. But you can check the device manager.
- Restart Ritual: A simple reboot of your laptop can often resolve minor issues.
- Seek Support: If all else fails, consult the antenna's documentation. Or, contact the manufacturer's support team. They will likely have advice.
Beyond the Upgrade: Optimizing Your WiFi Ecosystem
Upgrading your antenna is a major step. To get the absolute best experience, you can take some extra steps. They will help you optimize your WiFi network.
- Router Refresh: If your router is old, consider an upgrade. Modern routers support faster WiFi standards. They also offer better range.
- Channel Control: Adjust your router's WiFi channel. This can help avoid interference from other networks. You can use a WiFi analyzer app.
- Placement Power: Position your router in a central, open location. Avoid obstructions like walls and metal objects. This will help the signal.
The Final Frontier: Embrace the Faster WiFi Future
A laptop WiFi antenna upgrade is a worthwhile investment. It is a simple yet impactful way to improve your digital life. It's time to break free from the shackles of slow internet. By upgrading, you're paving the way for a faster, smoother, and more enjoyable online experience. Don't delay. Start enjoying the internet today!
Mac WiFi Connected, But No Internet? This SHOCKING Fix Works!Laptop WiFi Antenna Upgrade: Windows 10 Compatibility Guaranteed!
Hey tech enthusiasts! Ever been staring at that buffering wheel, willing your laptop’s Wi-Fi to just work? We’ve all been there! And let's be honest, sometimes that laptop Wi-Fi antenna feels about as effective as a wet noodle. But what if I told you there's a simple, relatively inexpensive fix that can dramatically improve your Wi-Fi signal strength and speed, all while ensuring perfect compatibility with your beloved Windows 10 machine? Well, buckle up, because we’re diving deep into the world of laptop Wi-Fi antenna upgrades.
1. The Agony of Weak Wi-Fi: Why Your Laptop is Suffering
First things first, let's talk about the pain points. Slow browsing, dropped video calls, laggy online gaming – these are all signs of a weak Wi-Fi signal. It's like trying to have a conversation with someone shouting from the other side of a football field. You get glimpses, fragments… but the full picture is lost. Your laptop’s internal Wi-Fi antenna, often a small, flimsy piece of hardware, is the primary culprit. Its size and placement, usually tucked away inside the laptop chassis, often struggle to compete with interference from walls, furniture, or even other electronic devices.
2. Unveiling the Upgrade: What Exactly Is a Laptop Wi-Fi Antenna Upgrade?
So, what are we actually talking about here? In short, a laptop Wi-Fi antenna upgrade involves replacing or supplementing your existing internal antenna with a more powerful and strategically positioned one. This could mean everything from a simple external antenna that plugs into a USB port to a more involved internal swap. We'll get into the nitty-gritty later, but the goal is always the same: to grab a stronger, cleaner Wi-Fi signal. Think of it as giving your laptop a pair of high-powered binoculars instead of squinting through a straw.
3. Windows 10 Compatibility: The Smooth Sailing Guarantee
The beauty of modern technology is its widespread compatibility, and this is no exception. The good news is that Windows 10 (and actually, most modern operating systems) are designed to work seamlessly with a wide array of Wi-Fi adapters and antennas. So, when we talk about a “Windows 10 compatibility guarantee,” it essentially means that the upgrade process won't require you to wrestle with complex drivers or software conflicts. Plug and play is the name of the game in many cases, and that makes this a less intimidating project than you might think.
4. Types of Wi-Fi Antenna Upgrades: A Quick Rundown
Let's explore the different options available, because one size certainly doesn’t fit all. We have a few primary types of Wi-Fi antenna upgrades to consider:
- External USB Antennas: These are the simplest and most affordable solutions. They plug into a USB port and often provide a considerable boost in signal strength. They’re like a quick shot of espresso for your Wi-Fi.
- Internal Antenna Replacements: More involved, but potentially more effective. This involves opening up your laptop and replacing the existing internal antenna with a higher-gain model. This option can be compared to a heart transplant – requires a bit more effort, but the payoff can be substantial.
- Internal Range Expanders: Some laptops have a small slot for internal upgrades such as antennas, which may include external features for enhancement.
5. Assessing Your Needs: What’s Your Wi-Fi Problem?
Before you jump in, it’s important to diagnose the root cause of your Wi-Fi woes. Are you experiencing slow speeds, frequent dropouts, or both? Are you far from your router, or is the signal weak even when you're close by? Consider these questions:
- Distance from the Router: How far is your laptop from your Wi-Fi router? The further away you are, the weaker the signal will be naturally.
- Obstructions: Assess the physical environment. Are there thick walls, metal objects, or other electronics that might be interfering with the signal?
- Existing Antenna: If you can, check the existing properties of your laptops's antenna.
Answering these questions will help you determine the best type of antenna upgrade for your specific situation.
6. The DIY Approach: Can You Do This Yourself?
Absolutely! For many users, upgrading their laptop’s Wi-Fi antenna is a perfectly manageable DIY project. USB antennas are incredibly simple to install – just plug and play. Internal antenna replacements require a bit more technical know-how, involving opening up your laptop, working with small components, and potentially consulting your laptop’s service manual to follow the appropriate path. But with the right tools, a little patience, and a good YouTube tutorial, it’s entirely achievable. It's like assembling IKEA furniture, you can do it!
7. Gathering Your Tools: What You’ll Need to Get Started
Here’s a basic list of what you might need, depending on the type of upgrade you choose:
- A New Wi-Fi Antenna: This is the star of the show! Choose a model that's compatible with your laptop and meets your needs. I recommend reading reviews to make sure it is a good fit for your system.
- A Small Phillips Head Screwdriver: For opening your laptop (if you're going the internal route).
- A Spudger or Plastic Pry Tool: This helps you carefully pry the laptop's case open without causing damage.
- Anti-Static Wrist Strap: To protect your laptop's sensitive components from static electricity.
- Replacement Screws (Optional): Sometimes, you'll need new screws, so it doesn't hurt to have extra ones.
8. Step-by-Step: Installing an External USB Antenna (The Easiest Route)
External USB antennas are the simplest to install, and here’s how it generally works:
- Plug It In: Insert the USB antenna into a free USB port on your laptop.
- Driver Installation: Windows 10 should automatically detect and install the necessary drivers. However, you may also need to install software that comes with the antenna. Check the manufacturer's website for the most up-to-date drivers.
- Positioning: Experiment with the antenna’s positioning. Try different angles and locations to find the optimal signal.
9. Delving Deeper: Installing an Internal Antenna (For the Bold)
This is the slightly more technical route, but the process generally looks something like this:
- Power Down and Disconnect: Turn off your laptop and unplug the power adapter.
- Open Up the Laptop: Carefully remove the back panel of your laptop. Consult your laptop’s service manual for precise instructions.
- Locate the Existing Antenna: Find the existing internal antenna.
- Disconnect the Old Antenna: Carefully disconnect the antenna wires from the Wi-Fi card.
- Install the New Antenna: Connect the new antenna wires to the Wi-Fi card.
- Reassemble the Laptop: Close the back panel and secure it with screws.
- Test the Connection: Boot up your laptop and check for improved Wi-Fi performance.
10. Troubleshooting: What If Things Go Wrong?
Don't panic! If you encounter problems, here are a few troubleshooting tips:
- Driver Issues: Make sure your drivers are up-to-date. Visit the manufacturer's website for the latest versions.
- Incorrect Connections: Double-check all connections to ensure they're secure.
- Signal Interference: Experiment with the positioning of your antenna.
11. Benchmarking Your Wi-Fi: Before and After
Before and after the upgrade, do a speed and latency test. This will give you concrete data to measure the improvement. Use a free online tool, and compare the results. Seeing those numbers jump can be a satisfying moment.
12. Beyond the Upgrade: Optimizing Your Wi-Fi Network
Upgrading your antenna is only one piece of the puzzle. To get the absolute best Wi-Fi performance, consider these additional tips:
- Update Your Router Firmware: Ensure your router's firmware is up to date for optimal performance and security.
- Choose the Right Channel: Your router transmits on a specific channel. Use a Wi-Fi analyzer app or website to find the channel with the least interference in your area.
- Secure Your Network: Use a strong password and encryption (WPA3 is recommended) to protect your network from unauthorized access.
13. The Power of Placement: Maximizing Signal Strength
Where you place your laptop, or the external antenna, can make a significant difference. Try to:
- Elevate the Antenna: Place it in a higher location for a clearer line of sight to the router.
- Minimize Obstructions: Keep the antenna away from walls, metal objects, and other electronics that might interfere with the signal.
14. Cost vs. Benefit: What’s the Value Proposition?
Wi-Fi antenna upgrades are generally very cost-effective. You can find decent USB antennas for under $30, and internal replacements may cost a bit more. The benefit, in terms of improved speeds, reduced lag, and a more stable connection, can be well worth the investment. Think of it as a one-time purchase that significantly enhances
Dell Laptop Wifi Nightmare? FIX IT NOW!USB wifi adapter not working windows 10 Desktop and Laptop

By IT Magics USB wifi adapter not working windows 10 Desktop and Laptop by IT Magics
Cara Mengatasi Adapter Wifi Yang Hilang di Windows 10 Pc atau laptop

By WINTECH id Cara Mengatasi Adapter Wifi Yang Hilang di Windows 10 Pc atau laptop by WINTECH id
How To Fix Wireless Adapter Missing In Windows 10 Get WiFi Adapter Back
By Sandeep Singh How To Fix Wireless Adapter Missing In Windows 10 Get WiFi Adapter Back by Sandeep Singh

Title: WiFI Card vs USB WiFi Adapter Check out this comparison
Channel: ADVANTI
WiFI Card vs USB WiFi Adapter Check out this comparison by ADVANTI
Wifi On Laptop
Laptop WiFi Antenna Upgrade: Windows 10 Compatibility Guaranteed!
We understand the frustration of a sluggish Wi-Fi connection. In today's hyper-connected world, a reliable wireless signal is no longer a luxury; it's an absolute necessity. Lagging video calls, slow downloads, and dropped connections can disrupt your workflow and erode your online experiences. If you're experiencing these issues on your laptop, particularly one running Windows 10, you're likely searching for a solution. Allow us to guide you through the process of upgrading your laptop's Wi-Fi antenna, ensuring optimal performance and seamless compatibility with your Windows 10 operating system.
Diagnosing Your Wireless Woes: Identifying the Root Cause
Before embarking on an upgrade, a thorough diagnosis is crucial. Is the problem genuinely the antenna, or is it something else? Consider these factors:
- Signal Strength: In the bottom right corner of your Windows 10 desktop is a Wi-Fi icon. Examining the signal bars will tell you the general strength of your connection. Weak signal bars suggest antenna limitations or interference.
- Distance from Router: The further away you are from your wireless router, the weaker the signal will be. Test your connection near the router to rule out distance as the primary issue.
- Router Performance: A slow router will affect your Wi-Fi. Have you checked the router's configuration or firmware. If your router is old, consider upgrading.
- Interference: Microwaves, Bluetooth devices, and even other Wi-Fi networks can interfere with your wireless signal. Try changing channels on your router to reduce this interference.
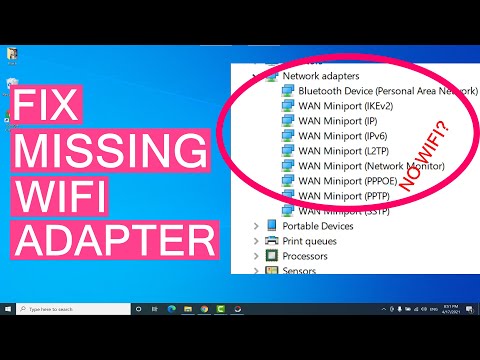
- Driver Issues: Outdated or corrupted drivers for your laptop’s Wi-Fi adapter can cause performance problems. The Device Manager (accessible by right-clicking the Start button) lets you update or troubleshoot drivers.
If you've addressed these initial checks and continue experiencing poor Wi-Fi performance, a laptop Wi-Fi antenna upgrade is a promising avenue for improvement, offering a significant boost to performance.
Choosing the Right Antenna: Deciphering the Specifications
Selecting the correct antenna is paramount for a successful upgrade. Various options are available, each catering to different needs and laptop designs. Here’s a breakdown of the essential considerations:
- Antenna Type: The most common types include internal and external antennas. Internal antennas fit inside your laptop, while external antennas attach externally. Internal antennas are often preferred for a cleaner aesthetic, while external antennas can offer greater range and signal strength. Within in both categories, you have a combination of different sizes, connectors and mounting styles.
- Antenna Gain (dBi): Antenna gain measures the antenna's ability to focus the radio signal. Higher dBi values generally indicate better range and signal strength. However, higher gain antennas might be more directional, potentially affecting performance at different angles.
- Wireless Standards: Ensure the antenna supports the latest Wi-Fi standards (802.11ac, 802.11ax - Wi-Fi 6 and Wi-Fi 6E). These standards provide faster speeds and improved efficiency. Backward compatibility is also essential; your new antenna should work with older standards (802.11a/b/g/n) your router may use.
- Connector Type: The internal Wi-Fi adapter in laptops uses various antenna connectors, typically U.FL/IPEX or MHF4. Identifying the connector type on your laptop is crucial to ensure compatibility. Check your laptop's service manual or look closely at the existing antenna connectors.
- Form Factor: Consider the size and design of the antenna. Internal antennas need to fit within the laptop chassis. External antennas offer more flexibility but require a secure mounting solution and can affect portability.
Carefully evaluating these factors allows for the selection of an antenna that meets your specific requirements and maximizes performance.
The Installation Process: A Step-by-Step Guide (Internal Antenna)
Upgrading an internal antenna often requires a bit more technical know-how but can be accomplished with careful attention to detail. Here is a general guide for installing an internal antenna.
Important Notes:
- Always disconnect the power adapter and remove the battery.
- Have a clean, well-lit workspace.
- Use an anti-static wrist strap to prevent electrostatic discharge (ESD) damage.
- Consult your laptop's service manual. It provides specific disassembly instructions.
Step-by-Step Instructions:
- Preparation:
- Power down your laptop completely.
- Unplug the power adapter.
- Remove the battery according to your laptop's instructions. (Typically, there is a latch at the bottom of the laptop that needs to be released or a screw to be removed.)
- Gather the necessary tools: a small Phillips head screwdriver, a plastic opening tool (optional but helpful for prying), an anti-static wrist strap, and the new Wi-Fi antenna.
- Disassembly:
- Consult your laptop's service manual to locate the access panel for the Wi-Fi card. It is often on the bottom of the laptop.
- Remove the screws securing the access panel.
- Gently remove the access panel.
- Locate the Wi-Fi Card:
- The Wi-Fi card is typically a small, rectangular circuit board with two or three antenna connectors.
- Disconnect the Old Antennas:
- Carefully disconnect the existing antenna cables from the Wi-Fi card. Use a small tool or your fingernail to gently pry the connectors.
- Remove the Wi-Fi Card (if necessary):
- Some laptops require the Wi-Fi card to be removed entirely. There’s usually a retention clip or screw.
- Remove any screws or clips securing the Wi-Fi card.
- Gently slide the Wi-Fi card out of its slot.
- Install the New Antennas:
- Attach the new antenna cables to the Wi-Fi card. This can be a tricky part; be gentle and ensure the connectors are fully seated.
- Reassemble:
- Carefully reinsert the Wi-Fi card into its slot (if you removed it). Secure it with any screws or clips.
- Route the new antenna cables, ensuring they are properly positioned and out of the way of other components.
- Replace the access panel and secure it with the screws.
- Reinsert the battery.
- Testing:
- Plug in the power adapter, and start your laptop.
- Connect to your Wi-Fi network and test the signal strength and performance.
- If everything is working correctly, you should notice a significant improvement in your Wi-Fi connection.
The Installation Process: A Step-by-Step Guide (External Antenna)
Upgrading your laptop with an external antenna offers a simpler installation, providing a boost in connectivity.
Important Notes:
- Always disconnect the power adapter and remove the battery.
- Have a clean, well-lit workspace.
- Use an anti-static wrist strap.
- Consult your laptop's service manual.
Step-by-Step Instructions:
- Preparation:
- Power down your laptop completely.
- Unplug the power adapter.
- Remove the battery according to your laptop's instructions.
- Gather the necessary tools: small Phillips head screwdriver (if your external antenna requires it), the new external Wi-Fi antenna, and any mounting hardware.
- Identify the Antenna Connection Point:
- Determine where your laptop Wi-Fi antenna connection point is. It is often located near a hinge from previous wireless setups, and if not, you will need to use the internal antenna setup as described above.
- Cable Connection:
- Connect the antenna cable to the Wi-Fi card or existing antenna connections. Ensure the connections are secure.
- Mounting the Antenna:
- Choose a suitable mounting location for your external antenna. Consider placement for optimal signal reception.
- Use the provided mounting hardware (velcro, adhesive, or screws) to securely attach the antenna.
- Routing the Cable:
- Carefully route the antenna cable, ensuring it does not interfere with the closing of your laptop lid.
- Testing:
- Reassemble your laptop.
- Plug in the power adapter, and start your laptop.
- Connect to your Wi-Fi network and test the signal strength and performance.
Windows 10 Compatibility: Addressing Potential Issues
While upgrading your antenna shouldn't directly cause compatibility issues with Windows 10, some scenarios require careful consideration.
- Drivers: After installing a new Wi-Fi antenna or adapter, the operating system might require updated drivers. Windows 10 typically handles driver installations automatically. If the connection isn’t working, try searching Windows Update for the latest drivers.
- Network Settings: After replacing the antenna, you may need to reconfigure your Wi-Fi connection settings. Ensure your Wi-Fi network is selected and that the password has been entered correctly.
- Check the Device Manager: If you suspect driver issues or hardware conflicts, use the Device Manager to troubleshoot your network adapter. Right-click on the Start button and select Device
