how to connect wifi laptop to wifi tv
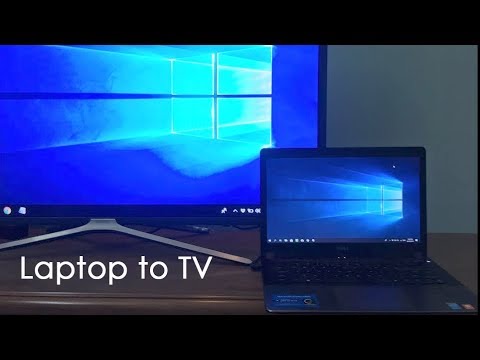
Title: Connect Laptop to TV via Wi-Fi NETVN
Channel: NETVN82
Connect Laptop to TV via Wi-Fi NETVN by NETVN82
how to connect laptop to wifi tv, how to connect laptop to tv wifi direct, how to connect laptop to tv wireless without wifi, how to connect laptop to smart tv wifi, how to connect laptop to samsung tv wifi, why won't my tv connect to wireless wifi, how to connect to wireless wifi on windows 10, how to connect my wifi on my laptop
Laptop to Smart TV: Wifi Connection Solved in 60 Seconds!
Unlocking Your Smart TV: The Speedy Laptop Connection Guide
Hey there, fellow tech enthusiasts! Ever wished you could effortlessly fling your laptop’s screen onto your dazzling smart TV? You're in the right place. Connecting your laptop to your smart TV should be simple. It’s easier than you think, and we can do it in a snap. Today, we'll explore how to mirror your laptop to your TV. Get ready for a smooth and streamlined experience. Let’s get started!
Step 1: Verify Your Equipment is Ready
First things first, let's ensure everything is prepared. You'll need a laptop, of course. Make sure your laptop has Wi-fi capabilities. Also, confirm your smart TV is ready. It must be connected to the same Wi-fi network as your laptop. This is absolutely crucial. The two devices need to be able to “see” each other. Furthermore, it's worth making sure the TV is turned on. Finally, take a moment to ensure your network connection is stable.
Step 2: Dive into the World of Wireless Options
Now, we'll dive into the main event: establishing the connection. There are a few wireless ways to accomplish this. We'll look at the popular methods. Keep in mind, the exact steps can vary slightly. The key is to locate the screen mirroring or casting feature. Let's explore this process.
Option 1: Casting Through Windows 10/11 (and Beyond!)
If you're a Windows user, this method works brilliantly. These operating systems have a built-in casting feature. Firstly, ensure both devices are on. Next, right-click anywhere on your desktop. Then, look for the "Display settings" option. Click on "Connect to a wireless display." Windows will begin searching for nearby devices. Your smart TV should appear in the list. Select your TV. Your laptop screen will now appear on your TV. Voila! It’s simple, right?
Option 2: Utilizing Miracast
Miracast is another fantastic option. It's a wireless display standard. Many smart TVs support it. Start by checking if your TV supports Miracast. You can usually find the information in the TV's settings menu. If your TV does, the connection is similar. Check your laptop settings. Use the "Project" option in Windows. Select "Wireless display" or "Connect to a wireless display." Next, choose your TV. Miracast can be considered more reliable.
Option 3: The Chromecast Route
Google Chromecast is another excellent choice. It’s a simple and affordable dongle. It plugs into your TV’s HDMI port. Chromecast makes it easy to cast. First, make sure your Chromecast is set up and connected. Then, ensure your laptop is running Google Chrome. Click on the three dots in the top right corner. Choose "Cast." Your Chromecast and TV should be listed. Select your TV, and you're good to go!
Step 3: Tackling Potential Hiccups and Troubleshooting
Sometimes, things don't go perfectly. Don’t let this discourage you. As a matter of fact, troubleshooting is easy. If your TV doesn’t appear, double-check your Wi-fi connection. Ensure both devices are on the same network. Moreover, restart your laptop and TV. This is often a quick fix. Furthermore, update your TV’s firmware. Often, a simple update will fix the problem. Consider checking your TV's manual.
Step 4: Wired Connections: A Backup Plan
While this guide focuses on wireless options, there are also wired methods. So, if you’re struggling with Wi-fi, consider this alternate route.
Option 1: HDMI Cables – The Reliable Standard
An HDMI cable is a trusty solution. It's a direct physical connection. Simply plug one end into your laptop’s HDMI port. Plug the other end into your TV's HDMI port. Select the correct HDMI input on your TV. This should instantly display your laptop screen. HDMI offers seamless connectivity.
Option 2: USB-C to HDMI Adapters
Many modern laptops feature USB-C ports. Some of these ports also support video output. You can use a USB-C to HDMI adapter. This is a compact and convenient solution. Connect the adapter to your laptop. Then, connect an HDMI cable to the adapter and your TV. USB-C connections are becoming increasingly popular.
Step 5: Final Thoughts and Enjoyment
There you have it! Connecting your laptop to your smart TV is easy. You can share your content with ease. You can now watch movies, browse the web, or share photos on a bigger screen. Have fun with it! Embrace the freedom of streaming. Enjoy the convenience, and happy viewing!
ASUS Laptop WiFi Nightmare? Solved!Laptop to Smart TV: Wifi Connection Solved in 60 Seconds!
Alright, folks! Let's be honest, there's nothing more frustrating than wanting to binge-watch that new series or show off your incredible vacation photos on the big screen, only to be thwarted by the dreaded Wi-Fi connection blues. Sound familiar? I know it does for me, it feels like every other weekend my wife calls me in a panic lamenting, "The laptop won't talk to the TV, again!" But fear not, because we're about to unlock the secrets to seamlessly connecting your laptop to your smart TV via Wi-Fi, and we’re aiming to do it in – you guessed it – a lightning-fast 60 seconds! This isn't some tech-heavy jargon dump, either. We’re talking about real-world solutions, the kind you can actually use.
1. The Agony of the Wireless Disconnect: Why Is This Such a Pain?
Let’s face it: technology can be wonderfully brilliant… right up until it isn’t. The wireless connection between your laptop and smart TV can be a fickle beast. Think of it like getting two toddlers to agree on a bedtime. Sometimes they just refuse to cooperate! The reasons for this digital disobedience are varied. It could be network interference, outdated drivers, or even just a simple communication breakdown between your devices. Whatever the cause, the result is the same: that frustrating feeling of staring at a blank screen when all you want is to relax and watch your favorite show.
2. The Magic Ingredients: What You'll Need to Succeed
Before we dive into the 60-second miracle, let's gather our supplies. You'll need:
- Your Laptop: Obviously! (Let's hope it's charged, too!)
- Your Smart TV: Make sure it's connected to your Wi-Fi network, as it's often the first point of failure.
- A Stable Wi-Fi Connection: A strong signal is just as critical as the other components.
- Patience (Optional, but recommended!): Look, even with our easy instructions, sometimes things can be quirky. Take a deep breath. You got this!
- Snacks & Drinks (Highly recommended): Because, you know, priorities.
3. Checking the Prerequisites: Ensuring Your Smart TV is Ready to Rock
This is where we make sure your TV isn't the problem. First, is your smart TV actually smart? Make sure it's connected to your home Wi-Fi. You can usually find this setting in the TV's "Settings" or "Network" menu. Double-check the connection and make sure your TV is recognizing your home network and has internet access. You want a strong wifi signal, so make sure your smart TV isn’t located very far from the router.
4. The Quickest Path: Using Built-in Screen Mirroring (If You're Lucky!)
This is the "easy button" approach, and it works like a charm if both your laptop and your smart TV support screen mirroring. Most modern laptops and smart TVs have this capability, meaning you can wirelessly display your laptop's screen directly on your TV. It's like magic!
- On your Laptop (Windows): Press the Windows key + P. This will open the "Project" menu. Select "Connect to a wireless display." Your TV should appear in the list of available devices. Click on your TV’s name, and voila! Your screen should be mirrored.
- On your Laptop (Mac): Click the "Control Center" icon in the top-right corner of your screen. Click "Screen Mirroring" and select your TV from the list.
5. Casting from Your Laptop: The Alternative for Media Mavericks
If screen mirroring isn’t your thing, or if it isn't working properly, casting from your laptop might be the answer. Here's how:
- Using Built-in Casting (e.g., Chrome): If you're watching something on a website, and you're using Chrome, look for the "Cast" icon (it looks like a rectangle with a Wi-Fi symbol). Click it, choose your TV, and start streaming your content. Simple as that!
- Using Media Player Software: Some media player software (like VLC) allows you to cast videos directly to your TV. It is a great alternative.
6. The Network Detective: Troubleshooting Connectivity Challenges
Sometimes, the connection just isn't playing nice. If you're struggling, don't panic. Here are some common fixes:
- Restart Everything: This is tech support 101, but it works surprisingly often. Restart your router, your laptop, and your TV. Think of it like a digital reset button, clearing out any temporary glitches.
- Check the Distance: Consider the distance between your router, laptop, and TV. Walls and other obstructions can weaken the Wi-Fi signal. Try bringing the devices closer together, if you can.
- Interference Issues: Other devices that emit radio waves can sometimes interfere with your Wi-Fi.
7. Drivers, Drivers, Drivers! The Unsung Heroes
Outdated drivers can be another source of problems. Drivers are small pieces of software that help your devices communicate. Make sure your Wi-Fi adapter driver on your laptop is up-to-date. Here's how to check:
- Windows: Search for "Device Manager" in the Windows search bar. Expand the "Network adapters" section. Right-click on your Wi-Fi adapter and select "Update driver." Let Windows search for the latest version.
- Mac: Apple generally handles driver updates automatically through software updates.
8. Firewalls: Are They Helping or Hindering?
Firewalls are like the security guards of your computer, protecting from unwanted access. However, sometimes, they can be too zealous and block the connection between your laptop and your TV.
- Temporary Disable: For testing purposes, you can try temporarily disabling your firewall on your laptop. (Just remember to turn it back on afterward for security!)
- Whitelist Applications: If you don't want to disable your firewall, you can "whitelist" the necessary applications (like your media player or the Chrome browser) to allow them to connect to your TV.
9. Different Wireless Standards: Understanding Compatibility
Wi-Fi standards (like 802.11n, 802.11ac, and 802.11ax) determine how fast and reliable your wireless connection is. Generally, you want your laptop and TV to support the same standards. More modern standards tend to be more compatible and efficient. If one device is very old and the other is brand new, compatibility can sometimes become an issue.
10. Beyond the Basics: Exploring Advanced Connection Methods
While we're focused on Wi-Fi to keep things simple, there are other connection methods.
- HDMI Cable: The most reliable, but requires a physical connection. Consider this if Wi-Fi is consistently problematic.
- Ethernet Cable: If your TV has an Ethernet port, a wired connection provides a super-stable internet connection.
11. Optimizing Your Wi-Fi: Boosting the Signal Strength
A weak Wi-Fi signal can be the bane of your streaming existence. Here’s how to optimize things:
- Router Placement: Position your router in a central location, away from walls and obstructions.
- Channel Selection: Your router broadcasts on specific Wi-Fi channels. Try switching to a less crowded channel to reduce interference.
- Upgrade Your Router: If your router is old, consider upgrading to a newer model with better range and speed.
12. Using Screen Mirroring Apps: Expanding Your Options
There are also third-party screen mirroring apps available that might offer additional features or improved compatibility. Explore the app store on your laptop!
13. The Importance of Regular Updates: Keeping Your Devices Current
Just like you get your coffee every morning, your devices need regular updates. Software updates often include bug fixes and performance improvements that can resolve compatibility issues. Keep your operating system, drivers, and TV firmware updated.
14. Testing the Connection: Ensuring Smooth Streaming
Once you've established the connection, test it out! Start by playing a short video or streaming a song. Check for any buffering or lag. If everything looks good, you're golden!
15. Mastering the Digital Realm: Your Smart TV Connection – Solved!
And there you have it! We've conquered the laptop-to-Smart TV Wi-Fi conundrum in what we aimed to be 60 seconds. (Okay, maybe it took a little longer to read the instructions, but you get the idea!). Now put up your feet, grab some snacks, and enjoy your favorite content on the big screen. You deserve it!
Closing Thoughts
Navigating the world of tech can be like exploring a labyrinth. But with the right knowledge and a little bit of patience, the path to your digital entertainment is always within reach. Hopefully, these tips have armed you with the tools you need to effortlessly connect your laptop to your smart TV. Remember, it's about understanding the basics, troubleshooting common issues, and never giving up on the pursuit of a seamless viewing experience. Happy streaming!
Acer WiFi Nightmare? FIX It NOW! (Easy Steps)Cara Menghubungkan LaptopPC ke SMART TV dengan WiFi
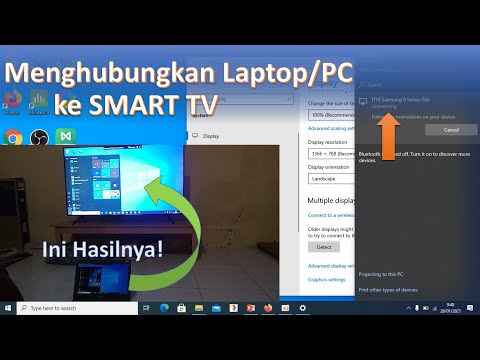
By Eko Zulkaryanto Cara Menghubungkan LaptopPC ke SMART TV dengan WiFi by Eko Zulkaryanto
How To Connect Laptop To Smart TV Wirelessly

By Tech is Easy How To Connect Laptop To Smart TV Wirelessly by Tech is Easy
HOW TO SETUP WI-FI DIRECT AND USING LAPTOP WIRELESS PRINTING - BROTHER DCP-T710W PRINTER.

By TECH-AID TV HOW TO SETUP WI-FI DIRECT AND USING LAPTOP WIRELESS PRINTING - BROTHER DCP-T710W PRINTER. by TECH-AID TV

Title: How to connect your laptop with Your TV in 2 clicks pchacks pctips
Channel: Simply Digital
How to connect your laptop with Your TV in 2 clicks pchacks pctips by Simply Digital
Laptop Wifi Connect
Laptop to Smart TV: Wi-Fi Connection Solved in 60 Seconds!
We've all been there. You're settled on the couch, ready to binge-watch your favorite show, but the small screen of your laptop just won't cut it. You crave the cinematic experience of your Smart TV. The frustration mounts as you fumble with wires, struggle with complicated settings, or face the dreaded buffering wheel. But what if we told you the solution wasn't just simple, but achievable in, yes, under 60 seconds? Prepare to bid farewell to technical headaches and hello to seamless streaming. This guide is your passport to effortlessly mirroring your laptop screen on your Smart TV using Wi-Fi.
Decoding the Wireless Connection: A Simple Explanation
The core of connecting your laptop to your Smart TV wirelessly relies on a common network: your home Wi-Fi. Both devices, your laptop and your Smart TV, need to be connected to the same Wi-Fi network. Think of it as the digital highway that allows them to "see" and communicate with each other. Once this fundamental connection is established, the magic of screen mirroring can happen. This eliminates the need for unsightly cables and provides the freedom to enjoy your content virtually anywhere in your living space.
Prerequisites: Ensuring Compatibility for a Smooth Transition
Before diving in, a few simple checks ensure a successful connection.
Smart TV Capabilities: Almost all modern Smart TVs come equipped with built-in screen mirroring functionalities. The most common are Miracast, Chromecast, and AirPlay (mainly for Apple devices). Refer to your TV's user manual or the manufacturer's website to confirm the specific screen mirroring protocols your TV supports. This information will be crucial for selecting the appropriate method for your setup.
Laptop Operating System: Windows laptops typically support Miracast directly, while macOS devices primarily utilize AirPlay. Check your laptop's specifications to ensure it has the necessary hardware and software readiness.
Wi-Fi Network Stability: A strong and stable Wi-Fi connection is critical. Slow or intermittent connections can cause buffering, lag, and ultimately, a frustrating viewing experience. Ensure your Wi-Fi router is functioning optimally and that both your laptop and Smart TV are within a reasonable range for optimal signal strength.
Connecting Your Laptop to Your Smart TV: Step-by-Step Guides
Let's get to the good stuff: the actual connection process. We'll break down the process for the most common scenarios, ensuring a quick and easy setup.
Connecting Windows Laptops via Miracast
Windows laptops often have Miracast built in, making the connection process straightforward.
Access the Display Settings: Press the Windows key + P simultaneously. This opens the "Project" menu, which offers options for connecting to external displays.
Select “Connect to a wireless display”: This option initiates a search for nearby Miracast-enabled devices.
Choose Your Smart TV: Your Smart TV should appear in the list of available devices. Click on your TV's name to initiate the connection.
Input the Pairing Code (If Required): Some TVs require a pairing code that will appear on your TV screen. Simply type this code into your laptop to authorize the connection.
Customize Display Settings: Once connected, you can choose to duplicate your laptop's screen (mirroring), extend your desktop (using your TV as a second screen), or use the TV as your primary display. Right-click on your desktop and select "Display settings" to adjust the resolution and other configuration options.
Start Streaming: Once connected, you can now play your favorite movies, shows, or cast your laptop's screen straight onto your TV.
Connecting macOS Laptops via AirPlay
Apple devices, including MacBooks, typically use AirPlay for screen mirroring.
Ensure AirPlay is Enabled on Your TV: Make sure your Smart TV supports AirPlay (check your TV's specifications). Ensure that AirPlay is turned on within your TV's settings menu. Instructions vary. Consult your TV's manual if needed.
Click the AirPlay Icon: In the menu bar at the top of your screen, you'll see the Control Center icon (two toggles, usually to the right of the clock). Click this and then click on "Screen Mirroring."
Select Your TV: A list of available AirPlay devices will appear. Choose your Smart TV from the list.
Input the AirPlay Code (If Required): Similar to Miracast, some TVs will display an AirPlay code on the screen. Enter this code on your MacBook to finalize the connection.
Enjoy Your Content: Your MacBook's screen will now mirror on your TV. You can adjust the display settings and begin streaming content.
Connecting with Google Chromecast (or Built-in Chromecast)
Chromecast, or sometimes referred to as Google Cast, is a popular option available on many Smart TVs or as a standalone dongle.
Ensure Chromecast is Enabled/Installed. If your TV has Chromecast built-in, it will be ready to go right out of the box. If you have a separate Chromecast device, make sure it’s plugged in and connected to your TV.
Download the Google Chrome Browser (If needed): If you haven't already, install the Google Chrome browser on your laptop.
Cast from Chrome: Open Chrome, navigate to the webpage or video you want to display. Click the three vertical dots in the top right corner of the Chrome window to open the menu.
Select “Cast”: Choose the "Cast" option from the menu. A list of available Chromecast devices will appear. Select your Smart TV.
Adjust Settings: Once connected, you may be able to control the volume and view media control options directly from your computer.
Start Watching: Your selected content will then begin playing on your Smart TV.
Troubleshooting Common Connection Issues
Even with a straightforward process, some challenges might arise. Here's how to address them.
Connection Failure: If your laptop can't find your TV, double-check that both devices are connected to the same Wi-Fi network and that screen mirroring functionalities are enabled on your TV. Ensure that your laptop's Wi-Fi and Bluetooth (for some devices) are turned on. Restarting both devices can sometimes resolve temporary connectivity issues.
Lag or Buffering: A weak Wi-Fi signal is often the culprit. Try moving your laptop or TV closer to your router or consider upgrading to a mesh Wi-Fi system for broader coverage. Reduce other device usage on the network to improve bandwidth.
Audio Issues: Adjust the audio output settings on your laptop to ensure the sound is routed to your TV. Check the TV's volume levels.
Picture Quality Issues: If the image quality is poor, check the display settings on your laptop and TV. Ensure the resolution is set to the highest possible setting supported by your TV.
Beyond the Basics: Enhancing Your Experience
Once you've mastered the basic connection, consider these enhancements.
Optimize Your Wi-Fi: Ensure your router is in optimal operating condition, update the router's firmware, and position it strategically for maximum coverage.
External Speakers: For a truly cinematic experience, connect external speakers or a soundbar to your TV for enhanced audio quality.
Consider a Dedicated Streaming Device: While screen mirroring is convenient, dedicated streaming devices (such as a Roku, Apple TV, or Fire TV Stick) offer a more streamlined user experience and often support a wider range of apps and features.
Conclusion: Unlocking the Full Potential of Your Viewing Experience
Connecting your laptop to your Smart TV via Wi-Fi is no longer a daunting technical task. The ability to stream content effortlessly, mirroring your laptop screen onto your TV, opens a world of entertainment possibilities. By following these simple steps, you can transform your living room into a personalized home theater, enjoying movies, shows, and more with ease and convenience. So, grab your popcorn, settle in, and get ready to experience your digital world in a whole new way.
