how to share your laptop wifi connection ethernet enabled devices
Title: Share Wifi To Other Devices Through The Ethernet Port of Laptop
Channel: Sid's E Classroom
Share Wifi To Other Devices Through The Ethernet Port of Laptop by Sid's E Classroom
Secret Trick: Share Your Laptop's WiFi with Wired Devices INSTANTLY!
Unlock Instant Internet: Bridging WiFi to Wired Devices
So, you're stuck. You have a wired device. But your only internet access is wireless. It can be frustrating, I know. You desperately need internet. What's a person to do? Well, there's a simple solution. Get ready to unleash this secret. Because it's simpler than you think. This method will turn your laptop into a WiFi bridge. It will share your internet with any wired gadget. Prepare to be amazed.
The Hidden Power of Internet Connection Sharing
Most people overlook this feature. It's built right into your operating system. Internet Connection Sharing (ICS) is the key. It allows you to share your WiFi connection. You can share it with Ethernet-enabled devices. This includes gaming consoles, smart TVs, and desktop computers. Essentially, you're creating a mini-network. It's powered by your laptop's wireless signal. It's a fantastic, underutilized tool. ICS offers a seamless experience. You can bypass the need for a separate router.
Setting Up Your Laptop as a WiFi Bridge: The Steps You Need
Let's dive right in. The setup process is straightforward. I’ll guide you step-by-step. Don't worry, it's not as daunting as it sounds.
Step 1: Wired Connection Is Critical: First, connect your wired device. Plug an Ethernet cable into your laptop. Attach the other end into your device. Ensure a solid connection.
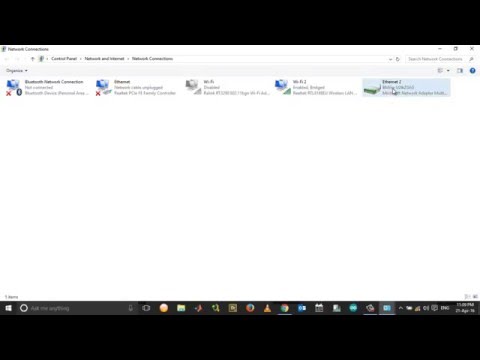
Step 2: Access the Network Settings: Next, go to your network settings. In Windows, search for "Network Connections." On macOS, it's located within "Network" preferences.
Step 3: Enabling Internet Connection Sharing: Here's where the magic happens. Find your active WiFi connection. Right-click on it. Select "Properties." Or, find the equivalent option on macOS. Go to the "Sharing" tab.
Step 4: Sharing the Connection: Check the box that says "Allow other network users to connect." Then, it asks you to select the network (usually Ethernet). Choose the Ethernet connection corresponding to your wired device. Click "OK."
Step 5: Verify Your IP Address Configuration: Sometimes, the device you are connecting to won't function immediately because the IP address isn’t configured promptly. You should check its settings. Look for options to obtain an IP address automatically. This happens most of the time.
Fine-Tuning for Optimal Performance
The setup is typically complete. However, a few adjustments can improve performance.
Restart Your Devices: Restart both your laptop and your wired device. This ensures everything synchronizes. It clears any potential hiccups.
Check Your Firewall: If you encounter problems, your firewall might be blocking the traffic. Briefly disable your firewall. See if this resolves the issue. Remember to re-enable it afterward. Adding an exception may fix the problem.
Consider Network Speed: WiFi speeds can fluctuate. Especially if you are far from your router. The speed will depend on your laptop’s wireless capabilities. Also, the Ethernet cable's speed matters. Use a high-quality cable.
Troubleshooting Common Hiccups
Sometimes, things don't go smoothly. Don't panic. Let's address some frequent issues.
No Internet Connection: Double-check your WiFi connection. Ensure the laptop successfully connects to the internet. Ensure the Ethernet cable is properly connected. If the problem persists, consider restarting all devices.
Slow Speeds: Wireless interference is common. Try moving your laptop closer to your router. Also, make sure nothing is blocking the signal. Test the speed of your wired device. Compare it against your wireless speed.
IP Address Conflicts: An IP conflict can happen. It may prevent the device from connecting. Go to the settings of the wired device. Change its IP configuration to "Obtain automatically."
Beyond the Basics: Advanced Uses
This trick is incredibly versatile. You can use it in numerous scenarios.
Temporary Internet: This is helpful if your home router fails. You can still share your laptop's connection.
Gaming on Consoles: Boost your console's performance. It provides a hardwired connection and reduces lag.
Smart TVs and Streaming: Enjoy buffer-free streaming. Benefit from a more stable connection.
Conclusion: Unleash Your Internet Potential
And there you have it. You've unlocked a valuable skill. You can now connect any wired device to your WiFi. It's a simple, yet powerful solution. You can enjoy seamless internet access. No need to fumble with new hardware. This method uses a hidden feature. Be smart, utilize it! Share this secret with your friends. They will thank you. Now, go forth and conquer your connectivity challenges!
Laptop WiFi Nightmare: The SHOCKING Solution You NEED!Secret Trick: Share Your Laptop's WiFi with Wired Devices INSTANTLY!
Alright, buckle up, folks! Ever found yourself in a situation where you desperately needed to connect a device to the internet, but only had a wired connection available? Maybe you're trying to hook up your gaming console, a desktop with no Wi-Fi card, or even an older printer. And your laptop? Well, it's happily sipping the sweet nectar of Wi-Fi. What if I told you there's a super simple, almost magical trick to share that laptop's wireless internet connection with those stubborn wired devices? Yeah, you guessed it – we’re talking about instantly sharing your laptop's Wi-Fi through its Ethernet port. Forget about wrestling with awkward setups or calling tech support in a panicky sweat. This is your digital life hack, your secret weapon against internet connectivity woes. Let’s dive in!
1. The Problem: The Wired World vs. the Wireless Oasis
Think of this scenario: You’ve got a shiny new Xbox Series X, a desktop PC that’s seen better days, or a smart TV, all craving a connection. But, they're wired – they demand a hardline, an umbilical cord to the router. Meanwhile, your laptop is basking in the glow of wireless bliss. It’s like a delicious cake that only the laptop can eat. Makes you want to throw your hands up, doesn't it? The problem is classic: bridging the gap between the wireless and wired worlds. That’s precisely where this nifty trick comes into play.
2. The Solution: The Magic of Internet Connection Sharing
The core of our trick lies in a feature most laptops boast: Internet Connection Sharing (ICS). Think of it as a digital translator, taking the Wi-Fi signals your laptop receives and then funneling them out through its Ethernet port. Essentially, your laptop becomes a temporary router, distributing the internet love to your wired devices. It's like the ultimate internet concierge!
3. Unveiling the Requirements: What You'll Need
Before we conjure this internet sorcery, let’s gather our ingredients:
- A Laptop: This is your central hub, your Wi-Fi wizard. It needs a Wi-Fi adapter (which most laptops have) and an Ethernet port (the wired one).
- An Ethernet Cable: You’ll need a standard Ethernet cable (like the one you might use to connect your computer to a router).
- Wired Devices: Your gaming console, desktop PC, smart TV, or whatever device you want to connect to the internet.
- Wi-Fi Access: Crucially, your laptop needs to be connected to a Wi-Fi network. No internet, no sharing!
4. Step-by-Step: Configuring Internet Connection Sharing (Windows)
We'll start with the Windows setup, as it's the most common. Ready? Here we go:
- Navigate to Network Connections: Search for "Network Connections" in the Windows search bar and open it. This is where the digital pixie dust happens.
- Find Your Wi-Fi Adapter: Locate your Wi-Fi adapter (it'll usually have a name like "Wi-Fi" or "Wireless Network Connection").
- Open Properties: Right-click on your Wi-Fi adapter and select "Properties." This opens a new window where we'll tweak some settings.
- Sharing Tab: In the Properties window, click on the "Sharing" tab.
- Enable Sharing: Check the box that says "Allow other network users to connect through this computer's Internet connection." This is the key!
- Select Your Wired Connection: In the "Home networking connection" dropdown, select your Ethernet adapter (it might be labeled "Ethernet" or "Local Area Connection"). This tells Windows where to send the shared internet.
- Apply & Okay: Click "Apply" and then "OK." Windows might briefly disconnect and reconnect, then you are good to go!
5. Step-by-Step: Configuring Internet Connection Sharing (macOS)
Now, what about our Mac folks? The process is pretty straightforward for them too.
- Open System Preferences: Click the Apple menu in the top-left corner of your screen and select "System Preferences."
- Sharing: Click on the "Sharing" icon.
- Internet Sharing: In the sidebar, select "Internet Sharing."
- Share Your Connection From: From the drop-down menu, choose "Wi-Fi."
- To Computers Using: Check the box next to “Ethernet.”
- Start Sharing: Click the “Start” button. macOS will prompt you to confirm. Click “Start.”
6. Connecting the Dots: Physical Connections Are Key
Now, grab your Ethernet cable. Plug one end into your laptop's Ethernet port and the other end into your wired device. It’s like completing the loop, creating the pathway for the internet to flow.
7. Testing the Waters: Verifying the Connection
Once everything is connected, it’s time to test. Try opening a webpage on your wired device, firing up your game console’s online multiplayer, or checking for software updates on your smart TV. If everything works, congratulations! You’ve successfully shared your laptop’s Wi-Fi. If not, don’t panic. Let's troubleshoot a bit.
8. Troubleshooting: Common Hiccups and Solutions
Sometimes, things don’t go perfectly the first time. Here are a few common issues and how to fix them:
- No Internet Access: Make sure your laptop is actually connected to Wi-Fi and verify that your laptop doesn't have a Firewall blocking the connection. Double-check all the settings in the previous steps.
- "Unidentified Network" Error: On your wired device, try restarting it. This often resolves the issue by forcing the device to correctly identify the network.
- IP Address Conflicts: In rare cases, your wired device might have a static IP address that conflicts with your laptop's shared connection. On your wired device, set your IP address settings to "Obtain IP address automatically" and "Obtain DNS server address automatically."
- Cable Issues: Try another Ethernet cable to see if that resolves issues. Sometimes the simplest things… work!
9. Security Considerations: Protecting Your Digital Fortress
While this technique is incredibly convenient, it’s essential to consider security. Make sure your Wi-Fi network has a strong password to prevent unauthorized access. A good password is like a locked door.
10. Benefits of Sharing Your Laptop's WiFi
Why go through this? Why not just plug your wired devices directly into your router? Well, the benefits are pretty sweet:
- Convenience: Often, it's easier to share your laptop's internet than to move your router for a quick game night.
- Temporary Solutions: Great for short-term scenarios, like connecting a device in a hotel room.
- Cost-Effective: No need to buy extra hardware like a Wi-Fi adapter for your wired device.
- Flexibility: Use your laptop as a mobile hotspot in locations without Wi-Fi.
11. Alternative Methods: Exploring Other Options
While ICS is generally the easiest method, there are alternative ways to bridge the wired-wireless divide:
- Wi-Fi Adapters: These small dongles can connect your wired devices wirelessly.
- Wireless Routers in Bridge Mode: Some routers can operate in "bridge mode," extending your Wi-Fi network using an Ethernet port. This is probably a better option if you need a permanent solution.
12. When to Avoid This Trick
While this is an amazing trick, it might not be the best option in every case:
- Heavy Internet Usage: Running multiple bandwidth-intensive tasks simultaneously might slow things down for all connected devices.
- Security Concerns: Relying on your laptop for both your primary Wi-Fi and as a router can introduce risks.
- Limited Battery Life: This technique rapidly consumes your laptop's battery.
13. Beyond the Basics: Advanced Tweaks
For the tech-savvy amongst us, there are a few advanced tweaks:
- Static IP Addresses: If you need more control, you can assign static IP addresses to your wired devices. This is usually unnecessary for this method to work!
- Quality of Service (QoS): Some routers may offer Quality of Service (QoS) settings that prioritize traffic from certain devices.
14. The Future of Connectivity: Staying Ahead of the Curve
Technology evolves rapidly. Just a few years ago, Wi-Fi was a luxury; now, it’s a necessity. By mastering this simple trick, you're already ahead of the curve. Understanding how to share and manage your internet connectivity is a valuable skill in today’s connected world.
15. Time to Celebrate: You've Mastered the Secret!
Congratulations! You've unlocked the secret to sharing your laptop's Wi-Fi with wired devices. You've transformed your laptop into an internet bridge, a digital savior in times of connectivity need. Now, go forth and conquer the wired world!
Closing Statement:
So there you have it! You’ve got a super easy method for sharing your laptop’s Wi-Fi with wired devices
Laptop WiFi Nightmare? Fix It Yourself in 5 Minutes!Share Internet from PC to PC via EthernetLAN cable

By Techy Druid Share Internet from PC to PC via EthernetLAN cable by Techy Druid
How to fix windows 10 Hotspot not obtaining ip address Hotspot not sharing internet

By The Guy's Computer How to fix windows 10 Hotspot not obtaining ip address Hotspot not sharing internet by The Guy's Computer
Use PC as WiFi Hotspot with Ethernet
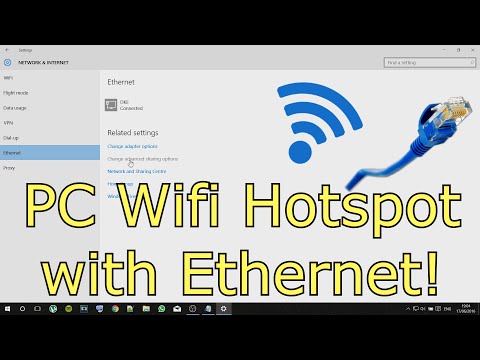
By Tech4Time Use PC as WiFi Hotspot with Ethernet by Tech4Time

Title: Enable WiFi Hotspot on Mac Share Internet Connection from Mac
Channel: Techy Druid
Enable WiFi Hotspot on Mac Share Internet Connection from Mac by Techy Druid
Laptop Wifi Hotspot
Secret Trick: Share Your Laptop's WiFi with Wired Devices INSTANTLY!
We've all been there: the frustration of a smart TV that refuses to connect, a gaming console craving a stable connection, or a desktop PC marooned in the digital wilderness because it lacks built-in WiFi. The wireless world, while liberating, often leaves certain devices behind, particularly those reliant on the steadfast reliability of a wired Ethernet connection. This is where the clandestine power of sharing your laptop's Wi-Fi connection comes into play. Forget complicated setups and expensive adapters; we're unraveling a seemingly simple, yet immensely valuable, technique to bridge the gap between your laptop's wireless internet and your wired devices, and do it with near-instantaneous results.
Unveiling the Hidden Power: The Magic of Internet Connection Sharing
The secret isn't some exotic piece of hardware or a clandestine software installation. It lies within the operating system of your laptop itself. Whether you're a Windows aficionado or a macOS maverick, the capability to share your laptop's Wi-Fi connection with other devices is usually built-in and waiting to be unleashed. It's like having a personal WiFi hotspot, but with a crucial difference: instead of broadcasting a new wireless signal, your laptop acts as a bridge, efficiently routing the existing Wi-Fi connection through its Ethernet port, providing a stable and quick connection for your wired devices. The advantages are myriad, especially for devices that are not equipped to easily receive a Wi-Fi signal. The simplicity is the true marvel.
Windows Warriors: A Step-by-Step Guide to Conquest
For those commanding a Windows machine, the process is remarkably straightforward. We will break it down into concise steps, making sure that the process is accessible and easy enough even for people who are not tech whizzes.
Accessing the Network and Sharing Center: Commence your journey by clicking the Windows key and searching for "Network Connections". Select "View network connections" from the options. Alternatively, you can right-click the network icon in your system tray (usually located in the bottom-right corner of your screen) and select "Open Network & Internet settings."
Identifying Your WiFi Adapter: In the Network Connections window, you'll see a list of your network adapters. Identify your active Wi-Fi adapter. This is usually labeled "Wi-Fi" followed by the name of your network card, or "Wireless Network Connection".
Entering the Sharing Realm: Right-click on your Wi-Fi adapter icon and select "Properties." In the properties window, navigate to the "Sharing" tab.
Granting the Permission: Check the box that reads "Allow other network users to connect through this computer's Internet connection." This is the crux of the whole procedure. This signifies you are allowing your wired devices to use your laptop's Wi-Fi signal.
Choosing Your Wired Connection: In the "Home network connection" dropdown menu, select the Ethernet adapter being used. The Ethernet adapter is the port in which you have connected your wired device. This is the port that will be providing a stable connection. Verify that you have connected your wired machine to the laptop with an Ethernet cable.
Confirming the Transformation: Click "OK" to save your settings. Windows will now configure your laptop to act as a bridge.
Verification (Optional): Ideally, your wired device should now have internet access. To verify it, open a web browser on your wired device and try to access a website. If it works, congratulations, you've done it!
macOS Mavericks: Navigating the Digital Winds
The process on macOS is equally refined, and it is just as rewarding.
Opening System Preferences: Start by clicking on the Apple menu in the top-left corner of your screen and opening "System Preferences".
Navigating to Sharing: Select the "Sharing" option.
Choosing Internet Sharing: In the left sidebar, select "Internet Sharing."
Selecting Your WiFi Connection Source: In the "Share your connection from" dropdown menu, select "Wi-Fi".
Designating the Recipient Adapter: In the "To computers using" box, check the box that corresponds to "Ethernet," representing your wired connection.
Starting the Sharing Service: Check the "Internet Sharing" box to enable the service. The system will prompt you with a confirmation message. Click "Start" to begin sharing your internet connection.
Monitoring the Connection: The status indicator next to "Internet Sharing" will display "On" when the connection is active. Your wired device should now have internet access. Test on the device, if it works, then you have successfully performed the process.
Troubleshooting Troubles: Conquering Connectivity Obstacles
Even with the simplest of procedures, it's natural to encounter a hiccup or two.
The Ethernet Cable Reality Check: The most common culprit is a faulty Ethernet cable. Ensure stability by confirming that the cable is securely connected to both your laptop and your wired device. Try a different cable to eliminate this potential issue.
IP Address Conflicts: Sometimes, your wired device might be assigned an IP address that conflicts with another device on your network. Resolve this by configuring your wired device to obtain its IP address automatically; this is usually the default setting and can be found in your device's network settings.
Firewall Considerations: Your laptop's firewall might inadvertently block the connection. Temporarily disable your firewall (for testing purposes only) to see if this resolves the issue. If it does, you can configure the firewall to permit the necessary traffic, for example, configuring your Firewall settings on Windows to allow the laptop to act as a router.
Driver Dilemmas: Ensure that your network adapter drivers are up to date. Outdated drivers can sometimes lead to connectivity problems. Visit the manufacturer's website of your laptop to update your drivers.
Beyond the Basics: Advanced Applications and Optimizations
Beyond the initial plug-and-play setup, there is more.
Creating a Dedicated Network: With careful configuration, you can create a separate, dedicated network for your wired devices. This isolates them from the main Wi-Fi network, potentially enhancing security and performance.
Prioritizing Bandwidth: If you are concerned about lag or slow speeds, many routers and operating systems offer options for prioritizing bandwidth allocation. A feature that may be useful if you are using your laptop to stream or play online games.
Static IP Addresses: While usually unnecessary, assigned static IP addresses can improve stability for devices that require a consistent connection, such as network printers or servers.
Why This Trick Matters: The Enduring Value of Wired Connections
In a world saturated with wireless technology, the humble Ethernet cable maintains its relevance. Wired connections provide unparalleled stability, lower latency, and a more consistent internet speed compared to Wi-Fi, which can be affected by interference or distance. This is especially important in online gaming, streaming high-definition content, or data-intensive tasks. The trick we’ve covered ensures that even devices lacking wireless capabilities can tap into the reliability of a hard-wired connection, leveraging the strength of your laptop’s Wi-Fi signal.
Conclusion: Achieving Instant Connectivity
Sharing your laptop's Wi-Fi with wired devices is a remarkably simple, though powerful, technique that can instantly solve connectivity issues. The process described here offers a quick and elegant solution. By following these steps, you can extend the reach of your Wi-Fi network and empower devices that thrive on the stability a wired connection provides. No longer will you be constrained by the limitations of your existing hardware; instead, you will have the power to transform your laptop into a bridge that connects the digital world, bringing both your wireless and wired devices together in perfect harmony.
