how to make my laptop connect to wifi better

Title: Make Your Laptop's Wifi Signal Faster On Windows 1087 Tutorial
Channel: MDTechVideos
Make Your Laptop's Wifi Signal Faster On Windows 1087 Tutorial by MDTechVideos
how to make my laptop connect to wifi better, how to make your laptop connect to wifi faster, how to make my laptop wifi connection faster, why my laptop cannot connect to home wifi, why won't my laptop connect to home wifi, how to improve wifi connection on laptop
Laptop WiFi Nightmare? This ONE Trick Fixes It!
Laptop WiFi Woes Vanquished: Your Ultimate Guide to Seamless Connectivity
Is your laptop's Wi-Fi causing you daily headaches? Are dropped connections and agonizingly slow speeds the bane of your existence? Don't despair! You're not alone in this digital struggle. Furthermore, there's a solution, and it's easier than you might think. Moreover, this guide unveils a powerful trick that can drastically improve your laptop's Wi-Fi performance. Let's dive in and banish those connectivity frustrations!
The Silent Culprit: Understanding Your Wi-Fi Weakness
Before we present the fix, let’s examine the common culprits. Often, the problem isn't your internet plan. Similarly, it’s usually something within your laptop's settings or the surrounding environment. Consider this: your Wi-Fi signal is like a radio broadcast. Obstacles like walls, furniture, and even other electronic devices can interfere. In fact, these elements can weaken the signal. They can also create interference. That can translate into a frustratingly slow connection. It can also result in complete dropouts.
Unveiling the Magic: The ONE Trick
Now for the main event! The single most effective way to boost your Wi-Fi performance is to optimize your Wi-Fi adapter’s settings. Therefore, it's often overlooked, yet profoundly effective. Here's how to achieve it:
Step 1: Accessing Your Adapter Properties: First, find the network icon in your system tray (usually in the bottom right corner). Then, right-click it and select "Open Network & Internet settings". Alternatively, you can search for "Network Connections" in your Windows search bar.
Step 2: Navigating to Adapter Options: Within the Network & Internet settings, locate and click "Change adapter options." This will open a window displaying all your network adapters.
Step 3: Refining Your Wireless Adapter: Find your Wi-Fi adapter (it will likely say "Wi-Fi" or "Wireless Network Connection"). Right-click it. Then, select "Properties."
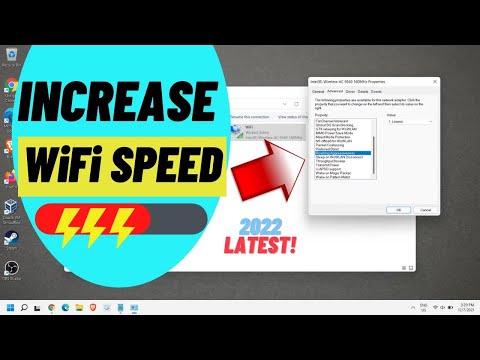
Step 4: Configuring Advanced Settings: In the Properties window, a new window appears. Select Configure, and then select the "Advanced" tab. Here's where the magic happens.
Step 5: The Crucial Tweaks:
- 802.11n/ac Mode: If available, change this setting to either "802.11ac" or "Auto." This utilizes the latest Wi-Fi standards. Consequently, it often provides faster speeds and more stable connections.
- Wireless Mode: Try different settings here. Sometimes, switching from "Auto" to a specific mode like "802.11n" can resolve conflicts.
- Roaming Aggressiveness: Experiment with this setting. A lower setting might prevent constant searching for better signals. A higher setting might improve connections in areas with weak coverage. Thus, test it out.
- Power Saving Mode: Ensure this setting is set to "Disabled" or "Maximum Performance." This prevents the adapter from throttling its power. In other words, it ensures optimal performance.
- Other settings: Some adapters have additional settings. Explore them, testing changes one at a time. But first, research settings specific to your adapter model.
Step 6: Applying and Testing: After making these adjustments, click "OK" to save the changes. Disconnect and reconnect to your Wi-Fi network. Now, test your connection speed and stability. Make sure you run a speed test. A popular one is Speedtest.net.
Beyond the Trick: Additional Wi-Fi Enhancement Strategies
While the adapter settings are often the key fix, other factors can also contribute to Wi-Fi issues. Therefore, consider these supplementary steps:
- Router Placement: Place your router in a central location. Keep it away from walls and obstructions. Elevating the router can also improve signal distribution.
- Frequency Band Selection: Most modern routers support both 2.4 GHz and 5 GHz bands. Therefore, 5 GHz is generally faster. However, it has a shorter range. Experiment with both to determine the best option for your needs.
- Router Firmware Updates: Regularly update your router's firmware. Consequently, it often contains crucial bug fixes and performance improvements.
- Channel Optimization: Use a Wi-Fi analyzer app. It helps identify less congested Wi-Fi channels. Therefore, you can configure your router to use a less crowded channel.
- Interference Mitigation: Minimize interference from other electronic devices. Microwaves, Bluetooth devices, and cordless phones can all disrupt the Wi-Fi signal.
Troubleshooting When Problems Persist
Even after trying these methods, problems may still persist. Therefore, consider these additional troubleshooting steps:
- Restart Your Router and Laptop: This simple action often resolves temporary glitches.
- Check Your Internet Service: Ensure your internet service is active and has no outages.
- Update Your Network Drivers: Outdated drivers can cause compatibility issues. Update them through Device Manager.
- Run the Windows Network Troubleshooter: Windows has a built-in troubleshooter. It can automatically identify and troubleshoot common network problems.
- Consider a Wi-Fi Extender: If you have a large home or office. A Wi-Fi extender can significantly boost your signal range.
Conclusion: Embrace a Seamless Online Experience
Tackling Wi-Fi troubles can be frustrating. However, with this ONE trick and the supplementary strategies, you’re well-equipped to solve them. Therefore, take control of your laptop’s Wi-Fi. Optimize your adapter settings, and embrace a faster, more reliable online experience. Furthermore, bid farewell to those lagging speeds. Embrace the joy of seamless connectivity. Therefore, go forth and conquer your Wi-Fi woes!
**Anewkodi USB Laptop WiFi Booster: Blazing-Fast Internet, Guaranteed!**Laptop WiFi Nightmare? This ONE Trick Fixes It!
We’ve all been there, haven’t we? That agonizing moment when your laptop's Wi-Fi decides to stage a revolt. You're trying to stream your favorite show, finish an important project, or even just casually browse the web, and bam – the dreaded spinning wheel of doom appears. Suddenly, your digital life grinds to a halt. Fear not, fellow internet travelers! We're diving deep into the Wi-Fi wilderness today, and I'm here to share a secret – a single trick that can often banish those connectivity woes and restore your sanity. Let's get started!
1. The Wi-Fi Woes: A Familiar Digital Torture
Let's be honest, laptop Wi-Fi problems are practically a rite of passage in the digital age. It's like owning a car; you know, eventually, something will break. The frustration is real. That buffering icon, that flickering signal, the endless loading times… They're enough to make anyone want to throw their laptop out the window (though, I strongly advise against it!). This isn't just a minor inconvenience; it impacts our productivity, our entertainment, and even our connections with loved ones.
2. Before the Fix: Diagnosing the Digital Disease
Before we get to the magic bullet, let’s make sure we're actually addressing the Wi-Fi issue and that it’s not something else, such as the internet service itself. A slow internet connection can be caused or made worse by a slow server.
First, restart your laptop. Sounds simple, right? It’s surprising how often this works. Think of it as a digital reset button for your device.
Second, check your internet connection. Is your phone or tablet connected to the Wi-Fi and functioning correctly? This helps you pinpoint if the problem is with your laptop or your entire internet setup.
Third, run a speed test. Websites like Speedtest.net or Fast.com can give you an idea of your download and upload speeds. If they’re significantly lower than what you pay for, you might need to contact your internet service provider.
3. Enter the Hero: The Power Cycle, Unveiled!
Okay, here it is, the one trick I'm talking about and is often the solution. It’s so simple, yet so effective, it's almost embarrassing. This one trick often solves the Wi-Fi problem. It’s called: The Power Cycle! I’m talking about rebooting your modem and router. Simple, right? But so often overlooked!
4. Power Cycling: A Step-by-Step Guide
Now, let's break down exactly how to power cycle, because, believe it or not, there's a proper way to do it. It's not just about unplugging and plugging back in.
- Turn off your laptop. Seriously, shut it down completely. No need to keep it running.
- Unplug your modem. This is the device that connects to your internet service provider's cable or DSL line.
- Unplug your router. This is the device that broadcasts the Wi-Fi signal. This is usually the one you are most concerned about.
- Wait… Give it a full 60 seconds. This allows all the residual power to drain from the devices, clearing the memory. Think of it as a digital detox.
- Plug in your modem. Wait for it to fully power up and connect to the internet. This can take a few minutes. Look for the lights that indicate the connection is established.
- Plug in your router. Again, wait for it to fully boot up and broadcast a Wi-Fi signal.
- Turn on your laptop. And…fingers crossed…connect to your Wi-Fi network.
5. Why Does This Work? Unmasking the Magic
Why does power cycling work so well? Your router and modem are, essentially, little computers. Just like your laptop, they can get bogged down over time. They accumulate temporary files, experience software glitches, and sometimes just…need a fresh start. Power cycling clears out these temporary issues, allowing the devices to establish a clean connection. It's like giving your Wi-Fi a digital spring cleaning!
6. Troubleshooting After the Reboot: Fine-Tuning the Connection
So, what if power cycling the router doesn't immediately solve the problem? Don't lose heart! There are other things you can try.
- Check for interference. Wi-Fi signals can be disrupted by other electronic devices, such as microwaves or cordless phones. Try moving your laptop or router to a different location. For instance, placing the router on a shelf and clearing the area around it.
- Update your router’s firmware. Router manufacturers regularly release firmware updates to improve performance and fix bugs. Check your router’s settings to see if there are any updates available.
- Change your Wi-Fi channel. In crowded environments, different Wi-Fi networks can interfere with each other. You can often change the Wi-Fi channel your router uses in its settings. There are apps that can scan for the clearest channel.
7. The Router’s Location Matters: Optimizing Your Signal
Think about your router's location. Is it tucked away in a closet? Is it hidden behind a wall of electronics? These locations can hinder the signal.
- Central Location: Place your router in a central location in your home or office, so the signal can reach all your devices easily.
- Elevated Position: Position your modem or router on a shelf or table, not the floor. This may enhance the signal.
- Avoid Obstacles: Keep the router away from walls, mirrors, and other devices that could cause interference.
8. Weak Wi-Fi Signal: The Culprits and the Fixes
A weak Wi-Fi signal can be frustrating. Here's are some reasons as to why and what you can do.
- Distance: The farther away you are from the router, the weaker the signal.
- Physical Obstacles: Walls, furniture, and other objects can block or weaken the signal.
- Interference: Other electronic devices on the same frequency can cause interference.
Fixes:
- Move Closer: The easiest fix is to move closer to the router.
- Reorganize: Rearrange your furniture to improve signal flow.
- Wi-Fi Extender: If you have a large home, consider a Wi-Fi extender.
9. Router Security: Protecting Your Network
Let's spend a moment on the often-overlooked aspect of your Wi-Fi: security. A secure Wi-Fi network protects your personal information and prevents unauthorized access.
- Strong Password: Use a strong, unique password for your Wi-Fi network. Avoid easily guessable passwords like your birthday or pet's name.
- Encryption: Make sure your router is using WPA2 or WPA3 encryption.
- Regular Updates: Keep your router’s firmware updated.
10. The Bandwidth Dilemma: Overcoming Congestion
If you're experiencing slow speeds, even with a strong signal, it may be due to bandwidth congestion. Think of it like a highway during rush hour; the more vehicles (devices) on the road, the slower everyone moves.
- Limit Connected Devices: Reduce the number of devices simultaneously using your Wi-Fi.
- Prioritize Traffic: Some routers allow you to prioritize traffic for certain devices or applications.
- Upgrade Your Plan: consider if your internet service plan provides sufficient bandwidth.
11. Laptop Wi-Fi Card Issues: A Hardware Consideration
Sometimes, the problem isn't the router, but your laptop's Wi-Fi card. Thankfully, hardware issues are rare but they still happen!
- Driver Updates: Ensure that your Wi-Fi card drivers are up-to-date.
- Hardware Problems: If all else fails, it may be time to consult a computer technician.
12. When the Problem Persists: Seeking Professional Help
If you've tried everything, and your Wi-Fi woes persist, it might be time to call in the experts. Contact your internet service provider or a computer repair technician.
13. The Art of Troubleshooting: A Skill for Life
Learning to troubleshoot Wi-Fi problems is a valuable skill. It can save you time, frustration, and money.
14. Your Digital Fortress: Protecting Your Online Privacy
Finally, let's remember the importance of online privacy. Use a VPN (Virtual Private Network) when using public Wi-Fi and be mindful of the websites and services you access.
15. The Future of Wi-Fi: What to Expect
Wi-Fi technology is constantly evolving! 6G and beyond are on the horizon.
The Grand Finale
So there you have it! The one trick that can often banish your laptop Wi-Fi nightmares: power cycling your modem and router. Of course, other issues can occur, but sometimes, that simple action is all it takes to restore a smooth, seamless internet experience. I hope this guide has empowered you with the knowledge and confidence to tackle those pesky connection problems. Now go forth and conquer the digital world!
FAQs: Wi-Fi Questions Answered
Here are some frequently
WiFi Nightmare? Conquer Your Laptop's Connection NOW!How To Increase WiFi Speed On Windows 11 - Full Guide

By GuideRealm How To Increase WiFi Speed On Windows 11 - Full Guide by GuideRealm
Best Way To Improve Wi-Fi Connection On PCLaptop 2022
By EasyTechGeek Best Way To Improve Wi-Fi Connection On PCLaptop 2022 by EasyTechGeek
How to Improve Wi-Fi Signals in Windows Laptop Speedup Wi-Fi

By MJ Tube How to Improve Wi-Fi Signals in Windows Laptop Speedup Wi-Fi by MJ Tube

Title: How To Hack WiFi Networks
Channel: BeyondMind
How To Hack WiFi Networks by BeyondMind
Laptop Working
Laptop WiFi Nightmare? This ONE Trick Fixes It!
Is your laptop’s Wi-Fi connection proving to be a persistent source of frustration? Do buffering videos, dropped connections, and glacial download speeds transform your browsing experience into a trial of patience? We understand the feeling. We have all been there, wrestling with the fickle nature of wireless networks. But there's good news: the solution might be simpler, and far more effective, than you realize. Let's dive into a powerful, often-overlooked method that can dramatically improve your laptop’s Wi-Fi performance.
The Hidden Culprit: Channel Congestion and Why It Matters
Before we unveil the "one trick," it's crucial to understand the underlying problem. Modern Wi-Fi routers broadcast their signal on specific "channels" within the 2.4 GHz and 5 GHz frequency bands. Think of these channels like lanes on a highway. If too many devices – your neighbors' routers, your own smart devices, microwave ovens, and other electronics – are all vying for space on the same channel, the result is traffic congestion. This congestion leads to dropped packets, slower speeds, and a generally unpleasant internet experience. The "one trick" directly addresses this congestion issue.
Introducing the Strategic Advantage: Channel Optimization
The key to a smoother, faster Wi-Fi connection lies in optimizing your router's Wi-Fi channel. Instead of letting your router automatically select a channel, which it often does poorly, we will take control and manually choose the best channel for your environment. This is akin to choosing the least crowded lane on the highway.
Step-by-Step Guide: Finding the Best Wi-Fi Channel
This process requires a few simple steps. Don't worry; we will walk you through each one.
1. The Right Tool for the Digital Architect: Wi-Fi Analyzer Software
To identify the most congested channels, we need a Wi-Fi analyzer. Several excellent, free options are available for both Windows and macOS. For Windows, popular choices like "Acrylic Wi-Fi Home" or "inSSIDer" provide detailed information about the Wi-Fi networks in your area, including their channels and signal strength. For macOS, "WiFi Explorer" is a robust and user-friendly option. Download and install your chosen software.
2. Unveiling the Wireless Landscape: Scanning Your Environment
Once the Wi-Fi analyzer is installed, launch it. The software will scan for nearby Wi-Fi networks and display them in a visual format. This display is your critical roadmap. You'll see a graph or chart that depicts the channels being used by various networks. The key is to identify the channels with the least activity.
3. Deciphering the Data: Identifying the Least Crowded Channel
Observe the graph. Look for channels that have the fewest overlapping signals from other networks. In the 2.4 GHz band, which has the most channels, only channels 1, 6, and 11 are non-overlapping (meaning they don't interfere with each other). In the 5 GHz band, which has more channels and less congestion in general, many channels are available. The Wi-Fi analyzer will typically display the strength of the signals using specific color codes. The stronger the signal, the more "crowded" the channel. Try to identify the channels with the weakest signals in order to avoid interference. Some analyzers may also suggest the best channel for you based on their analysis.
4. Router Configuration: Manual Channel Selection
Now comes the crucial part: changing your router's Wi-Fi channel. Access your router's configuration page by typing its IP address (usually 192.168.1.1 or 192.168.0.1) into your web browser's address bar. You'll need your router's username and password, which are often found on a sticker on the router itself. Once logged in, navigate to the Wi-Fi settings. The exact location of these settings varies slightly depending on your router's make and model, but they're usually under a tab labeled "Wireless," "Wi-Fi," or something similar. Look for a "Channel" or "Wireless Channel" setting.
5. Switching Channels: Implementation and Validation
From the available options, we will select the channel we identified as the least congested in your analysis. Select the ideal channel, save your settings, and reboot your router. This step is usually necessary for the changes to take effect. Once your router restarts, your laptop should automatically reconnect to the Wi-Fi network.
6. Re-testing and Refining
Test your connection. Run a speed test to make sure your download speeds and upload speeds are good. Are you satisfied with the improved performance? If not, re-scan the area with your Wi-Fi analyzer and repeat the process if necessary, trying different channels. The ideal channel can sometimes change as neighbors turn their Wi-Fi routers on or off. As needed, consistently check the network's performance and adjust settings. This is a simple process.
Beyond the Basics: Advanced Optimization Tips
While channel optimization is the primary "trick", here are some supplementary recommendations to further improve your laptop's wireless performance:
- Router Placement: Position your router in a central, elevated location in your home. Avoid placing it near walls, metal objects, or appliances that can interfere with the signal. Try to keep the router in an area where there are less walls.
- Router Firmware Updates: Regularly check for firmware updates for your router. These updates often include performance improvements and security patches.
- Frequency Band Selection (5 GHz): If your laptop and router support the 5 GHz band, use it! It offers faster speeds and less congestion than the 2.4 GHz band, especially in urban environments. Make sure that the Wi-Fi analyzer shows less signals on the 5GHz channels.
- Wireless Security: Ensure your Wi-Fi network is secured with a strong password and WPA2 or WPA3 encryption. Open networks are open signals.
- Reduce Wireless Interference: If possible, minimize the use of devices that can cause interference, such as microwave ovens, cordless phones, and Bluetooth devices, especially when using the 2.4 GHz band.
- Consider a Wireless Extender (if needed): If your problem persists in very big homes an extender might be needed. An extender can help you extend you Wi-Fi signal to areas that are too far from the router.
Troubleshooting: Common Issues and Solutions
Sometimes, even with channel optimization, problems persist. Here's a look at some common issues and how to resolve them:
- Slow Speeds Despite Channel Optimization: If your speeds remain slow, even after optimizing your channel, consider other factors, such as your internet service provider (ISP) plan, your router's age, and the number of devices connected to your network.
- Weak Signal Strength: If your laptop is experiencing weak or intermittent signal strength, check your router's placement and ensure there are no obstructions between the router and your laptop.
- Connection Drops: If your connection drops, check for interference from other devices, update your router's firmware, and ensure your laptop's Wi-Fi adapter drivers are up to date.
- 5 GHz Band Not Showing Up: Verify that your router supports the 5 GHz band and that it is enabled in your router's settings. Also, ensure your laptop supports the 5 GHz band.
The Takeaway: Reclaim Your Wireless Freedom
Wi-Fi frustrations should not be a permanent state of affairs. By dedicating a few minutes to channel optimization, you can significantly improve your laptop's wireless performance. This is just a single step, but it is a critically important one. By understanding the underlying principles and following these simple steps, we can take control of the situation and enjoy a faster, more reliable, and a more enjoyable online experience. You'll be surprised at the difference this "one trick" can make. So, ditch the buffering, and get back to enjoying the internet the way it was intended – fast, reliable, and completely hassle-free.
