how to connect raspberry pi 3 to laptop using wifi

Title: Raspberry Pi- Auto Connect to Wifi and access to Laptop and PC using VNC Viewer
Channel: SME Dehradun
Raspberry Pi- Auto Connect to Wifi and access to Laptop and PC using VNC Viewer by SME Dehradun
Raspberry Pi 3 to Laptop WiFi: The SHOCKINGLY Easy Method!
Unlock Wireless Freedom: Connect Your Raspberry Pi 3 to Your Laptop's WiFi – The Easy Way!
Alright, tech enthusiasts! Have you ever found yourself wrestling with a Raspberry Pi, yearning for a wireless connection but feeling utterly defeated? It's a familiar scenario. The blinking lights, the confusing setup, the sheer frustration! But what if I told you there's a ridiculously simple method to bridge that gap – a method so easy, it'll have you wondering why you struggled for so long? Prepare to be amazed!
The Great Wireless Divide: Bridging the Gap
Let’s be honest. Setting up a functional, wireless connection with your Raspberry Pi can sometimes feel like scaling Mount Everest. There are so many variables. Network configurations, driver installations, and cryptic error messages can quickly drain your enthusiasm. However, before you throw your Pi across the room, take a deep breath. Because the solution is simpler than you think. Instead of battling complex setups, we’ll focus on the elegant simplicity of utilizing your laptop's existing WiFi capabilities.
This method bypasses the need for extra dongles or complicated network configurations. Therefore, you're saving time and effort. To make things even better, the process is surprisingly straightforward. The result? Seamless, wireless communication between your Raspberry Pi 3 and your laptop.
Your Secret Weapon: The Power of Network Sharing
Your laptop already serves as a powerful wireless interface. It connects to your home network. Luckily, it can also share that connection. In other words, your laptop becomes a bridge, connecting your Pi 3 to the internet. This method is a game-changer. Subsequently, you'll experience a much smoother workflow.
You don't need to be a network guru to pull this off, either. First, it takes a few simple steps. Second, it’s remarkably effective. Consequently, you’ll be up and running in no time. We'll cover these steps.
Getting Started: Gathering Your Arsenal
Before we begin, let’s assemble your tools. You'll only need a few things:
- Your Raspberry Pi 3: Obviously! Make sure it has a MicroSD card with your operating system (Raspberry Pi OS) installed.
- Your Laptop: Running Windows, macOS, or Linux.
- An Ethernet Cable: Just a standard one will do.
- A Little Patience: Things might not work immediately.
With these items in hand, you're ready to roll!
The Easy Steps: A Simple Guide
Ready to initiate your connection? Excellent! Follow these steps carefully:
- Connect the Hardware: Connect your Raspberry Pi 3 to your laptop using the Ethernet cable.
- Laptop Setup (Windows): Open your network connections. You can search for "network connections" in the Windows search bar. Find your WiFi connection. Right-click on it and go to "Properties."
- Sharing is Caring (Windows): Navigate to the "Sharing" tab. Check the box that permits other network users to connect. Select your Ethernet connection from the dropdown menu. Click “OK”.
- Laptop Setup (macOS): Go to System Preferences > Sharing. Select "Internet Sharing". Share your connection from "Wi-Fi" to "Ethernet". Start the sharing service.
- Laptop Setup (Linux): The process varies slightly depending on your Linux distribution, however, the core concept holds true. Generally, you'll need to access your network settings. Then, you'll set up your WiFi connection to share its internet to the Ethernet connection. Research on your distro.
- Configure Your Pi: After the laptop is prepared, it's time to configure your Raspberry Pi. By default, the Pi will attempt to obtain an IP address automatically via DHCP. If it doesn’t connect, consult your router's DHCP lease list. This lists connected devices and their IP.
- Test the Connection: Open a terminal window on your Raspberry Pi (or use SSH). Then, try pinging a website like Google:
ping google.com. If you see replies, you're connected!
Troubleshooting and Fine-Tuning: Handling the Unexpected
Sometimes, even the simplest methods can encounter minor hiccups. But don’t fret! Here are a few troubleshooting tips.
- No Internet? Double-check your laptop's internet connection. Ensure network sharing is enabled correctly. Restart your laptop, then your Pi, too.
- IP Address Issues: If your Pi isn't getting an IP address, consider setting a static IP. This enables more immediate connectivity. This can also be done by editing the
dhcpcd.conffile (usingsudo nano /etc/dhcpcd.conf). - Firewall Interference: Your laptop’s firewall could be blocking the connection. Temporarily disable it for testing. However, enable it again once you're finished to maintain security.
Beyond the Basics: Expanding Your Horizons
Once you’ve established a stable connection, the possibilities expand! You can remotely access your Pi. You can access files. You can also experiment with all sorts of projects! Consider using your Pi for:
- Home Automation: Control lights, appliances, and more.
- Media Server: Stream movies and music directly from your Pi.
- Programming and Development: Work on your projects.
Conclusion: Embrace the Wireless Revolution
Connecting your Raspberry Pi 3 to your laptop's WiFi doesn't need to be a headache. As a result, now you know this shockingly easy method. It eliminates the complexity. It streamlines your setup. And it opens up a world of wireless possibilities.
So, embrace the freedom. Embrace the convenience. And most importantly, embrace the fun. Your Raspberry Pi adventures await. Now, start creating something amazing! You’re ready to take your projects to the next level.
Lenovo Laptop Wi-Fi Weak? This SHOCKING Fix Works Every Time!Raspberry Pi 3 to Laptop WiFi: The SHOCKINGLY Easy Method!
Ever stared at your Raspberry Pi 3, that tiny marvel of computing power, and wished you could just easily connect it to your laptop's Wi-Fi, without wrestling with Ethernet cables or remembering arcane command-line Kung Fu? We’ve all been there! Let's be honest, sometimes the simplest things feel as complicated as deciphering ancient hieroglyphs. But fear not, fellow tech adventurers! We're about to demystify this process and reveal a method that's so shockingly easy, you'll feel like you've unlocked a cheat code. Consider this your roadmap to wireless connectivity, simplified and streamlined.
1. The Quest Begins: Why Bother Connecting Your Pi to Your Laptop's WiFi?
Before we jump into the "how," let's tackle the "why." Why even bother connecting your Raspberry Pi 3 to your laptop's Wi-Fi? Well, the benefits are as numerous as the stars in the night sky (okay, maybe not that many, but you get the point!). Imagine:
- Wireless Freedom: Ditching those pesky Ethernet cables means you can position your Pi anywhere within your Wi-Fi range. Freedom, baby!
- Remote Access: Control and manage your Pi from anywhere in your house (or even the world, depending on your setup) – perfect for projects like home automation or server setups.
- Easier Project Development: No more running back and forth between your Pi and your monitor. You can SSH (Secure Shell) into your Pi from your laptop, making coding and troubleshooting a breeze. Think of it as having a direct line to your project’s brain.
- Sharing Your Laptop’s Internet: If you don't have a direct Wi-Fi connection, your laptop's can act as a gateway. Think of it as your Pi hitching a ride on your laptop’s internet express.
2. Gathering Your Arsenal: What You'll Need for the Mission
Fortunately, this mission doesn't require a complex arsenal. Just a few essential items:
- Your Raspberry Pi 3: The star of the show!
- A MicroSD Card: This is where the operating system (typically Raspberry Pi OS) will live.
- Your Laptop: Running Windows, macOS, or Linux - it doesn't matter, we'll make it work!
- A MicroSD Card Reader: To flash the operating system onto the microSD card.
- Power Supply for Your Pi: You'll need the standard Raspberry Pi power supply that's compatible with its USB connection.
- (Optional, but helpful): A monitor, keyboard, and mouse, especially for the initial setup if you're not comfortable with headless configuration. Think of this as your training wheels before the real race begins.
3. Flashing the OS: Preparing Your Pi for Adventure
This is where we prepare our secret weapon: the operating system. We'll use Raspberry Pi Imager, a free and easy-to-use tool that makes flashing the OS a piece of cake.
- Download Raspberry Pi Imager: Find it on the Raspberry Pi website.
- Insert your MicroSD card into your card reader and plug it into your laptop.
- Open Raspberry Pi Imager.
- Choose your OS: Select “Raspberry Pi OS (other)” or “Raspberry Pi OS Lite” if you're aiming for a headless setup (without a monitor).
- Select your SD card.
- Click “Write”. And hold tight! The process could take a few minutes, depending on your internet speed and SD card.
4. Enabling SSH and Configuring WiFi: The Secret Sauce
Now for the fun part: configuring Wi-Fi without a monitor and keyboard! This is where the magic truly happens. Right before we flash the OS, we add a few extra files.
- Enable SSH: (If using Raspberry Pi Imager) Go to advanced options before writing your OS image and enable SSH. You'll want to set a password for added security.
- Configure WiFi (via a file to write to the SD card): Before you write the OS image, add a file called "wpa_supplicant.conf" to the root of your SD card. This file will tell your Pi how to connect to your Wi-Fi network. The file should look something like this:
ctrl_interface=DIR=/var/run/wpa_supplicant GROUP=netdev
update_config=1
country=US # Replace with your country code

network={
    ssid="YOUR_WIFI_SSID"  # Replace with your Wi-Fi network name
    psk="YOUR_WIFI_PASSWORD"  # Replace with your Wi-Fi password
    key_mgmt=WPA2-PSK
}
- **Important: Replace "YOURWIFISSID" and "YOURWIFIPASSWORD" with your actual Wi-Fi credentials, and replace “US” with your country code (e.g., GB for the United Kingdom, CA for Canada).
- Write the OS: Now, use Raspberry Pi Imager or any other writing tool to write the OS to the microSD card.
5. Plugging In and Booting Up: Let the Games Begin!
Once the OS is written, eject the SD card from your laptop and carefully insert it into your Raspberry Pi 3.
- Plug in the power supply. Your Pi should boot up. If you're using a monitor, you'll see the startup sequence. If you're going headless, don't worry; the Pi is up and running, ready for adventure.
6. Finding Your Pi’s IP Address: The First Step to Remote Access
To connect to your Pi wirelessly, you need to know its IP address. There are a few ways to find this:
- Check Your Router: Log in to your router’s admin panel. You should see a list of connected devices, including your Raspberry Pi. Look for the device name "raspberrypi."
- Use an IP Scanner: Download and run an IP scanner on your laptop. There are many free options available. The scanner will scan your network and reveal the IP addresses of all connected devices.
- Ping The Pi: If you know the hostname of your Pi (default is usually "raspberrypi"), you can try to ping the Pi. Open a terminal or command prompt and type
ping raspberrypi.local.
7. SSH into Your Pi: Your Wireless Portal
Now that you have your Pi’s IP address, it's time to SSH in. This is your gateway to your Raspberry Pi.
- Open a terminal or command prompt on your laptop.
- Type
ssh pi@YOUR_PI_IP_ADDRESS, replacing "YOURPIIP_ADDRESS" with the IP address you found. For example,ssh pi@192.168.1.100. - The first time you connect, you’ll likely be asked if you want to trust the connection (type 'yes').
- Enter the password you set up during the Raspberry Pi Imager configuration (or the default password, which is "raspberry" if you haven't changed it).
- BAM! You're in! You've successfully SSHed into your Raspberry Pi wirelessly.
8. Updating Your Pi: Keeping Things Fresh
It's always good practice to update your operating system to the latest packages.
- Once SSH'd into your Pi, type:
sudo apt updatefollowed bysudo apt upgrade. This will update the packages. - You might need to reboot your Pi:
sudo reboot
9. Troubleshooting: When Things Go Awry
Let's address the elephant in the room: What if things don't go perfectly? Troubleshooting is a part of the process.
- Double Check the Wi-Fi credentials: The most common culprit is a typo in your
wpa_supplicant.conffile (we’ve all been there!). - Make sure the Wi-Fi network is working: Can your laptop connect to the same Wi-Fi network without issue?
- Check your router's settings: Some routers have security settings that might block new devices from connecting.
- If you still can’t connect, try using a monitor and keyboard to connect directly to the Pi and troubleshoot that way - this is helpful for seeing any error messages.
10. Advanced Tweaks and Customizations: Taking It Further
Once you've mastered the basics, you can explore more advanced configurations:
- Static IP Address: Assigning a static IP address to your Pi can make it easier to connect.
- Remote Desktop: Use a VNC (Virtual Network Computing) server or other remote desktop software to access your Pi's graphical interface wirelessly.
- Port Forwarding: If you want to access your Pi from outside your home network, you'll need to configure port forwarding on your router.
11. Security Considerations: Protecting Your Pi
Don't leave your Pi vulnerable! Here are some basic security tips:
- Change the default password: Immediately change the default password ("raspberry").
- Keep your software updated:
RASPBERRY PI - How to AutoConnect WIFI & view on Windows Laptop

By Saravanan AL RASPBERRY PI - How to AutoConnect WIFI & view on Windows Laptop by Saravanan AL
Connect Raspberry Pi to Laptop Wirelessly saMvidita

By SaMvidita Connect Raspberry Pi to Laptop Wirelessly saMvidita by SaMvidita
Connect raspberry pi 3 B with Ubuntu using wifiethernet - 2022

By Hitarth Kothari Connect raspberry pi 3 B with Ubuntu using wifiethernet - 2022 by Hitarth Kothari
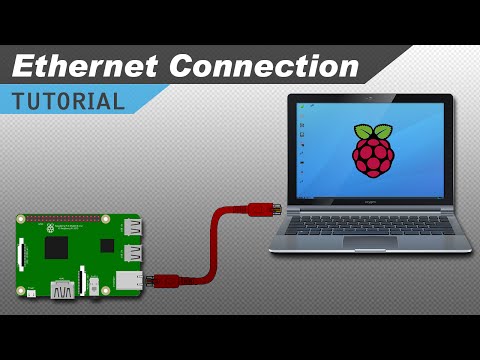
Title: How to Connect to a Raspberry Pi Directly with an Ethernet Cable
Channel: Circuit Basics
How to Connect to a Raspberry Pi Directly with an Ethernet Cable by Circuit Basics
Laptop Working
Raspberry Pi 3 to Laptop WiFi: The Astonishingly Simple Method!
We understand the frustration. You have a powerful, pocket-sized Raspberry Pi 3, bursting with potential, but tethered to the limitations of a wired connection. You yearn for wireless freedom, the ability to manage your Pi from anywhere in your home, to unleash its capabilities without the tangle of Ethernet cables. We've been there. And we've discovered a method so straightforward, so incredibly simple, that the only thing shocking will be how quickly you're up and running. Forget complicated configurations and hours of troubleshooting. This is the definitive guide to connecting your Raspberry Pi 3 to your laptop's WiFi, seamlessly and effortlessly.
Unveiling the Master Plan: Bridging the Gap
The core concept is elegant in its simplicity: we'll transform your laptop into a wireless access point and connect your Raspberry Pi 3 to it. This bypasses the need for a separate router and allows your Pi to access the internet through your laptop's connection. It's a clever workaround, and the beauty lies in its ease of execution. We’ll be using the built-in capabilities of your operating system, harnessing the power you already possess.
Prepping Your Arsenal: What You'll Need
Before diving in, gather your essential tools. This is a minimalist operation.
- A Raspberry Pi 3: The star of the show. Make sure it's powered on and has a microSD card with a recent Raspbian (or your preferred OS) image flashed. You'll need SSH access enabled, which is generally a good idea upon the first boot of your Raspberry Pi.
- A Laptop: Running Windows, macOS, or Linux. This is the wireless gateway.
- An Ethernet Cable (Optional, but Recommended initially): This is for the initial setup, giving the Raspberry Pi an internet connection so we can install necessary software. It’s not essential, but it makes the process significantly easier.
- Patience: This process is remarkably easy, but a little patience never hurts.
Phase 1: Laptop Configuration – Setting Up the Wireless Hotspot
The first step involves turning your laptop into a WiFi hotspot. The specific steps differ slightly depending on your operating system, but the underlying principles remain the same. Let's break it down:
- Windows: Navigate to Settings > Network & Internet > Mobile Hotspot. Toggle the "Share my Internet connection with other devices" switch to "On." Select your internet connection from the "Share my internet connection from" dropdown. You can customize the network name and password if you desire. This is your wireless access point, the lifeline to the internet.
- macOS: Open System Preferences > Sharing. Check the "Internet Sharing" box. In the "Share your connection from" dropdown, select your internet connection (usually Wi-Fi or Ethernet). In the "To computers using" list, select "Wi-Fi." Click "Wi-Fi Options…" to configure your network name and password. Finally, check the "Internet Sharing" box to activate the hotspot.
- Linux (General Guide – Specifics Vary by Distribution): Most modern Linux distributions offer built-in hotspot functionality. Consult your distribution's documentation for specific instructions. Typically, you'll find the option in your network settings. Enable wireless sharing and configure your SSID and password. If you are on a distribution such as Arch Linux, you might choose to manually configure this using tools such as
hostapdanddnsmasq.
Phase 2: Raspberry Pi Configuration – Connecting to Your Laptop's WiFi
With your laptop acting as a hotspot, we now turn our attention to the Raspberry Pi. Here's where the magic happens:
If you have Ethernet Access (Recommended): Plug the Ethernet cable from your laptop into your Raspberry Pi. SSH into your Raspberry Pi using its IP address. (You can find this IP address on your laptop's hotspot settings, or by looking at your router.)
Now that you are SSH'd into your Raspberry Pi, editing the
wpa_supplicant.conffile is key. The file will be located in the/etc/wpa_supplicant/directory. You can usesudo nano /etc/wpa_supplicant/wpa_supplicant.confto edit the file.Add the following lines to the end of the file, replacing
"YOUR_SSID"with your laptop's hotspot name and"YOUR_PASSWORD"with your hotspot password:network={ ssid="YOUR_SSID" psk="YOUR_PASSWORD" key_mgmt=WPA-PSK }Save the file and exit the editor (Ctrl+X, Y, Enter in nano).
Reboot your Raspberry Pi with
sudo reboot. After the reboot, your Raspberry Pi will connect to your laptop's WiFi automatically.
Without Ethernet Access: If you do not have Ethernet access, this is still possible. First, ensure that you have your Raspberry Pi's wireless module configured. You can either create a new image and set up the Wi-Fi connection settings during the initial flashing or manually set up the connection.
- On the microSD card, you will need to create a
wpa_supplicant.conffile in the root directory of the boot partition. The root partition should contain theconfig.txtfile. The file should contain the same information as stated in the Ethernet access section earlier. - Once the file is inserted, you can now insert the SD card into the Raspberry Pi and boot. The Raspberry Pi is designed to read the configuration files, and therefore, your changes should be applied automatically.
- On the microSD card, you will need to create a
Verifying the Connection: To confirm the connection, SSH into your Raspberry Pi again, if possible. Try pinging a known website (e.g.,
ping google.com). If you receive replies, your Raspberry Pi is successfully connected to the internet via your laptop's WiFi.
Phase 3: Unleash Your Pi's Potential
Now that your Raspberry Pi is wirelessly connected, the possibilities are virtually limitless. You can:
- Control your Raspberry Pi remotely: Access your Raspberry Pi from anywhere on your local network using SSH, VNC, or other remote access methods.
- Host a web server: Serve websites, applications, and other content from your Raspberry Pi.
- Run media servers: Stream your media libraries to other devices on your network.
- Develop IoT projects: Connect sensors, actuators, and other devices to your Raspberry Pi and control them wirelessly.
- Experiment with various applications: Set up network monitoring systems, home automation systems, or any other project that requires a network connection.
Overcoming Common Roadblocks
While this process is generally straightforward, you might encounter minor issues. Here's how to troubleshoot:
- Connection Fails: Double-check your hotspot settings (SSID and password) on both your laptop and your Raspberry Pi's
wpa_supplicant.conffile. Ensure your laptop's firewall isn't blocking the connection. Verify the Raspberry Pi has time to connect. - Limited Internet Access: Your laptop's internet connection is the determining factor. Make sure your laptop has a stable internet connection before connecting to the Raspberry Pi.
- IP Address Conflicts: Occasionally, IP address conflicts arise. If you suspect this, try assigning a static IP address to your Raspberry Pi in the
wpa_supplicant.conffile.
Beyond the Basics: Further Customization
Once you've mastered the fundamental connection, you can explore advanced options.
Static IP Addresses: Assigning a static IP address to your Raspberry Pi ensures consistent access. Modify the
wpa_supplicant.conffile and add the following lines, replacing the example values with your desired IP configuration:network={ ssid="YOUR_SSID" psk="YOUR_PASSWORD" key_mgmt=WPA-PSK ip_address=192.168.42.100/24 gateway=192.168.42.1 dns_nameserver=8.8.8.8 dns_nameserver=8.8.4.4 }MAC Address Filtering: Enhance security by filtering network access based on the Raspberry Pi's MAC address. This can be configured in your laptop's hotspot settings, if available, or within your router.
Automated Startup: Configure your Raspberry Pi's WiFi to connect automatically on boot. This is the default behavior when you set up the
wpa_supplicant.conffile correctly.
Conclusion: The Power is in Your Hands
You've done it! You've successfully connected your Raspberry Pi 3 to your laptop's WiFi, unlocking a world of wireless possibilities. The process, as you've witnessed, is remarkably simple, requiring minimal technical expertise. Embrace your newly liberated Pi, and start exploring the countless projects and applications that await. Consider this your springboard, the starting point for a journey of innovation and endless creation. The future of your Raspberry Pi is now, wirelessly connected and ready to take flight.
