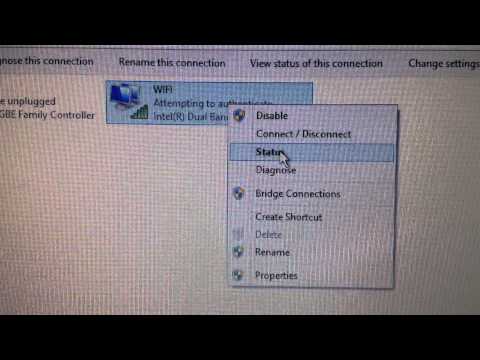
how to change wifi to manual on asus laptop
Title: How to change wifi setting from manual to automatic
Channel: manoj dasari
How to change wifi setting from manual to automatic by manoj dasari
Asus WiFi: Ditch Auto & Go Manual – The Secret Trick!
Unleash Your ASUS WiFi Potential: The Manual Configuration Magic
Ever feel like your ASUS router is playing a guessing game with your internet? Maybe it's buffering during crucial moments. Perhaps downloads are sluggish. What if I told you there's a secret weapon to optimize your WiFi? It involves ditching the “Auto” setting and embracing the power of manual configuration. Trust me, it's not as intimidating as it sounds! This article is your guide. We'll explore the benefits and steps. Therefore, prepare to become a WiFi wizard.
Why Auto Isn't Always Your Friend
The "Auto" setting on your ASUS router seems convenient initially. Consequently, it handles channel selection, bandwidth allocation, and other settings. However, it often makes suboptimal choices. Auto mode frequently relies on the router’s initial assessment. It doesn't dynamically adapt to changing network conditions. Your neighbor’s new WiFi setup can easily impact your connection. It could cause interference. Because of this, you might experience slow speeds and dropped connections. Manual configuration gives you more control. You can fine-tune your network for peak performance.
Decoding the WiFi Channels: Finding Your Sweet Spot
Let's dive into the core of manual configuration. The secret lies within the WiFi channels. These are the radio frequencies your router uses to broadcast its signal. Firstly, channels aren't created equal. Some are better than others, especially in crowded environments. Next, you need to identify the least congested channel in your area. How do you do that? You can use a WiFi analyzer app on your smartphone. Many free apps are available. They scan your local WiFi networks. This reveals the channels each network uses. Then, you’ll see which channels are least crowded.
The 2.4 GHz vs. 5 GHz Showdown: Bandwidth Battles
ASUS routers use both 2.4 GHz and 5 GHz bands. Each has its strengths. The 2.4 GHz band offers wider coverage. It penetrates walls better. However, it’s often more congested. Many devices, including older ones, operate on this band. In contrast, the 5 GHz band offers faster speeds. It experiences less interference. It usually offers better performance. Therefore, it's the ideal choice when possible. Consider the devices you use. Consider the tasks you perform. Choose the band that best suits your needs.
Bandwidth Bonanza: Fine-Tuning Your Channel Width
Let's talk about channel width. This setting determines how much bandwidth your router uses on a particular channel. Typically, the 2.4 GHz band utilizes 20 MHz channels. The 5 GHz band supports wider channels, such as 40 MHz, 80 MHz, and even 160 MHz. Wider channels provide greater throughput. They can handle more data simultaneously. However, wider channels also create more interference. This is especially true in crowded areas. Experiment with the channel width settings. Ultimately, find the optimal balance. Find the setting that maximizes your speed without sacrificing stability.
Digging into the Router's Interface: A Step-by-Step Guide
Now, let's get your hands dirty. You'll need to access your ASUS router's interface. This is usually done through a web browser. Open your browser and type in your router's IP address. Commonly it is 192.168.1.1 or 192.168.50.1. You can usually find this address on a sticker on your router. You'll be prompted for a username and password. Then, log in.
Navigating the Wireless Settings: Your Command Center
Once logged in, navigate to the "Wireless" or "WiFi" settings. Look for the "Channel" and "Channel Width" options. These are the keys to optimizing your network. First, select the least congested channel you identified earlier using your WiFi analyzer. Then, experiment with the best channel width. Test different settings. Observe their impact on your connection speed and stability. Save your changes. Restart your router to apply the new settings.
Security First: WPA3 and Advanced Configuration
While you're in the interface, ensure your WiFi is secure. Use the latest security protocol, WPA3. This provides robust protection against unwanted access. Also, explore other advanced settings. Some routers offer features like Quality of Service (QoS). QoS prioritizes certain types of traffic. This can improve the performance of gaming and streaming. Finally, experiment with these features. See how they boost your user experience.
Testing, Tweaking, and Triumph: The Path to WiFi Success
The journey to WiFi optimization is a continuous process. So, test your network speed regularly. Track the impact of changes. Tweak your settings. Remember, the optimal configuration depends on your environment. It depends on your devices. Most importantly, persist. It takes some time and effort. Eventually, you'll discover the perfect settings. Then, you will achieve the best WiFi performance. Congratulations, you're now a WiFi guru!
Unlock Your WiFi Password NOW! (Hidden Laptop Trick)Let's get this done!
Asus WiFi: Ditch Auto & Go Manual – The Secret Trick!
Hey everyone, Liam here, your friendly neighborhood tech enthusiast! We've all been there, right? Staring blankly at our Asus router's interface, wondering why the internet feels like it's perpetually running through molasses. We buy the latest, greatest, most expensive router, expecting blazing speeds, but often, we're left with frustratingly slow connections. The culprit? More often than not, it's that tempting little "Auto" setting on your Asus WiFi router. Today, we're going to pull back the curtain and reveal a surprisingly simple secret that can drastically improve your WiFi performance. We're talking about ditching the "Auto" and going manual! Trust me, it's easier than assembling IKEA furniture (and probably less frustrating too!).
Why Auto Isn't Always Your Best Friend
We're led to believe that "Auto" is the ultimate solution, the set-it-and-forget-it option. And in many cases, it is! But with WiFi, it's like having a self-driving car that makes decisions based on the weather, the traffic, and your mood – sometimes it gets it right, and sometimes… well, you end up circling the block endlessly. "Auto" on your Asus router often makes its decisions based on a variety of factors, including channel congestion and interference. While it tries to optimize, it might not always choose the best option for your specific environment.
Think of it this way: "Auto" is like letting a restaurant chef randomly select ingredients for your meal. Sometimes you get a culinary masterpiece; other times, you end up with a dish that's… questionable. That's because "Auto" doesn't know the unique specifics of your home network's needs. The walls in your house, the other WiFi networks nearby, and the devices you have connected all play a role in how your WiFi performs.
Understanding the WiFi Landscape: Your Home's Unique Ecosystem
Before we dive into the manual settings, let's quickly understand that WiFi is more than just magic signals bouncing through the air. It works on different channels within the 2.4 GHz and 5 GHz frequency bands. Imagine these channels as lanes on a highway. If everyone's using the same lane (channel), you get traffic jams (slow speeds). The 2.4 GHz band is like the multi-lane highway, with more channels, but lower speeds and further range. The 5 GHz band is a high-speed, shorter-range highway, typically less congested because it has more frequencies, allowing for more bandwidth.
Consider the fact that your neighbors' WiFi networks are also using these channels. If everyone's overlapping, it's a recipe for interference and slow internet speeds. Going manual allows you to select a channel that's less crowded, essentially allowing you to find the "fast lane" on the WiFi highway.
Getting Started: Accessing Your Asus Router's Settings
This is the easy part!
- Find Your Router's IP Address: Typically, you can locate this on a sticker on your Asus router or find it in your device's network settings (often under "Gateway" or "Router"). It usually looks something like 192.168.1.1 or 192.168.50.1.
- Open Your Web Browser: Type the IP address into your browser's address bar and hit Enter.
- Log In: You'll need your router's username and password. If you haven't changed them, they're usually on the router's sticker or in the documentation. (Default is widely known, so change it!)
- Navigate the Interface: The Asus interface can vary slightly depending on your router model, but look for a section related to "Wireless," "WiFi," or "Wireless Settings."
- Find the Channel Settings: This is where the magic happens! Within your wireless settings, you should find options for the 2.4 GHz and 5 GHz bands, including "Channel" and "Channel Bandwidth."
- Backup Your Configuration: Some routers allow you to export your current settings. Do this before you start, just in case.
The Secret Trick: Manual Channel Selection
Here's the deal: Instead of leaving the "Channel" setting on "Auto," we're going to select a specific channel.
The 2.4 GHz Band: A Little More Strategic
The 2.4 GHz band gets more crowded because it uses up to 13 channels, but only three actually overlap (channels 1, 6, and 11). This means you will need to test to find the most uncongested Channel. This does not mean that the signal will be weaker - it is simply less crowded.
- Use a WiFi Analyzer App: Before changing any settings, download a WiFi analyzer app on your smartphone or computer. There are many free options available (WiFi Analyzer for Android, WiFi Explorer for Mac, etc.). This app will scan your area and show you which channels your neighbors are using.
- Identify Clear Channels: Look for channels that have the least amount of activity from other networks. Ideally, you want to find a channel that no one is using, or one that only has weak signals.
- Select a Channel: In your Asus router's settings, manually select one of the clear channels you identified. Start with 1, 6, or 11 in the 2.4 GHz band. Do not use overlaps between those channels.
- Test and Adjust: Once you've made the change, test your WiFi speed by running a speed test (like speedtest.net) and browsing the web. If you don't see an improvement, try a different channel and repeat the test.
The 5 GHz Band: The Fast Lane Beckons!
The 5 GHz band offers more channels and less congestion, but it has a shorter range. This is the preferred band.
- Repeat the Analyzer Process: Use your WiFi analyzer app to scan for 5 GHz channels. This will show you many available channels. Choose the least congested.
- Channel Selection: Manually select a 5 GHz channel in your Asus router settings.
- Channel Bandwidth: Typically, you want to set the channel bandwidth to 80 MHz for optimal speed and responsiveness, but you should check your device capabilities.
- Test and Refine: As with the 2.4 GHz band, test your speed and performance after each change.
Beyond Channels: Other Settings to Tweak
Channel selection is the cornerstone of this trick, but other settings can also impact performance:
Channel Bandwidth
As mentioned, in the 5 GHz band, experiment with different channel bandwidths (40 MHz, 80 MHz, even 160 MHz if supported by your devices and router). Larger bandwidths can result in faster speeds, but can also increase interference.
Wireless Mode
Ensure your wireless mode is set to the optimal standard for your devices. Options include "802.11ac/ax," "802.11n," or "mixed" modes.
QoS (Quality of Service)
QoS prioritizes network traffic on your network. Using QoS is situational. If you are gaming or streaming, you can prioritize those activities to ensure the best experience.
Troubleshooting Common Issues
- No Improvement: If you don't see any improvements, it could be due to interference from other sources (microwaves, Bluetooth devices). Try moving your router to a different location or experimenting with different channels.
- Slow Speeds: Double-check your internet service provider (ISP) speed and your device's WiFi capabilities. Make sure other devices aren't consuming bandwidth.
- Intermittent Connection: Again, try different channels or bandwidths. Ensure your router's firmware is up-to-date.
The Proof is in the Pudding: My Personal Experience
I used to struggle with spotty WiFi in my home. My devices would randomly disconnect, and streaming videos was a constant headache. Then, I decided to ditch the "Auto" settings on my Asus router. I spent an hour using a WiFi analyzer, identifying the clearest channels, and manually configuring my router. The result? A dramatic improvement in speed and stability! No more buffering, no more dropped connections, and much happier family members!
The Perks of Manual Configuration
- Improved Speed and Stability: Less congestion equals faster speeds.
- Reduced Interference: By selecting less-used channels, you minimize interference from neighbors' networks.
- Enhanced Control: You're in charge! You understand exactly how your WiFi is configured.
The Downsides (Let's Be Honest)
- Requires Some Effort: Using the WiFi analyzer and manually configuring your router takes a bit of time.
- Potential Instability: If you choose a channel that's unexpectedly congested, you might experience connectivity issues. But hey, that's what troubleshooting is for!
Is it Worth the Effort? Absolutely!
We're talking about a simple tweak that can significantly improve your daily online experience. By taking a little bit of time to understand your WiFi environment and manually configuring your router, you can unlock the full potential of your internet connection.
Key Takeaways: Wrapping Up the Secret Trick
- Ditch the "Auto" Setting: Give your WiFi a chance to
How to Change IP Address on Windows 10 8 7 100 Helpful Change IP Address Windows 10 Easy
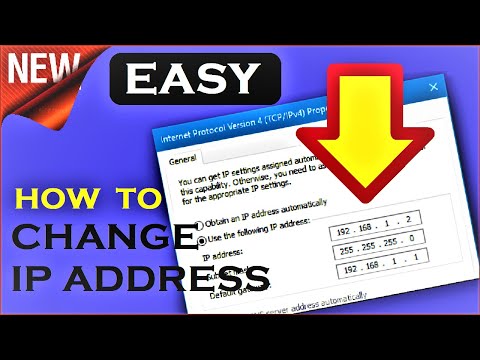
By How to Fix Your Computer How to Change IP Address on Windows 10 8 7 100 Helpful Change IP Address Windows 10 Easy by How to Fix Your Computer
How to Add Wireless Wifi Network Manually in Windows 10 PC or Laptop

By Discover You How to Add Wireless Wifi Network Manually in Windows 10 PC or Laptop by Discover You
Cara atasi WiFi tidak bisa connect di laptop not connected

By ijal tutorial Cara atasi WiFi tidak bisa connect di laptop not connected by ijal tutorial

Title: Cara Mengaktifkan Wifi di Laptop Windows ASUS LENOVO HP ACER AXIO TOSHIBA
Channel: Multi Talenta Tutorial
Cara Mengaktifkan Wifi di Laptop Windows ASUS LENOVO HP ACER AXIO TOSHIBA by Multi Talenta Tutorial
Laptop Wifi Hotspot
Asus WiFi: Ditch Auto & Go Manual – The Secret Trick!
We understand the frustration. You invest in a powerful Asus router, expecting blazing-fast WiFi, only to find speeds that are… well, less than optimal. The culprit? Often, it's the default "Auto" settings, which, ironically, can leave your connection feeling anything but automatic. Today, we're unveiling the secret trick to unlocking your Asus router's full potential: ditching the auto settings and embracing the power of manual configuration. Prepare to experience WiFi the way it was meant to be.
Why "Auto" Isn't Always Your Friend: The Hidden Bottlenecks
While seemingly convenient, "Auto" mode in your Asus router often makes assumptions, leading to compromises. The router continuously scans for the "best" channels and settings, influenced by a cacophony of surrounding WiFi signals, noise, and interference. This constant adjustment can result in unstable connections, fluctuating speeds, and ultimately, a sub-par experience. Think of it like this: a Formula 1 race car with a driver who keeps changing gears haphazardly. You won't win any races. The same applies to your WiFi.
"Auto" mode can get tripped up by dynamic environments. For instance, a neighbor’s new router, or a sudden burst of microwave activity, can force your router to switch channels, causing temporary disconnections or slower speeds. This unpredictability is precisely what we aim to eliminate.
Step 1: Accessing Your Asus Router's Control Panel – The Gateway to Optimization
Before we dive into the specifics, you'll need access to your Asus router's administration interface. This is typically accomplished by typing your router's IP address into a web browser. The default address is usually 192.168.1.1 or 192.168.50.1, but it might vary depending on your specific model. You can usually find this information printed on a sticker on the router itself.
Once you've entered the IP address, you will be prompted for your username and password. The default credentials are often "admin" for both. If you've changed them, please use your customized login details. If you've forgotten your credentials, consult your router's manual or perform a factory reset (usually initiated by holding a reset button for several seconds – consult your manual!).
Step 2: Scanning the Battlefield – Identifying the Best WiFi Channels
The foundation of a stable and speedy WiFi network is choosing the right channel. Think of each channel as a lane on a highway. If too many cars (WiFi signals) are crammed into the same lane, traffic slows down (your internet slows down). We utilize a tool that scans for the most congested channels. Here's how we approach this:
- Utilize WiFi Analyzer Tools: There are several free and readily available WiFi analyzer apps for both Android and iOS devices. These tools scan your surrounding WiFi environment and visualize which channels are the most crowded, and which are relatively clear. Popular options include WiFi Analyzer (Android) and NetSpot (macOS, Windows, and iOS).
- Observe the Channel Graphs: These tools present a visual representation of the WiFi channels in your area. Look for graphs that show the strength and frequency of each channel. Identify the channels with the least amount of activity.
- Consider Channel Overlap: Understand that 2.4 GHz channels overlap. Channels 1, 6, and 11 are non-overlapping. In a crowded environment, sticking to these channels can minimize interference. 5 GHz channels offer more non-overlapping options, providing cleaner bandwidth.
Step 3: Decoding the 2.4 GHz Band: Configuring Your Settings
Once you have determined the clearest channels, it is time to configure your router. Access the "Wireless" or "WiFi" settings section within your Asus router's control panel. Specifically, look for the settings that will let you customize your 2.4 GHz network.
- Channel Selection: Manually select the channel you've identified as the least congested, such as channel 1, 6, or 11. Doing so will drastically reduce congestion on your network.
- Channel Bandwidth: Set the channel bandwidth to 20 MHz if your devices support 2.4 GHz only. For wider compatibility, opt for 20/40 MHz. However, be aware that the 40 MHz setting can increase interference, especially in densely populated areas, if you have a mixed environment with older hardware.
- Wireless Mode: Select the most advanced wireless mode supported by your router and devices, such as 802.11g/n/ax, or a combination of options. This ensures compatibility while maximizing performance.
Step 4: Unleashing the Power of the 5 GHz Band
The 5 GHz band frequently offers a more pristine environment compared with 2.4 GHz. It features more channels and less congestion. Here’s how we optimize the 5 GHz band:
- Channel Selection: Again, use your WiFi analyzer tool to identify the least crowded channels in the 5 GHz band. The 5 GHz band offers a larger selection of channels, so you're more likely to find a clear one.
- Channel Bandwidth: Maximize the channel bandwidth, usually at 80 MHz or 160 MHz, for the fastest possible speeds (if supported by your devices and router). Wider bandwidth allows for more data to be transmitted simultaneously.
- Control Channel: Consider setting the control channel to "Auto" for the 5 GHz band. Some users report better performance with manual selections, but in general, "Auto" usually works well.
Step 5: Fine-Tuning Advanced Settings: Elevating Performance Further
Beyond the core settings, several advanced options can further optimize your WiFi. Navigate through your router settings and consider these configurations:
- Airtime Fairness: This feature prioritizes devices, giving those with fast connections priority over older, slower ones. To boost performance, you can often enable this setting. It can increase overall WiFi speed.
- WMM (Wi-Fi Multimedia): Ensure WMM is enabled. This setting prioritizes multimedia traffic, which is perfect for streaming videos, online gaming, and video calls.
- Transmit Power: Adjust the transmit power to match your needs. This controls the signal range. If you have a small home, reducing the transmit power can minimize unnecessary interference from your router reaching outside your home. Experiment with medium power.
- Enable Beamforming (If Available): Beamforming focuses the WiFi signal directly toward the devices using it. This can increase signal strength and stability, especially for newer devices.
Step 6: The Secret Sauce: Regularly Monitoring and Adjusting
Configuring your router is not a one-time fix. The WiFi landscape constantly changes. Regularly monitor your network performance and re-evaluate your settings every few months, or whenever you notice a decline in speed or stability.
- Speed Tests: Regularly perform speed tests using websites like Speedtest.net or fast.com to assess your connection speed. Compare the results to your internet plan's advertised speeds.
- Ping Tests: Use the command prompt or terminal to perform a ping test to determine latency and stability. Ping a website or your router's IP address. Look for low latency values (lower is better) and minimal packet loss.
- WiFi Analyzer Re-assessment: Use your WiFi analyzer tool periodically (every few months) to reassess channel congestion. The best channels might change over time.
Step 7: Troubleshooting Common Issues: The Path to Seamless Connectivity
Even with meticulous configuration, issues can arise. Here's how to troubleshoot:
- Device Compatibility: Ensure your devices support the WiFi standards (802.11ac or 802.11ax) used by your router. Older devices may not get the fastest speeds.
- Obstructions: Physical obstructions like walls, mirrors, and metal objects can interfere with WiFi signals. Position your router in a central location, away from these impediments.
- Distance: The further a device is from your router, the weaker the signal will be. Consider a WiFi extender if needed.
- Interference: Other devices (microwaves, Bluetooth devices) can generate interference. Try turning off these devices temporarily to see if it improves performance.
The Manual Advantage: Experience the Difference
By taking control of your Asus router's settings and ditching the defaults, you unlock the potential for a faster, more stable, and more reliable WiFi experience. This manual approach gives you the power to customize your network to fit your specific needs. Say goodbye to buffering and hello to seamless streaming, lag-free gaming, and blazing-fast downloads. The secret trick? It's not a trick at all – it's simply the intelligence to take charge, and we've given you the tools.
