dns server not responding windows 10 wifi hp laptop
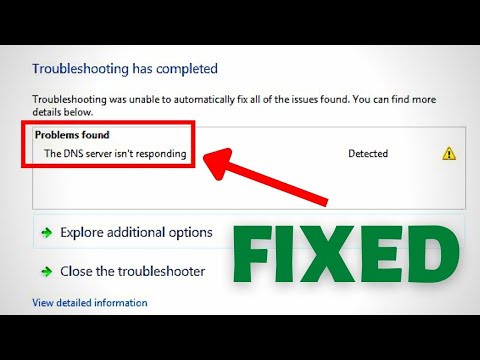
Title: Problem Found the DNS Server isn't responding Error on Windows 107 SOLVED
Channel: FIXsage
Problem Found the DNS Server isn't responding Error on Windows 107 SOLVED by FIXsage
HP Laptop Wifi Nightmare? DNS Server Refusal on Windows 10 FIXED!
HP Laptop Wifi Woes? Conquer the DNS Server Refusal! Your Windows 10 Solution
Have you ever wrestled with a Wi-Fi connection on your HP laptop only to be met with the dreaded "DNS server not responding" error? Frustrating, isn't it? It can feel like your internet is stuck in slow motion. Thankfully, there's light at the end of the tunnel. This guide will navigate you through the steps to banish that digital roadblock.
Understanding the DNS Devil: Why is Your Internet Ignoring You?
Before we dive into solutions, consider what's happening. DNS, or Domain Name System, acts like the internet's phonebook. It translates website addresses (like google.com) into numerical IP addresses that your computer understands. The "DNS server not responding" message implies your computer cannot find this phonebook. Consequently, it cannot connect to the websites you're trying to access. This often stems from a glitch in your network settings, a conflicting IP address, or even a problem with your router.
Troubleshooting Time: Unlocking Your Connection
Let’s get to work. We need to systematically troubleshoot your connection. First, we must confirm your connection. Does your laptop connect to other Wi-Fi networks? If it does, the problem may lie with your home network. If other devices in your home can connect flawlessly, then, the issue likely resides solely with your HP laptop.
Step 1: The Simple Reboot – Often Overlooked, Always Helpful
Firstly, start with the simplest solution. Restart your laptop entirely. Also, reboot your router. Often, these quick resets solve the bulk of connectivity issues. After the reboot, try connecting to your Wi-Fi again. You could be surprised at how often this fixes the problem. If your Wi-Fi is still struggling, move on to the following steps.
Step 2: Flushing the DNS Cache – Clearing the Digital Clutter
Your computer saves DNS information to speed up browsing. This cache can sometimes become corrupted. To clear it, follow these steps:
- Search for "cmd" in the Windows search bar.
- Right-click on "Command Prompt" and select "Run as administrator."
- In the command prompt, type
ipconfig /flushdnsand press Enter. - You should see a message confirming the DNS resolver cache was flushed.
Now, attempt to connect to a website. Hopefully, it works again.
Step 3: Releasing and Renewing Your IP Address – A Fresh Start for Your Network
Sometimes, your computer has an incorrect IP address. You can fix this using the command prompt:
- Open the command prompt as administrator again.
- Type
ipconfig /releaseand press Enter. This releases your current IP address. - Then, type
ipconfig /renewand press Enter. This requests a new IP address.
Test your connection after this step.
Step 4: Switching DNS Servers – Exploring Alternative Phonebooks
Your computer usually uses your internet service provider's (ISP) DNS servers. However, these can sometimes be faulty. You can switch to public DNS servers like Google's or Cloudflare's. To do this:
- Right-click on the Wi-Fi icon in the system tray and select "Open Network & Internet settings."
- Click "Change adapter options."
- Right-click on your Wi-Fi adapter and select "Properties."
- Select "Internet Protocol Version 4 (TCP/IPv4)" and click "Properties."
- Select "Use the following DNS server addresses."
- Enter Google's DNS servers: 8.8.8.8 as the Preferred DNS server and 8.8.4.4 as the Alternate DNS server. Alternatively, use Cloudflare’s: 1.1.1.1 and 1.0.0.1
- Click "OK."
Try browsing again.
Step 5: Driver Updates – Ensuring Compatibility
Outdated network drivers can also cause DNS issues. Therefore, let's verify the drivers.
- Press the Windows key + X and select "Device Manager."
- Expand "Network adapters."
- Right-click on your Wi-Fi adapter and select "Update driver."
- Choose "Search automatically for drivers."
- If updates are available, install them.
- Restart your computer after updating.
Step 6: Network Troubleshooter – Windows' Built-in Assistant
If the above steps don't work, Windows has a built-in troubleshooter.
- Right-click on the Wi-Fi icon in the system tray.
- Select "Troubleshoot problems."
- Follow the on-screen instructions.
Step 7: Hard Resetting Your Router – A Deeper Clean
If all else fails, consider resetting your router. This is a more comprehensive approach. Locate the reset button on your router. It's usually a small button you need to press with a paperclip or similar object. Press and hold the button for about 30 seconds. This will restore your router to its factory settings. Afterwards, you will often need to reconfigure your Wi-Fi password.
Conclusion: Reclaiming Your Online Experience
Dealing with HP laptop Wi-Fi problems is frustrating. However, with these troubleshooting steps, you can often fix the "DNS server not responding" error. You can regain your internet access. Remember to work through the steps systematically. In addition, note down which steps you've taken. You'll have a better chance of quickly resolving the issue. Hopefully, you're now connected to the internet once more. Enjoy your online experience!
Laptop WiFi Crashing? This ONE Trick Fixes It INSTANTLY!HP Laptop Wifi Nightmare? DNS Server Refusal on Windows 10 FIXED!
Ah, the dreaded "No internet, secured" message! It’s a digital slap in the face, isn't it? One minute you’re ready to binge-watch your favorite show, the next, poof—connection gone. If you're a fellow HP laptop owner battling a DNS server refusal issue on Windows 10, you're in the right place. We've all been there, staring blankly at that blinking Wi-Fi symbol, feeling like a castaway on a digital desert island. But fear not, because we're going to get you back online! Think of this as your personal survival guide, your lighthouse in the storm of lost internet connectivity.
The Woe of the Wireless World: Understanding the DNS Dilemma
First things first, let's decode this digital jargon. DNS, remember this acronym – Domain Name System – is like the internet's phonebook. When you type in a website address (like, you know, www.google.com), your computer needs to translate that into a numerical IP address (a bit like a house number) to actually find the website. The DNS server is the guy who does that translation. If your DNS server refuses to play ball, you get the dreaded "DNS Server Refusal" error. It’s like trying to call a friend and the operator just hangs up on you. Frustrating, to say the least!
Is It Really Your Laptop? Troubleshooting the Obvious Suspects
Before we dive into the nitty-gritty fixes, let’s eliminate the low-hanging fruit. Sometimes, the solution is embarrassingly simple.
- Restart, Restart, Restart! It sounds cliché, but a good ol' restart of your laptop (and your router, while you're at it) can work wonders. Think of it as a digital reset button. Sometimes, your laptop just needs a nap.
- Check the Router's Lights: Are they all blinking green? Or are there angry red lights glaring back at you? This can indicate a router problem, rather than a laptop one.
- Other Devices Working? See if your phone, tablet, or another computer can connect to the internet. If they can, then we know the problem is likely your HP laptop. If not, the issue lies somewhere within your network or your ISP.
Diving Deep: Potential Causes for DNS Server Refusal
If the basic troubleshooting didn't do the trick, we're going to need to dig a little deeper. This could be due to a few different things:
- Corrupted Network Drivers: These are the software programs that allow your laptop to communicate with your Wi-Fi adapter. If they’re outdated, corrupted, or just plain grumpy, they can cause connection problems.
- Incorrect DNS Server Settings: Your laptop might be trying to use a DNS server that's not working or isn't correctly set up. It's like trying to use a faulty map to get to your destination.
- Network Adapter Issues: Sometimes, the network adapter itself (the part that actually connects to the Wi-Fi) might be malfunctioning.
- Firewall Interference: Your Windows Firewall (or third-party security software) could be blocking your internet connection, mistaking it for a threat.
The Fix is In: Step-by-Step Solutions for DNS Server Refusal on Your HP Laptop
Alright, let's get down to business. Here's the step-by-step guide you've been waiting for:
1. Flush the DNS Cache: A Digital Spring Cleaning
Your computer keeps a temporary record of DNS lookups to speed things up. This is known as the DNS cache. Sometimes, this cache gets clogged with outdated information, leading to errors. Here's how to flush it:
- Open Command Prompt: Type "cmd" in the Windows search bar and right-click on "Command Prompt" (the one that shows up) and select "Run as administrator." This gives you the necessary permissions.
- Type the Command: In the Command Prompt window, type
ipconfig /flushdnsand press Enter. - Success! You should see a message confirming that the DNS resolver cache was successfully flushed.
2. Changing Your DNS Server: A New Route
Sometimes, the problem isn't your computer, but the DNS server it's using. Let's try switching to a public DNS server, like Google's or Cloudflare's.
- Open Network Connections: Type "network connections" in the Windows search bar and open the one that comes up.
- Right-click Your Wi-Fi Connection: Select "Properties."
- Select "Internet Protocol Version 4 (TCP/IPv4)": Click "Properties."
- Use the Following DNS Server Addresses: Select the "Use the following DNS server addresses" option.
- For Google DNS:
- Preferred DNS server: 8.8.8.8
- Alternate DNS server: 8.8.4.4
- For Cloudflare DNS:
- Preferred DNS server: 1.1.1.1
- Alternate DNS server: 1.0.0.1
- For Google DNS:
- Click "OK": Restart your computer, and test your connection.
3. Updating Your Network Adapter Driver: Keeping Things Up-to-Date
Outdated drivers can cause all sorts of issues. Let's get the latest ones:
- Open Device Manager: Right-click the Windows Start button and select "Device Manager."
- Expand "Network Adapters": You'll see a list of your network adapters.
- Right-click Your Wi-Fi Adapter: (It will have "Wireless" or "Wi-Fi" in the name) and select "Update driver."
- Choose "Search automatically for drivers": Windows will search for the latest drivers online and install them.
- Restart Your Laptop: Test your internet connection
4. Resetting Your Network Settings: A Fresh Start
Windows 10 has a handy tool to reset your network settings to their default values. It's like hitting the "undo" button for your network configuration.
- Open Settings: Click the Windows Start button and click the gear icon (Settings).
- Go to "Network & Internet": Click the "Network & Internet" section.
- Scroll Down To "Network Reset": You will find it. Click on it.
- Click the "Reset Now" Button: You will be prompted with a warning. Read it, understand it, confirm it, and hit reset.
- Restart Your Laptop: The laptop will automatically shut down and restart.
5. Checking Your Firewall: Ensuring Smooth Sailing
Sometimes, your firewall can be a bit overzealous. Let's make sure it's not blocking your internet connection.
- Open Windows Defender Firewall: Type "firewall" in the Windows search bar and open "Windows Defender Firewall."
- Allow an App or Feature Through Windows Defender Firewall: Click on the option on the left-hand side.
- Look for the App: Scroll through the list and find your browser or internet-related application. Make sure both "Private" and "Public" are checked.
- Restart your laptop: and test your connection.
Beyond the Basics: Additional Troubleshooting Tips
- Check for Malware: Run a full scan with your antivirus software. Malware can sometimes interfere with your internet connection.
- Disable Proxy Settings: If you're using a proxy server, try disabling it. Sometimes, these settings can cause conflicts.
- Contact Your ISP: If none of these solutions work, it’s time to call in the professionals. Your internet service provider (ISP) might be experiencing issues on their end.
6. The Joy of a Fixed Internet Connection!
You did it! Hopefully, one of these steps has resolved your DNS server refusal issue. Now, time to get back to the things that matter: streaming your favorite shows, catching up on your emails, or simply browsing the web without any annoying interruptions.
Concluding Our Journey: Getting Back Online
We understand how frustrating it is when your HP laptop's Wi-Fi gives you the cold shoulder. It’s like being cut off from the world. But remember: troubleshooting is often a process of elimination. We’ve tried different approaches, from simple restarts to more complex driver updates settings. We hope one the solution has succeeded. Keep calm, keep trying, and you’ll conquer this digital challenge!
Frequently Asked Questions (FAQs)
1. Why am I getting a "DNS Server Refusal" error on my HP laptop?
The most common reasons include incorrect DNS server settings, outdated or corrupted network drivers, firewall issues, or problems with the DNS server itself. We’ve covered all of these in detail above!
2. Is it possible for the DNS server issue to be caused by my router?
Yes, absolutely. Your router is a key piece of the puzzle. Try restarting your router. You can also try changing the DNS settings on your router instead of your HP laptop.
**3. Does flushing the DNS cache erase all my internet history
Is Your WiFi MIA? Find Your Laptop's Hidden Wireless Card NOW!How to Fix DNS Server Not Responding On Windows 111078 Wi Fi or Ethernet Connection 2023

By EasyTechGeek How to Fix DNS Server Not Responding On Windows 111078 Wi Fi or Ethernet Connection 2023 by EasyTechGeek
The DNS Server isn't Responding - Cara Mengatasi Tidak Bisa Konek Internet

By Techdidak The DNS Server isn't Responding - Cara Mengatasi Tidak Bisa Konek Internet by Techdidak
Fix DNS Server Isnt Responding Error on Windows 107 Quick Solution

By Learn Infoxta Fix DNS Server Isnt Responding Error on Windows 107 Quick Solution by Learn Infoxta
Title: How To Fix Wifi No Internet Access Fix DNS Server Is Not Responding
Channel: AP CHANNEL ASLI
How To Fix Wifi No Internet Access Fix DNS Server Is Not Responding by AP CHANNEL ASLI
My Laptop Work
HP Laptop Wifi Nightmare? DNS Server Refusal on Windows 10 FIXED!
Have you found yourself staring at your HP laptop, the WiFi icon stubbornly displaying "No Internet," while the world of online connectivity remains frustratingly out of reach? The dreaded "DNS Server Refusal" error message on the Windows 10 operating system, particularly on HP laptops, has plagued countless users, casting a pall over productivity, entertainment, and the seamless flow of digital life. We understand your frustration. We also understand the complexities lurking beneath the surface of this common issue. This guide is designed to arm you with the knowledge and practical solutions to vanquish this WiFi demon for good. Prepare for a comprehensive, step-by-step journey to reclaim your online freedom.
Unraveling the Mystery: What is a DNS Server Refusal?
Before we dive into solutions, let's briefly clarify the core problem. A DNS (Domain Name System) server acts as the internet's phonebook. It translates human-readable website names (like google.com) into numerical IP addresses that your computer uses to actually find and connect to the right place. When your HP laptop encounters a "DNS Server Refusal," it means that your computer is attempting to ask a DNS server for the IP address of a website, and the DNS server is denying that request. This denial prevents your laptop from connecting to the internet, even if you’re connected to a WiFi network. Several factors can trigger this refusal.
Troubleshooting Steps: Conquering the DNS Server Refusal
We offer several tested solutions to remedy this disruptive problem. Remember to try these, one at a time, and restart your HP laptop after each significant change to see if the issue resolves.
1. The Simple Reset: Restarting Your Devices
Before delving into complex configurations, a straightforward restart often provides a quick fix.
- Restart Your HP Laptop: This clears temporary files and can resolve minor software glitches.
- Restart Your Router/Modem: Unplug the power cable from your router and modem. Wait for at least 30 seconds to a minute. Plug them back in, waiting for them to fully boot up and establish an internet connection.
Often, this basic step is enough to clear temporary hiccups that might have caused the DNS issue.
2. Flushing the DNS Cache: A Digital Spring Cleaning
Your computer stores a cache of DNS information to speed up website loading times. Sometimes, this cache can become corrupted, leading to errors. Wiping the cache is a common remedy to DNS issues.
Open Command Prompt as Administrator: Search for "Command Prompt" in the Windows search bar. Right-click on "Command Prompt" and select "Run as administrator."
Execute the following commands sequentially: Type each command and press Enter after each one:
ipconfig /flushdns– This command clears the DNS resolver cache.ipconfig /registerdns– This command refreshes the DHCP settings.ipconfig /release– This command releases the IP address.ipconfig /renew– This command acquires a new IP address.netsh winsock reset– This command resets the Winsock catalog, which can help resolve network-related issues.
Restart Your HP Laptop: After executing these commands, restart your laptop to ensure the changes take effect.
3. Changing Your DNS Server Addresses : A Strategic Shift
Your computer usually uses your internet service provider’s (ISP) DNS servers. However, these servers can sometimes be unreliable or overloaded. You can manually configure your HP laptop to use public DNS servers known for their speed and reliability. Google Public DNS and Cloudflare are popular and reliable alternatives.
Open Network Connections: Right-click on the WiFi icon in your system tray (bottom right corner of your screen) and then select "Open Network & Internet settings."
Change adapter options. Select "Change adapter options."
Select Your WiFi Network Adapter: In the Network Connections window, locate your WiFi adapter (usually labeled "Wi-Fi"). Right-click on it and select "Properties."
Select Internet Protocol Version 4 (TCP/IPv4): In the Properties window, double-click on "Internet Protocol Version 4 (TCP/IPv4)."
Use the following DNS server addresses: Select "Use the following DNS server addresses." Then, enter the following:
- Google Public DNS:
- Preferred DNS server:
8.8.8.8 - Alternate DNS server:
8.8.4.4
- Preferred DNS server:
- Cloudflare DNS:
- Preferred DNS server:
1.1.1.1 - Alternate DNS server:
1.0.0.1
- Preferred DNS server:
- Google Public DNS:
Validate Settings on Exit: Check the box labelled "Validate settings on exit."
Click "OK" on all windows: Close all the windows and restart your HP laptop.
4. Updating Network Adapter Drivers: Keeping Software Fresh
Outdated network adapter drivers can often cause connectivity problems. Keeping your drivers updated is crucial for a smooth and reliable WiFi experience.
- Open Device Manager: Right-click the Windows Start button and select "Device Manager."
- Expand Network Adapters: In the Device Manager window, expand the "Network adapters" category.
- Update Your WiFi Adapter Driver: Right-click on your WiFi adapter (e.g., "Intel Wireless-AC 9560") and select "Update driver."
- Search Automatically: Choose "Search automatically for drivers." Windows will search for the latest driver updates online.
- If no updates are found: Go to your HP laptop's support page and download the latest driver for your specific model. Install it manually.
- Restart Your Laptop: After updating the driver, restart your HP laptop.
5. Reviewing Firewall Settings: Preventing Unwanted Blockages
Sometimes, your firewall settings can inadvertently block your laptop's access to DNS servers.
Open Windows Defender Firewall: Search for "Windows Defender Firewall" in the Windows search bar and open it.
Allow a program or feature through Windows Defender Firewall: Select "Allow an app or feature through Windows Defender Firewall."
Check Network Discovery and File and Printer Sharing: Ensure that "Network Discovery" and "File and Printer Sharing" are checked for both "Private" and "Public" networks. Click "OK."
Advanced Settings: Click on "Advanced settings" on the left panel of the Windows Defender Firewall window.
Outbound Rules: In the left panel within the Advanced Security window, select "Outbound Rules."
Check for Blocked DNS Rules: Examine the list of outbound rules. Look for any rules that might be blocking DNS traffic. If you find such a rule, and it is related to DNS, right-click on it and select "Disable Rule" or "Delete Rule."
Restart Your Laptop: After reviewing and adjusting your firewall settings, restart your HP laptop.
6. Checking for Malware: A Security Scan
Malware can sometimes interfere with your network settings and cause DNS issues. Running a thorough scan is a good idea.
- Run a Windows Security Scan: Windows 10 includes a built-in security scanner. Search for "Windows Security" in the Windows search bar and open it. Then click on "Virus & threat protection."
- Run a Quick Scan or Full Scan: Run a "Quick scan" or a "Full scan" to check for malware and other security threats.
- Consider a Third-Party Antivirus: If you use a third-party antivirus program, run a scan with that program as well.
- Remove Infected Files: If any threats are detected, follow the antivirus program's instructions to remove them.
- Restart Your Laptop: Restart your HP Laptop.
7. Resetting Network Settings: A Nuclear Option
If all else fails, you can reset your network settings to their default configuration. Be aware that this will erase all your saved WiFi passwords and custom network configurations. This is a last resort.
- Open Network & Internet Settings: Right-click on the WiFi icon in your system tray and select "Open Network & Internet settings."
- Network Reset: Scroll down to the bottom and select "Network reset."
- Reset Now: Click the "Reset now" button.
- Confirm: Confirm the reset. Your computer will restart.
- Reconnect to your WiFi Networks: After your computer restarts, you will need to reconnect to any existing WiFi networks by entering their passwords.
8. Examining Your Router's Configuration: Another Possible Culprit
While the problem is often with your HP laptop, sometimes the router itself is the source of the DNS issues.
- Access Your Router's Configuration Page: Open a web browser and type your router's IP address into the address bar (e.g.,
192.168.1.1or192.168.0.1). You can find this address in your router's documentation or by searching for "what is my router's IP address" online. - Log In: Enter your router's username and password (these are usually found on a sticker on the router itself or in its documentation).
- Check DHCP Settings: Look for the DHCP (Dynamic Host
