how to make laptop as wifi hotspot windows xp
Title: How to make your laptop to a wifi hotspot on windows xp788.1
Channel: Arafatur Rahman Shimul
How to make your laptop to a wifi hotspot on windows xp788.1 by Arafatur Rahman Shimul
Turn Your XP Laptop into a WiFi Hotspot: The Easiest Trick EVER!
Unleash the Wireless: Your XP Laptop's Secret Hotspot Power-Up!
Remember those trusty XP laptops tucked away in the attic? They might just be holding onto a superpower. Believe it or not, you can transform that vintage machine into a fully functional WiFi hotspot. Seriously! It's a bit of retro magic, and it’s simpler than you might imagine.
Dust Off the Past: Why Bother with an XP Hotspot?
Why even consider this in the age of smartphones and lightning-fast internet, you may ask? Well, consider options. Perhaps you’re traveling and need a secure, dedicated connection. Alternatively, you require a stable line for your older devices. More importantly, it is a fun, nifty project. It is a way to breathe new life into an old tech. Think about the possibilities!
Getting Started: The Hidden Tools Within
First things first, let's get our ducks in a row. You'll need your XP laptop, of course. Then, ensure it has a working wireless network adapter. This is usually built-in. But, if not, you can get a USB adapter. Next, you will require an internet connection. This can come from an Ethernet cable. Also, the older machines have a dial-up connection. However, that is not a good choice. Now, let's delve into the slightly more complicated process.
The Magic Touch: Configuring Your XP Hotspot
The core of the operation involves a built-in feature. This is called "Internet Connection Sharing" or ICS. It might seem a little technical. But trust me, it's remarkably straightforward. Here's how to get it going.
- Connect to the Internet: Plug an Ethernet cable into your XP laptop, or ensure your existing internet connection is active.
- Open Network Connections: Find this within your Control Panel. You'll see all the network connections.
- Select Your Ethernet Connection: Right-click on your Ethernet connection. Click on "Properties".
- Sharing Tab: Look for the "Sharing" tab in the properties window.
- Enable Sharing: Check the box that says "Allow other network users to connect through this computer's Internet connection." A drop-down menu likely appears. Select your wireless network adapter.
- Create a Password: This part's optional. However, it’s HIGHLY recommended. Select a password to secure your network.
- Apply and Close: Click "Apply" and then "OK". Your XP laptop is now a WiFi hotspot!
Troubleshooting: Smoothing the Rough Edges
Sometimes, things don't go perfectly. So, if you run into issues, don't panic. First, double-check all steps. Make sure that the correct network adapters are selected. Ensure you have the correct password. For instance, firewalls can sometimes interfere. Temporarily disable these to see if it solves the issue. Also, sometimes a simple restart works wonders. If all else fails, consult online forums. Many helpful resources exist.
Testing and Refining: Ensuring a Smooth Connection
Before you start, test your new hotspot. Grab your phone or another device. Try connecting to the XP laptop's WiFi network. Then, browse the web. Speed tests also help. The performance might not match modern standards. Nevertheless, it should suffice for most basic tasks. You might need to adjust settings. For instance, you can modify the channel selection. Moreover, you can optimize the performance.
Beyond the Basics: Advanced Tweaks for the Tech-Savvy
Want to get even geekier? You can configure the hotspot’s IP address range. Likewise, you can adjust the wireless security settings. Explore different encryption methods. However, keep in mind. Your XP laptop may not support the latest security protocols. It's a fun way to learn more about networking. Plus, it’s a handy skill.
The Legacy Lives On: Embracing the Old, Enjoying the New
So there you have it! You've successfully revived your XP laptop. You turned it into a functioning WiFi hotspot. It’s proof that old tech can still surprise us. Embrace the past, enjoy the now. Remember. This seemingly simple trick unlocks a world of possibilities. It gives your old machine a new purpose.
JMU WiFi: Laptop Connection Secrets Unlocked!Turn Your XP Laptop Into a WiFi Hotspot: The Easiest Trick EVER!
Hey tech enthusiasts and fellow wanderers in the digital realm! Ever found yourself stranded with an old XP laptop, yearning for a WiFi connection to share with your phone, tablet, or even a friend’s device? Picture this: You're stuck in a hotel room with terrible internet or maybe you're just trying to save money. Or perhaps you're simply a retro tech lover like myself. Well, dust off that trusty old relic because we're about to resurrect it from the digital graveyard and teach it a new, incredibly useful trick. We’re going to transform it into a WiFi hotspot – and trust me, it's easier than frying an egg (or, let's be honest, easier than trying to understand some of those convoluted tech tutorials!).
1. Why Bother with an XP Hotspot in 2024?
Before we dive in, you might be asking, "Why even bother? Isn't XP ancient history?" Absolutely! But here's the thing: even old technology can be surprisingly useful. Think of it like a vintage car – it might not be the fastest or the most fuel-efficient, but it has character and can still get you where you need to go. In this case, your XP laptop, acting as a hotspot, can be a lifesaver in various situations:
- Emergency Connectivity: Power outage? Out in the sticks? Your XP machine can be your backup plan in a pinch, connecting you to the internet when other options fail.
- Sharing with Guests: Got visitors who need internet access? Boom! Instant WiFi for everyone.
- Saving Money: Avoid those pesky hotel WiFi fees (or those exorbitant data plans!).
- Fun and Nostalgia: Let's be honest, it's just cool to give an old piece of tech a new lease on life.
- Security Conscious In the past, public wifi networks were not so secure. You are more in control of an XP enabled hotspot, which offers better protection.
2. The Tools You'll Need: Simple and Straightforward
The beauty of this trick is that it requires minimal tools and no expensive software. Here’s your checklist:
- An XP Laptop: Obviously! Make sure it’s in working order and has a network adapter.
- An Ethernet Cable (Optional): If you want to connect your XP laptop to the internet via a wired connection (like your router), you’ll need one.
- Patience (A Little Bit): We promise it’s easy, but sometimes things take a minute, just like trying to find the TV remote.
3. Diving In: The Step-by-Step Guide
Now for the fun part! We’ll walk through the process of creating your WiFi hotspot in easy-to-understand steps. Don't worry, no complex tech jargon here – think of it as a simple recipe with no hard-to-find ingredients.
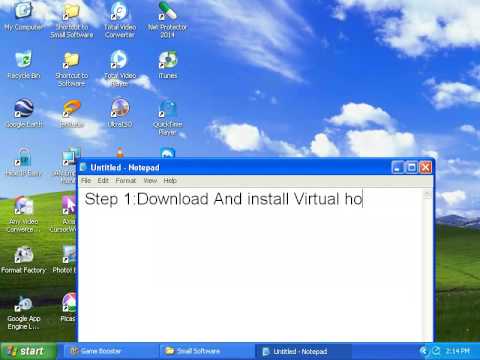
Step 1: Connecting to the Internet (If You Need To)
If your XP laptop already has a direct internet connection (through an Ethernet cable), skip this step. However, most people use a wireless connection.
- Connect your XP laptop to the internet by an Ethernet Cable, or by wireless: If using wireless, connect to your regular WiFi network.
Step 2: Accessing Network Connections
- Navigate to the "Control Panel" on your XP laptop. It’s tucked away in the Start Menu.
- Find "Network Connections" – you might have to click "Network and Internet Connections" first to find it.
Step 3: Setting Up Internet Connection Sharing (ICS)
This is the core of the magic.
- Right-click on the network connection you are using to access the internet (e.g., "Local Area Connection" if you're using an Ethernet cable or your wireless network connection).
- Select "Properties".
- Click on the "Advanced" tab.
- Under "Internet Connection Sharing," check the box that says "Allow other network users to connect through this computer's Internet connection."
- If you have multiple network adapters, there might be a drop-down menu. Choose the network adapter that will provide the WiFi connection (often labeled Wireless Network Connection).
- Click "OK" – that's it!
Step 4: Configuring a Wireless Network (If Not Already Set Up)
If you don't have a pre-configured wireless network, you'll probably need this step. If your XP machine already connects to your wireless network, go to Step 5.
- If you are on your home wireless network, create a new wireless network configuration.
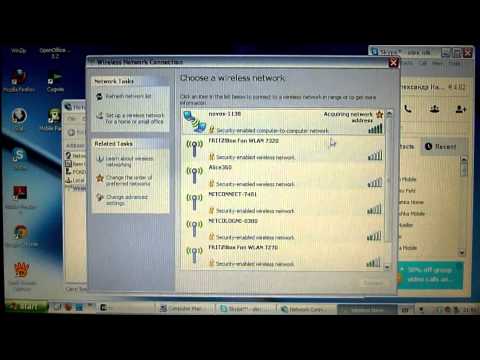
- Go back to "Network Connections" and right-click the icon for your wireless network connection.
- Choose "View Wireless Networks".
- Click “Change advanced settings.”
- In the "Wireless Network Properties" under the "Wireless Networks" tab, click "Add".
- Enter a "Network name (SSID)" – this is the name of your WiFi hotspot. (Make it memorable, like "MyXPWiFi" or something fun.)
- Choose a "Network authentication" type.
- Choose the "Data encryption" option – WPA or WPA2 (these are more secure) are recommended.
- Enter a "Network key" – create a strong password for your hotspot.
- Click "OK", "OK", and "OK".
Step 5: Connecting Your Devices
Now, grab your phone, tablet, or any other device that needs internet.
- Go to your device’s WiFi settings.
- Find the network name (SSID) you created in Step 4 (e.g., "MyXPWiFi").
- Enter the password.
- Connect! You’re online!
4. Troubleshooting Common Hiccups
Sometimes things don't go perfectly the first time. Don't panic! Here are some common problems and how to fix them:
- Devices Can't See the Hotspot: Double-check that you enabled Internet Connection Sharing in Step 3, and that the correct network adapters are selected. Ensure your XP laptop's wireless card is enabled.
- Can Connect, but No Internet: Make sure your XP laptop is connected to the internet. If you're using a wired connection, check the Ethernet cable. If you're using wireless, verify that you are connected to a working WiFi network.
- Slow Connection: XP machines are older, so don't expect lightning-fast speeds. Proximity to the laptop can also affect speed. Ensure devices are close.
5. Security Considerations: Protecting Your Data
While we are at it, let's focus on security:
- Strong Password: Use a strong, unique password for your hotspot. Avoid using easily guessable phrases.
- Encryption: Always use WPA or WPA2 encryption to protect your data.
- Keep XP Updated (If Possible): Even though XP support ended a long time ago, keep your antivirus software and firewall up-to-date. This helps prevent malicious connections.
- Monitor Connected Devices: Regularly check which devices are connected to your hotspot, particularly when using a public network.
6. Boosting Your Signal: Maximizing Coverage
Need to improve your hotspot's reach?
- Placement: Position your XP laptop in a central location, away from walls and metal objects that can interfere with the signal.
- Antenna (If Applicable): Some laptops have external antenna connections. Connecting an external antenna can improve the signal.
- Lower the barriers: Remove objects that might be blocking the signals.
7. The Power of ICS Explained: Why It Works
Behind the simple steps, Internet Connection Sharing (ICS) is working hard. It's essentially turning your XP laptop into a router. Your laptop receives the internet connection and then shares it with other devices on a new, local network that it creates. It's like a traffic controller, routing data packets to the right places.
8. Advanced Tweaks: Taking It to the Next Level
Want to fine-tune your hotspot? Here are some advanced options (for those feeling adventurous):
- Firewall Settings: You can adjust the XP's firewall settings to allow or block specific types of traffic.
- Static IP Addresses: Assigning static IP addresses to connected devices can sometimes improve performance and reliability.
- Additional Software: Some third-party software can improve hotspot configuration.
9. A Note on Battery Life: Conserving Power
Running a hotspot can drain your laptop's battery quickly.
- Plug It In: The easiest solution! Keep your laptop plugged in whenever you’re using it as a hotspot.
- Power Saving: Adjust your XP's power settings to optimize battery life.
10. The User Experience: Making It Smooth
- Rename the Hotspot: Give your hotspot a friendly name.
- Create a Password: Protect your hotspot with a password.
- Share the details: Remember to share your hotspot's name and password with trusted users.
11. Beyond the Basics: Creative Uses
- Offline File Sharing: Even when not connected to the internet, your XP hotspot can allow file sharing between devices connected to the network.
- Printer Sharing:
How to fix WiFi on Windows XP techtutorial

By Juri Fab How to fix WiFi on Windows XP techtutorial by Juri Fab
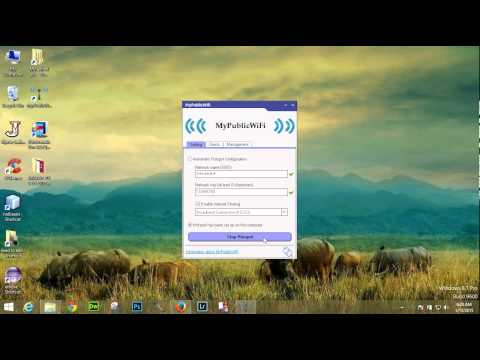
Create Hotspot in Windows xp
By isoft Developer Create Hotspot in Windows xp by isoft Developer
Wi-Fi Hotspot in Windows XP Step by Step
By alexn1138 Wi-Fi Hotspot in Windows XP Step by Step by alexn1138

Title: How to Setup Wifi in Windows XP
Channel: Etechlic
How to Setup Wifi in Windows XP by Etechlic
Laptop Wifi Connect
Turn Your XP Laptop into a WiFi Hotspot: The Easiest Trick EVER!
We've all been there: stuck in a hotel room with a flaky internet connection, stranded at an airport with dwindling battery life on our devices, or simply needing a way to share our laptop's internet with our tablet or smartphone. While newer operating systems like Windows 10 and 11 boast built-in hotspot functionality, those of us clinging to the reliable yet aging Windows XP may feel left out. Thankfully, that's far from the case. Converting your XP laptop into a fully functional Wi-Fi hotspot is not only possible, but it is surprisingly straightforward, allowing you to share your wired or wireless internet connection with multiple devices. Forget complicated software installations or cryptic command-line instructions. We're going to break down the process into easily digestible steps, ensuring even the most technologically apprehensive user can create their own personal Wi-Fi haven.
Understanding the Foundation: The Magic of ICS (Internet Connection Sharing)
The key to transforming your Windows XP laptop into a WiFi hotspot lies in a feature called Internet Connection Sharing (ICS). Think of ICS as a gatekeeper that allows one internet connection (typically the laptop's own) to be shared with other devices on a local network. In essence, your XP laptop will act as a mini-router, broadcasting a wireless signal that other devices can connect to and, therefore, access the internet. ICS doesn’t require complex hardware or advanced networking knowledge: it taps into the existing infrastructure of your laptop's network adapters. Before we begin, however, it’s crucial to understand the capabilities of your network adapters. Ensure your XP laptop has a functional wireless network adapter or an Ethernet port. Though the Ethernet port allows for using a wired connection, the wireless adapter handles the broadcasting of the Wi-Fi signal.
Step-by-Step Guide: Configuring ICS for WiFi Hotspot Functionality
The following steps provide a comprehensive walkthrough to establishing your XP laptop as a Wi-Fi hotspot. Proceed with precision and patience, carefully following each instruction.
Accessing Network Connections: Begin by navigating to your Network Connections settings. This is typically accomplished by right-clicking the "My Network Places" icon on your desktop and selecting "Properties." Alternatively, you can access it through the Control Panel. Within the Control Panel, click "Network and Internet Connections," then click "Network Connections."
Identifying Your Internet Connection: In the Network Connections window, you’ll see listed network adapters. Identify the connection your laptop is using to access the internet. This will be either your Ethernet connection (if using a wired connection) or your wireless network adapter (if connected to a Wi-Fi network). Take special note of the adapter currently providing internet access.
Enabling Internet Connection Sharing (ICS): Right-click the network connection you identified in the previous step (the one with internet access) and select "Properties." In the Properties window, navigate to the "Advanced" tab.
Activating ICS: Under the "Internet Connection Sharing" section, check the box labeled "Allow other network users to connect through this computer's Internet connection." This is the core of the setup and activates the ICS function.
Selecting Your Network Adapter: In the dropdown menu below, choose the network adapter you wish to use for your Wi-Fi hotspot. This is almost always your laptop's wireless network adapter. If your computer has multiple network adapters, be certain you have selected the correct one.
Confirmation and Configuration: A warning may appear. You can generally accept this warning, as it addresses automatic IP addressing configurations that might be handled by the Wi-Fi router setup. Click "OK" to acknowledge the warning and apply your choices. Click "OK" again to close the properties window.
Testing the Connection: After these steps, your XP laptop should now be broadcasting a Wi-Fi signal. Grab your smartphone or tablet and search for available Wi-Fi networks. You should see a network with a name similar to "Local Area Connection," or potentially named after your computer, or your home network if your computer is connected to a Wi-Fi connection. The connection name may vary depending on your network adapter's name.
Connecting Your Devices: Connect to this network using the WEP key, if you decide to create any encryption, or just accept the network if you opted for an open network. It is important to note that the connection will more than likely not prompt you for a password. If you already have a Wi-Fi network connection, you will have to disconnect to reveal the connection.
Securing Your Hotspot: Protecting Your Data
While the steps above create a functional hotspot, it’s imperative to secure your connection. By default, an open network broadcasts, which is susceptible to security breaches. Here's how to protect your data and ensure a secure connection:
Accessing Wireless Network Properties: Revisit your Network Connections settings (described in Step 1 above) and locate your wireless network adapter, which will now be listed.
Configuring Wireless Network Settings: Right-click on your wireless network adapter and select "Properties." Click on the "Wireless Networks" tab.
Adding a WEP Key (Security): Ensure the "Use Windows to configure my wireless network settings" box is checked. Click "Add…" to create a new wireless network profile.
Setting Up Encryption: In the "Wireless network properties" window, give your network a unique name in the "Network name (SSID)" field. This will be the name other devices see when searching for your hotspot.
Choosing Authentication: In the "Network Authentication" dropdown, select "Open." This is the most widely compatible method. In the "Data Encryption" dropdown, select "WEP." WEP is compatible with most older and newer devices, but WPA or WPA2 may work for newer devices, depending on compatibility.
Creating a Password: In the "Network key" field, enter a strong password (at least 8 characters long) that you will use to secure your Wi-Fi connection. Retype the password in "Confirm network key." Important: If you selected a password, all devices connecting to your new Wi-Fi hotspot will require this same password to gain access.
Confirm and apply the settings: Click "OK" to complete the wireless network profile setup. Click "OK" again to close the Wireless Network Properties window.
Troubleshooting Common Issues
Even with clear instructions, you might encounter some obstacles. Here are solutions to common issues:
No Internet Access on Connected Devices: Verify the XP laptop itself has an active internet connection (test by browsing the web). Double-check that ICS is enabled correctly and that you've selected the correct adapter during setup. Ensure that the IP addresses are assigned automatically. If you have static IPs assigned, you might need to adjust your network adapter's settings.
Unable to See the Hotspot Network: Make sure your wireless adapter is enabled and broadcasting. Check that other devices' Wi-Fi is activated and searching for networks. Restarting both the XP laptop and the connecting device often resolves this problem. If there's still a problem, verify all the steps are accurate.
Slow Internet Connection: If the connection is noticeably slow, you could be experiencing bandwidth limitations. To optimize speed, consider running the hotspot on a Wi-Fi connection, and not a wired connection. Also, move your laptop closer to your primary internet source (router or modem) to ensure a strong signal.
Device won't connect: Confirm you are entering the correct password if you enabled encryption. If you haven't enabled encryption, ensure your network adapter settings allow connections from all devices.
Beyond the Basics: Further Customization and Optimization
While the core steps above are all you need for a functional hotspot, you can further customize and optimize your setup:
- Static IP Addressing (Advanced Users): While ICS typically handles IP address assignment automatically, you can manually configure static IP addresses for your devices. This might be helpful if you need to reserve a specific IP for another device.
- Managing Connected Devices: While XP won't provide a user-friendly interface to monitor connected devices, you can use third-party software to show who is connected and the data download.
The Power of Simplicity: Embracing the Ease of Windows XP
Despite its age, Windows XP remains a robust operating system capable of surprisingly modern feats. Turning your XP laptop into a Wi-Fi hotspot showcases its enduring versatility. With a little patience and the right approach, you can leverage its capabilities to create a portable, shareable internet connection wherever you go. The beauty of this solution lies in its simplicity: no complex software installations, no need to decipher cryptic command-line instructions. You can have a working Wi-Fi hotspot in minutes. So, the next time you find yourself in a Wi-Fi desert, remember the power of Internet Connection Sharing, and unlock the hidden potential within your trusty XP laptop.
