getting an apple laptop connected to wifi

Title: how to fix wifi & network problems macbook
Channel: My iphone support
how to fix wifi & network problems macbook by My iphone support
apple laptop connect to wifi, how do you connect apple laptop to internet
Apple Laptop WiFi: The SHOCKINGLY Easy Trick!
Unlocking Effortless Wi-Fi: The Apple Laptop Secret You Didn't Know!
Ever felt that sting of frustration when your Apple laptop's Wi-Fi acts up? We've all been there, staring at the spinning wheel, willing the internet to cooperate. But, what if I told you there's a remarkably simple solution? A hidden trick that could banish those Wi-Fi woes in mere seconds?
The Frustration Factor: Why Wi-Fi Fails Us
Let's face it, unreliable Wi-Fi is a modern-day plague. We rely on it for everything. Work, entertainment, communication; it's the invisible thread connecting us. Therefore, when it falters, it can feel like the world has stopped. The truth is, many factors contribute to Wi-Fi headaches. Interference, network congestion, and outdated settings can all play a part. Moreover, your Apple laptop’s inherent settings sometimes need a little nudge.
The Unexpected Hero: A Hidden Reset
Now, prepare for a game-changer. It’s not a complicated software update or a pricey tech gadget. Instead, it's a refreshingly simple reset. This isn't a factory reset; instead, it’s a targeted approach. It's cleverly hidden, and many users are entirely unaware of its existence. However, it’s been a secret weapon for tech enthusiasts for years. This tweak rejuvenates your Wi-Fi connection in a matter of clicks. To start, head to your System Preferences.
Step-by-Step: Your Wi-Fi Revival Guide
So, let's dive into the incredibly easy steps. First, navigate to your "Network" settings. After that, you will see your Wi-Fi connection listed. At this moment, you should click on "Advanced." A new window will immediately appear. Here, you’ll find the secret sauce: a list of preferred networks. Consequently, delete your Wi-Fi network from this list. Then, save your changes and restart your Apple laptop. Rebooting forces the system to seek out and reconnect to your Wi-Fi.
The Power of a Fresh Start
Why does this work? It's because deleting and re-adding the network forces a fresh connection. In effect, it clears out any lingering glitches or outdated settings that might be causing problems. Thus, it's like hitting the "reset" button on your connection. The result is usually a faster, more stable, and more reliable Wi-Fi experience.
Beyond the Trick: Further Optimization
While this trick is amazing, you can still do more. Moreover, consider these extra tips. First, ensure your router's firmware is up-to-date. Second, position your router in a central, open location to maximize coverage. Finally, limit the number of devices using the network simultaneously. Doing these things further enhances your Wi-Fi performance.
Battling Interference: Your Wi-Fi's Enemies
However, sometimes the enemy isn't within your Apple laptop. It's external interference. Moreover, microwaves, Bluetooth devices, and even other Wi-Fi signals can disrupt your connection. To counter this, try changing your router's Wi-Fi channel. You can do this in your router’s settings. Choose a less congested channel for optimal performance. Finally, keep your router away from other electronic devices.
Troubleshooting Tactics: When the Trick Doesn't Suffice
Nevertheless, what if the hidden trick doesn't work immediately? Don't panic. First, check your router. Ensure it is online and functioning correctly. Second, try restarting your router alongside your laptop. After that, examine your internet service provider. An outage might be the issue. Finally, if problems persist, contact Apple Support.
The Long-Term Benefits: A Seamless Online Experience
In conclusion, mastering this simple trick offers significant perks. Imagine a world without Wi-Fi dropouts during video calls. Picture streaming movies without constant buffering. Consequently, this secret unlocks a more seamless and enjoyable online experience. You save time and energy. You also reduce unnecessary frustration.
Embrace the Simplicity: Your Wi-Fi Victory
In short, fixing your Apple laptop's Wi-Fi issues doesn’t require complex technical expertise. Often, it's about finding the hidden keys. Thus, start with the simple trick. Then, explore the optimization tips. Take control of your Wi-Fi and enjoy a faster, more reliable connection.
Prepaid WiFi Stick: UNLIMITED Internet Freedom for Your Laptop!Apple Laptop WiFi: The SHOCKINGLY Easy Trick!
Alright, fellow Apple enthusiasts, tech nomads, and WiFi warriors! Let's be honest, we've all been there. You're sitting there, coffee brewing, ready to dive into some serious work (or maybe just binge-watch that new series – no judgment!), and then…the dreaded WiFi symbol on your MacBook decides to throw a temper tantrum. Spinning beach ball of doom? Lag so bad you feel like you’re living in slow motion? Yep, been there, done that, and bought the t-shirt (probably with a sad WiFi signal on it). But what if I told you there's a shockingly easy trick, a secret weapon, a digital ninja move that can vanquish those WiFi woes and get you back online in a flash? Buckle up, because we’re about to unlock the magic.
1. The WiFi Woe: Why Does My Apple Laptop WiFi Fail Me?
Before we dive into the secret sauce, let's get down to the nitty-gritty. Why does this happen in the first place? Think of your WiFi connection like a busy highway. Lots of cars (devices) vying for space on the road. Interference from other electronics, thick walls, or even the simple distance from your router can create roadblocks. Sometimes, your MacBook's software gets a little…stuck. It might be clinging to a weak signal, or perhaps its internal settings got jumbled. Whatever the reason, the result is the same: frustration and a serious online drag.
2. Troubleshooting 101: The Usual Suspects (And Why They Often Fail)
Okay, so you've got a problem. What do you do? You probably try the usual suspects:
- Restart your Mac: The digital equivalent of "turning it off and on again." Sometimes, this works. Sometimes, it's just a temporary fix.
- Restart your router: The classic. Power cycling your router can clear out temporary glitches. But if the underlying problem persists, you're back to square one.
- Forget the WiFi network and reconnect: This can sometimes force your Mac to find the strongest signal. But again, not always a long-term solution.
These are all good starting points, but they're like using a Band-Aid on a broken leg. They address the symptom, not the root cause. And let's be real, after trying these, you're probably still pulling your hair out.
3. The SHOCKINGLY Easy Trick: The Power of a Simple Command
Here’s the money shot! The magic bullet! The…well, you get the idea. This deceptively simple trick involves a few command-line entries in your Mac's Terminal. Don't worry, it's not rocket science. It's more like following a delicious recipe:
- Step 1: Open Terminal. You can find it in your Applications/Utilities folder, or by using Spotlight search (command + spacebar).
- Step 2: Type (or copy and paste) the following command and hit enter:
networksetup -getairportpower airport
This command tells your Mac to report the current power state of your Airport (WiFi) card. The result will be displayed.
- Step 3: Type (or copy and paste) the following command and hit enter:
networksetup -setairportpower airport off
This turns off the Airport card, effectively disabling WiFi.
- Step 4: Wait a few seconds. Give it a beat. Think of it as a digital deep breath.
- Step 5: Type (or copy and paste) the following command and hit enter:
networksetup -setairportpower airport on
This turns your WiFi back ON.
- Step 6: Test your Connection: Click the WiFi signal in the Menu Bar and select your network.
That’s it! Sounds almost too easy, doesn't it?
4. Why This Trick Works: A Digital Reset
So, what's the secret sauce behind this simple command? Think of it as a digital reset. By turning off and then back on your WiFi card, you're forcing your MacBook to re-establish its connection with the router. It's like hitting the "refresh" button on your WiFi. This can clear out temporary glitches, re-establish the strongest signal, and resolve those pesky connectivity issues. It's like giving your WiFi a fresh start, like a phoenix rising from the digital ashes!
5. Beyond the Basics: Enhancing Your WiFi Experience
This trick is a great starting point. But let’s take it a step further. Here are a few more things you can do to enhance your WiFi experience:
- Update your macOS: Apple regularly releases operating system updates that include WiFi improvements and bug fixes.
- Position your Router Strategically: Place your router in a central location, away from walls, metal objects, and other electronics that could cause interference.
- Upgrade your Router: If you're still using an older router, consider upgrading to a newer model with faster speeds and better range.
- Investigate for Interference: Are there any electronic devices nearby that could be causing interference? Microwaves, Bluetooth speakers, and even cordless phones can sometimes impact your WiFi performance.
6. The Impact of Walls and Distance
Like sunlight, Wi-Fi signals don't travel well through walls, particularly those made of brick, concrete, or metal. Distance is also a factor; the farther away you are from the router, the weaker the signal. Think of it like throwing a ball. The further you throw, the less energy it has. Thick walls act as a barrier, absorbing the signal's energy. The easy fix? Try moving closer to your router. Or, for a more permanent solution, consider a Wi-Fi extender to boost the signal to those dead zones.
7. Decoding the WiFi Signal Strength Icon
That little WiFi symbol in the menu bar, with its curved bars, can be misleading. Sometimes, the bars appear full, but your connection crawls. Other times, it shows a weak signal, but you're browsing smoothly. This is because the icon represents the signal strength, but it doesn't tell the whole story. It doesn't account for interference, network congestion, or other factors that can impact the actual speed and reliability of your connection.
8. Identifying WiFi Interference: The Sneaky Culprit
WiFi interference is like a digital ghost in your network. It’s invisible, yet it can wreak havoc on your connection speed and stability. Common culprits include:
- Other WiFi networks: If you live in a densely populated area, your network might be competing with others for the same airspace.
- Bluetooth devices: Bluetooth signals can interfere with 2.4 GHz WiFi networks.
- Microwaves, cordless phones, and other electronics: These devices emit radio waves that can disrupt your network signal.
9. Optimizing Router Settings for Peak Performance
You can often tweak your router settings to improve your WiFi performance. While the specific settings vary depending on your router model, here are some general tips:
- Change the WiFi channel: Your router broadcasts its signal on a specific channel. If your channel is congested, switch to a less crowded one.
- Enable WPA3 encryption: This is the latest and most secure WiFi encryption standard.
- Update your router firmware: Firmware updates can improve performance, security, and stability.
10. The Myth of "Too Many Devices"
A common misconception is that having too many devices connected to your WiFi will slow down your internet speed. While it's true that each device consumes bandwidth, most modern routers can handle multiple devices simultaneously. However, if you're doing bandwidth-intensive tasks like streaming 4K video on multiple devices, you might experience some slowdown.
11. Testing Your Internet Speed: Know Your Baseline
Before you start troubleshooting, it's a good idea to test your internet speed. There are many free online speed tests available (Speedtest.net is a popular one). This will give you a baseline to measure against. If your speed is significantly lower than what you're paying for, you know there's a problem.
12. When to Call in the Professionals
If you've tried all the tricks in the book and are still struggling with WiFi issues, it might be time to consult the experts. Your internet service provider (ISP) can often diagnose problems with your connection. You might also consider hiring a computer technician.
13. The Power of a Wired Connection
While WiFi is convenient, a wired Ethernet connection is generally more reliable and faster. If you need a rock-solid connection for tasks like video conferencing or online gaming, consider connecting your MacBook directly to your router with an Ethernet cable.
14. The Future of WiFi: What's Next?
WiFi technology is constantly evolving. The latest standard, Wi-Fi 6E, offers faster speeds, lower latency, and better performance in congested environments. As more devices support Wi-Fi 6E, we can expect even better WiFi experiences in the future.
15. Turning WiFi Troubles into Triumphs: Your Roadmap
Let’s recap. WiFi woes? They're frustrating, but you're now armed with a powerful weapon – the shockingly easy command-line trick. You’ve also got a better understanding of the underlying causes, troubleshooting steps, and ways to optimize your WiFi setup. Remember, like any technology
Laptop WiFi Nightmare? This FIX Guarantees Blazing Speed!How To Fix MacBook Not Connecting to Wi-Fi or Wi-Fi Not WorkingSOLVED

By Tricknology How To Fix MacBook Not Connecting to Wi-Fi or Wi-Fi Not WorkingSOLVED by Tricknology
How to Connect to WiFi on MacBook

By Tech Tips How to Connect to WiFi on MacBook by Tech Tips
Why Won't My Mac Connect To Wi-Fi
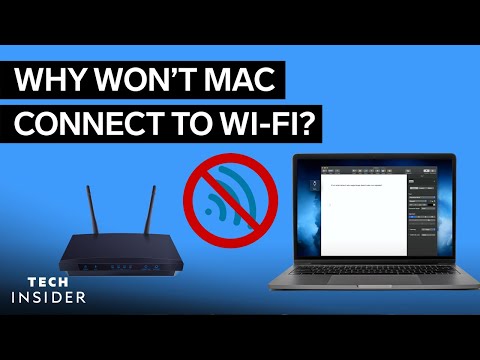
By Insider Tech Why Won't My Mac Connect To Wi-Fi by Insider Tech

Title: How to Connect to a WiFi Network on Macbook Air or Pro
Channel: Ricardo Gardener
How to Connect to a WiFi Network on Macbook Air or Pro by Ricardo Gardener
Wifi On Laptop Phone
Apple Laptop WiFi: Unlock Lightning-Fast Connections with This Unexpected Method
We've all been there: staring at the spinning wheel, desperately awaiting that webpage to load, that email to send, or that video to buffer. For Apple laptop users, these frustrating moments can feel particularly jarring, given the premium experience we've come to expect. But what if the solution to your sluggish WiFi connection wasn't complex, expensive hardware, or a costly call to your internet service provider? What if the answer lay in a surprisingly simple, often overlooked adjustment? We delve into a method that can dramatically improve your Apple laptop's WiFi performance, empowering you to reclaim your time and enjoy a truly seamless online experience.
The Hidden Culprit: Understanding WiFi Channel Congestion on Your Apple Laptop
The modern digital landscape is a crowded one. Your home, office, or even local coffee shop is likely teeming with wireless signals, all vying for the same limited bandwidth. This congestion is the primary enemy of a fast and reliable WiFi connection. Think of it like a busy highway: the more cars (devices) on the road, the slower traffic moves. In the WiFi world, these "cars" are radio waves, and each wireless network transmits on a specific channel. Your Apple laptop automatically selects a channel when connecting to a WiFi network, but this selection isn't always optimal. The default channel might be crowded with other networks in the area, leading to interference and slower speeds.
Identifying the Bottleneck: Uncovering WiFi Channel Interference in Your Environment
Before we implement the solution, diagnosing the problem is essential. Several tools can help us assess the state of the WiFi landscape around you. While dedicated WiFi analysis software is available, your Apple laptop already possesses the built-in capabilities to provide crucial insights. We’ll focus on utilizing these readily available tools, ensuring you don’t need to invest in any external software to achieve optimal results.
Using the Wireless Diagnostics Tool:
Apple thoughtfully includes a powerful and often underutilized tool called Wireless Diagnostics. It’s accessible by holding down the Option key while clicking the WiFi icon in the menu bar until the option opens. Start by holding down that key, then click on the WiFi icon. Select "Open Wireless Diagnostics…"
Once the Wireless Diagnostics window appears, you can select the "Monitor" option inside. This mode will actively scan your environment for wireless networks and provide real-time data about their channels, signal strength, and potential interference. Pay close attention to the "Interference" column; a high number here indicates a congested channel causing slow speeds.
Interpreting the Data:
The Wireless Diagnostics utility provides a wealth of information. It will display a graph (often referred to as the "scan result" graph) indicating the channels being used by nearby WiFi networks and their relative signal strengths. Ideally, you want to connect to a channel with minimal overlap from other networks. Look for channels that appear relatively "clean" in the graph, with less activity. It is also important to ensure that you are using the 5 GHz network whenever possible, as it offers faster speeds and tends to be less congested than the older 2.4 GHz band.
The Game-Changer: Optimizing Your Apple Laptop's WiFi Channel Selection
Now that we know the source of the problem, it’s time to implement the solution: optimizing your Apple laptop's connection channel.
Accessing Your Router's Configuration:
The first step is to access your router's administrative interface. The process for this varies depending on your router's make and model. Typically, you'll need to enter your router's IP address into a web browser (e.g., Safari, Chrome, Firefox). You can often find this IP address in your router's manual or printed on the router itself. Common IP addresses include 192.168.1.1 or 192.168.0.1.
Once you've entered the IP address and hit "Enter," you'll likely be prompted to enter a username and password. Again, this information can usually be found in your router's documentation or printed on a label on the router. If you've forgotten the credentials, a simple search online for your router's model and "default login" will likely provide the information.
Changing Your Router's WiFi Channel:
Once logged into your router's configuration panel, look for the WiFi settings, typically under "Wireless" or a similar heading. Within the WiFi settings, you'll find an option to change the channel. The exact wording may vary (e.g., "Channel," "Wireless Channel," "802.11 Channel"), but the functionality is the same.
Refer back to the information you gathered using the Wireless Diagnostics tool. Select a channel that is less congested, as identified by that tool. In most cases, you can select the right channel using a simple drop-down menu. Common channels to try include 1, 6, and 11 for using the 2.4GHz band. If you are using the 5GHz band with a more modern router, you can often choose a channel in the range of 36-48 or 149-165, which minimizes the chance of interference. Make the change and save the settings. The router will then restart.
Testing Your Results:
After the router restarts, reconnect your Apple laptop to your WiFi network. Open the Wireless Diagnostics tool again to verify the channel change and confirm that you can see the improved network conditions. Perform a speed test using a site like speedtest.net or Fast.com to see if your speeds have improved. You should notice a significant boost in download and upload speeds and a more responsive overall browsing experience. Note that you may need to repeat this procedure several times while you experiment with different channels until you identify the optimal one, considering your local network conditions.
Beyond the Channel: Additional WiFi Optimization Tips for Your Apple Laptop
While changing the channel is often the most impactful adjustment, several other factors can contribute to improved WiFi performance on your Apple laptop. Incorporating these tips can further enhance your online experience.
- Position Your Router Strategically: The location of your router is crucial. Place it in a central location in your home, away from obstructions such as walls or metal objects. Elevated positions, such as on a shelf or table, also help to improve signal propagation.
- Reduce Interference from Other Devices: Electronic devices like microwaves, cordless phones, and Bluetooth devices can interfere with your WiFi signal. Keep your router away from these devices if possible.
- Update Your Router's Firmware: Regularly update your router's firmware. Router manufacturers release updates to improve performance, fix bugs, and enhance security. The firmware can generally be updated in your router's configuration menu by searching for "Firmware Update" in the settings.
- Consider a WiFi Extender (If Necessary): If you have a large home or your router can't cover the entire area, consider using a WiFi extender. This device takes the existing WiFi signal and rebroadcasts it, extending your network's reach. Be sure to place the extender in an area where it can receive a strong signal from your router.
- Prioritize Bandwidth: Ensure your Apple laptop is connected to your more powerful 5 GHz network. This will often be a separate network identified with "5G" or "5GHz" in its name. The 5 GHz band provides faster speeds and is less prone to interference than the older 2.4 GHz band.
- Limit Connected Devices: If numerous devices are accessing the same WiFi network simultaneously, your bandwidth is stretched thinner. Consider limiting the number of devices connected or, if possible, upgrading your internet plan.
Troubleshooting Common WiFi Issues on Your Apple Laptop
Even after implementing the above steps, you may encounter some persistent WiFi issues. Here are some troubleshooting tips:
- Restart Your Apple Laptop and Router: A simple reboot can often resolve temporary glitches. Turn off your Apple laptop and unplug your router for at least 30 seconds before restarting them.
- Check for Software Updates: Ensure your Apple laptop's operating system (macOS) is up to date. Software updates often include performance enhancements and bug fixes for WiFi connectivity. You can check for updates in System Preferences > Software Update.
- Forget and Rejoin the Network: In System Preferences > Network > WiFi, select your WiFi network and click the "Advanced…" button. Then, next to your network name, click on the minus button. Then rejoin the network by selecting it from the available networks list; this will prompt you to re-enter your password.
- Reset Network Settings: If all else fails, you can reset your network settings. This will remove all saved WiFi passwords and other network configurations. To do this, go to System Preferences > Network, click on the three dots next to WiFi, and select "Make Inactive." Then, make your settings active again, and reconnect to your WiFi network.
- Contact Your Internet Service Provider (ISP): If the problem persists, the issue may lie with your ISP. Contact your ISP for assistance. They can check for outages in your area or troubleshoot the connection from their end.
Conclusion: Reclaiming Your Digital Experience for Apple Laptop Users
Slow WiFi on your Apple laptop doesn't have to be an unavoidable part of life. By understanding the underlying causes of poor WiFi performance, such as channel congestion, and taking proactive steps to optimize your connection, you can unlock significantly faster speeds and enjoy a more seamless online experience. Changing the WiFi channel on your router, combined with the other optimization tips discussed, can make a substantial difference. You no longer need to suffer
