wifi antenna for laptop homemade
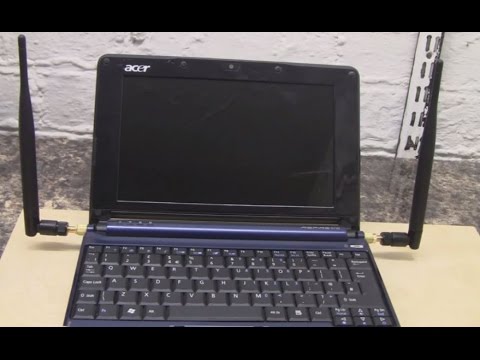
Title: Laptop External Antenna Mod 61
Channel: andrew mcneil
Laptop External Antenna Mod 61 by andrew mcneil
wifi antenna for laptop homemade, do laptops have wifi antenna, how to make wifi antenna for pc, do laptop wifi antennas work
Boost Your Laptop's WiFi Signal: Shockingly Easy DIY Antenna!
Supercharge Your Laptop WiFi: Crafting a Ridiculously Simple Antenna!
Have you ever wrestled with a frustratingly weak WiFi signal? Perhaps you're battling that digital monster in your home, the dreaded "dead zone." It's genuinely annoying, isn't it? Instead of suffering in silence, there's a surprisingly simple solution. It won't cost you a fortune. Moreover, it requires minimal technical expertise. You can radically improve your laptop's WiFi signal strength with a little ingenuity.
Understanding the WiFi Weakness Woes
Let's be honest, modern homes present a complex challenge for WiFi. Thick walls, electronic devices, and even your neighbor's network can interfere. Consequently, your laptop's built-in antenna might struggle. That's when buffering videos and slow downloads become a reality. But, worry not! You're about to discover a low-cost way to fight back. It’s a DIY antenna that dramatically changes the game.
The DIY Antenna: Your Secret Weapon
Forget expensive routers or complicated network configurations. We're embracing a remarkably effective, homemade solution. The core idea revolves around enhancing the antenna's ability to receive and transmit signals. Therefore, the aim is simple: amplify the signal your laptop already has.
Materials You'll Need (Almost Zero Cost!)
You probably have most of these items already. First, you'll need a USB extension cable. In addition, you'll require a metal colander (yes, seriously!), and a simple USB WiFi adapter. A strong adhesive like hot glue is essential, too. Furthermore, some aluminum foil will come in handy. Finally, a pair of scissors or a utility knife is necessary.
Step-by-Step Assembly: The Antenna Builds Itself
Start by carefully unplugging your laptop. Next, connect the USB WiFi adapter to the end of the USB extension cable. Afterwards, position the colander. It should be facing outwards. Now, use your adhesive to securely attach the USB adapter to the inside of the colander. It should be in the center. Wrap the outside of the colander with aluminum foil. Make sure there are no breaks, and it should be smooth. This step reflects and concentrates the WiFi signal.
Placement is Key: Optimizing Your Antenna's Effectiveness
Once assembled, plug the USB extension cable into your laptop. Moreover, the positioning of your new antenna is crucial. Try placing the colander antenna in different locations. Furthermore, elevate it for the best results. Experiment to find the sweet spot for your signal. Remember, small adjustments can make a big difference.
Testing and Tweaking: Fine-Tuning for Maximum Power
So, how do you know if it works? Well, first you should run a speed test. Compare your WiFi speed before and after setting up your DIY antenna. Then, monitor your signal strength on your laptop. The results should astound you.
Troubleshooting Your DIY Antenna
Sometimes, things don't work perfectly the first time. For example, ensure the USB WiFi adapter is correctly connected. Also, check your aluminum foil is covering the entire area of the colander. If your signal doesn't improve initially, try moving the antenna. In addition, try a different USB port.
Beyond the Colander: Exploring Alternative Designs
The colander method is simple, but it's not the only option. However, feel free to explore variations on this theme. For instance, you could modify the size of the colander. Alternatively, you could research different materials. Try experimenting, and you might discover an even more effective design. As a result, the possibilities are as vast as the internet itself!
The Bottom Line: Unleash Your Stronger WiFi
You've now learned how to build a practical, budget-friendly WiFi antenna. You no longer have to endure frustratingly weak signals. It's a simple project with a significant payoff. Not only will you boost your WiFi, but you'll embrace a DIY approach. So, start building your antenna now. Enjoy blazing-fast internet!
Unlock Your Laptop's WiFi Hotspot: The Secret Trick Google Doesn't Want You to Know!Boost Your Laptop's WiFi Signal: Shockingly Easy DIY Antenna!
Alright, fellow tech explorers! Let's face it, that frustrating feeling of a lagging Wi-Fi signal is as common as finding socks mysteriously disappearing in the laundry. You're in the middle of an important video call, streaming your favorite show, or, let's be real, frantically trying to catch up on memes, and BAM! The dreaded buffering symbol rears its ugly head. We've all been there. But what if I told you that fixing this Wi-Fi woes doesn't require expensive gadgets or a tech wizard? I'm talking about a simple, ridiculously easy DIY antenna that you can build yourself. Get ready to say goodbye to digital dropouts and hello to a stronger, more reliable connection!
1. The WiFi Signal Struggle is Real: Why Are We Even Here?
Before we dive into the nitty-gritty of building your own antenna, let's quickly acknowledge the problem we are solving. Weak Wi-Fi signals are the bane of our connected existence. Walls, furniture, distance from the router, and even other electronics can all conspire against your precious internet. It’s a constant battle, a digital David versus Goliath where Goliath (the weak signal) is constantly winning. But fear not! We're here to equip you with the slingshot (and a few household items) to turn the tide.
2. Decoding the WiFi Mystery: A Basic Primer
Okay, let's get technical for just a moment. Think of your Wi-Fi router as a radio station, broadcasting signals, and your laptop's Wi-Fi card as the receiver. The stronger the signal, the clearer the reception. When the signal is weak, think of it like trying to listen to your favorite radio station when you are miles away from the transmitter. Static, interference, and dropped calls are all too common. Our DIY antenna is basically a way to amplify that signal, like a powerful amplifier for your radio.
3. Introducing the DIY WiFi Antenna: Your Secret Weapon
The antenna we're building is surprisingly straightforward. It’s essentially a parabolic reflector that focuses the Wi-Fi signal towards your laptop's antenna. Think of it like a satellite dish, but much, much simpler. The beauty of this project is that it utilizes everyday materials. No fancy soldering or complex wiring required! We're talking about items you probably have lying around your house right now.
4. Gathering Your Troops: The Supplies You'll Need
This is where the magic happens, but first you need the ingredients. Your toolkit is surprisingly minimal. You will need:
- A Metal Colander or Strainer: This acts as our reflector. Choose one that's about 8-12 inches in diameter. The size isn't critical, but bigger generally equates to better signal reception.
- A USB WiFi Adapter (Optional): This is where you can put an extra layer of reception by attaching a powerful USB adapter to your laptop.
- A USB Extension Cable: If you want to place your adapter in the colander or strainer.
- Hot Glue Gun and Glue Sticks: For securing the adapter and other components.
- Scissors or Wire Cutters For any necessary adjustments.
- A Computer: To receive your newly boosted signal on.
5. Constructing the WiFi Antenna: Step-by-Step Guide
Alright, let's get building!
- Prep the Colander: Ensure your colander is clean and dry. This is our primary focus area.
- Position the USB Adapter: If you are going the adapter route, grab your hot glue and center the adapter on the internal base of your colander or strainer.
- Test and Enjoy: Once the glue is dry, point your antenna at your router and run a speed test.
6. Placement is Key: Optimal Antenna Positioning
Just like a satellite dish, the direction your antenna faces is incredibly important. Experiment with positioning. Try facing it directly at your router. The ideal scenario here is to have a direct line of sight. If there are walls in between, test multiple positions to find the best signal.
7. Troubleshooting Time: When Things Don't Go As Planned
Sometimes, even with the best instructions, things don't work perfectly the first time. Don’t worry! Let's consider some common issues and how to fix them:
- Weak or No Signal Improvement: Double-check connections, ensure optimal antenna positioning, and verify that your router isn’t the problem (try moving closer to the router).
- Stability Issues: Make sure the antenna is stable and not easily knocked over. The last thing you want is to deal with interruptions.
8. Beyond the Antenna: Additional Wi-Fi Boosting Tips
Your DIY antenna is a great starting point, but there are other steps you can take to improve your Wi-Fi performance.
- Router Location: Place your router in a central, open location. Avoid placing it near walls, metal objects, or other electronics.
- Channel Optimization: Use a Wi-Fi analyzer app on your phone or laptop to identify the least congested Wi-Fi channel in your area.
- Router Firmware Updates: Regularly update your router's firmware for performance improvements and security patches.
9. The Science Behind the Magic: How It Actually Works
The metal colander or strainer focuses the radio waves emitted by your router, just like a satellite dish focuses signals from space. When the waves reflect off the curved surface, they converge at a focal point — in this case, the antenna of your Wi-Fi adapter. This concentration boosts the signal strength.
10. Cost-Effective Solutions: Why DIY Wins
Building your own antenna is significantly cheaper than buying a high-powered Wi-Fi adapter or range extender. It's also a fun project, reduces electronic waste by repurposing household items, and gives you a sense of accomplishment. Plus, you can be proud of your ingenuity!
11. Safety First: A Few Important Reminders
While this project is low-risk, keep these safety tips in mind:
- Always unplug your laptop or any external devices before opening or modifying them.
- Be careful when using hot glue.
- If you are not comfortable with electronics or tools, ask for assistance from someone who is.
12. Alternatives and Variations: The DIY Antenna Evolution
You can experiment with different materials for the reflector. Instead of a colander, you could use a sheet of metal foil, a piece of cardboard covered in foil, or even a repurposed satellite dish. Get creative!
13. Comparing DIY to Commercial Solutions
DIY antennas offer an affordable and customizable solution. While commercial Wi-Fi boosters may have more advanced features, DIY allows you to address specific needs and situations on a budget.
14. The Future of Wi-Fi: What to Expect
Wi-Fi technology is constantly evolving. Expect to see faster speeds, increased range, and improved security in the coming years. But for now, grab your colander, and let’s start boosting that signal!
15. Wrapping Up: Your Path to Stronger WiFi Begins Now!
And there you have it! You've learned how to build a shockingly simple DIY antenna that can significantly improve your laptop’s Wi-Fi signal. By following these steps, and making sure to use your critical thinking skills, you can enjoy a stronger, more reliable internet connection without spending a fortune. Good luck, and may your Wi-Fi always be speedy!
FAQs
1. Will this antenna work with any router and laptop?
Yes, in most cases. This DIY antenna works by improving signal reception, so it's compatible with any laptop that has a Wi-Fi adapter and any standard Wi-Fi router.
2. How far can I extend my Wi-Fi range with this antenna?
The increase in range varies depending on your environment (walls, interference, etc.). The antenna can boost the signal across the home or even outside, but the improvement depends on specific factors.
3. Is this antenna safe to use?
Yes, this DIY antenna is safe to use as long as you take standard safety precautions. Do not try to take apart anything electrical unless you're trained for it.
4. Can I make this antenna more powerful?
Yes, experimentation is key. You can adapt the size of the reflector, try different materials, or add a more powerful USB Wi-Fi adapter.
5. What if it doesn't work?
If you are not getting the expected results, retrace your steps. Ensure that your antenna is set up correctly, that its location is facing the router, and that your router itself is working properly. You can also try experimenting with different materials and designs.
Closing Segment
So there you have it, folks! Your pathway to stronger, more reliable Wi-Fi is just a colander, glue gun, and a little ingenuity away! Now go forth and conquer those Wi-Fi dead zones. Let me know in the comments how your antenna build goes and share any tips you discover with fellow tech enthusiasts. Happy connecting!
- Principal Keywords: WiFi Signal Boost, DIY Antenna
- SEO Headline: Boost WiFi: Shockingly Easy DIY Antenna Tutorial!
- Pathway: WiFi Antenna Guide
- Meta Summary: Tired of weak WiFi? Build a shockingly easy DIY antenna! Boost your laptop's signal with simple household items. Quick guide inside!
DIY Extreme Range WiFi USB Antenna in 5 Minutes

By Timothy Pleines DIY Extreme Range WiFi USB Antenna in 5 Minutes by Timothy Pleines
DIY USB Wifi Adapter from an Old Tablet REALTEK RTL8188ETV

By LoopLinks DIY USB Wifi Adapter from an Old Tablet REALTEK RTL8188ETV by LoopLinks
can you use aluminum foil as a wifi antenna in your PC shorts
By mryeester can you use aluminum foil as a wifi antenna in your PC shorts by mryeester

Title: how to make an antenna wifi 10 km
Channel: Digital Sat Pro
how to make an antenna wifi 10 km by Digital Sat Pro
Laptop Wifi Hotspot
Boost Your Laptop's WiFi Signal: Shockingly Easy DIY Antenna!
Are you tired of lagging video calls, frustratingly slow download speeds, and the constant buffering wheel of doom? Does your WiFi signal seem to vanish the moment you step away from the router? You're not alone. Weak WiFi signals plague homes and offices everywhere, but before you consider expensive equipment upgrades or complex technical solutions, have we got a treat for you! We're about to unveil a remarkably simple, budget-friendly, and surprisingly effective DIY antenna that can dramatically boost your laptop's WiFi signal strength. Prepare to be amazed!
Understanding the WiFi Signal: A Brief Primer
Before diving into the construction, it's useful to understand a few fundamental concepts regarding how your laptop and router communicate. WiFi, or Wireless Fidelity, utilizes radio waves to transmit data. These waves, like the ripples created when a pebble hits a pond, spread outwards from your router. Your laptop's built-in WiFi antenna, often a small component tucked away inside the screen or casing, receives these signals. The strength of the signal depends on several factors, including the distance between your laptop and router, physical obstructions like walls and furniture, and interference from other electronic devices. Our DIY antenna works by focusing and amplifying the signal, essentially acting as a directional receiver, much like a satellite dish.
The Power of Directionality: Why Antennas Matter
Most laptop WiFi antennas are omnidirectional, meaning they receive signals from all directions. While this is convenient, it also means they're vulnerable to interference and can't concentrate their reception on the specific location of your router. A directional antenna, however, focuses its reception on a single point, significantly improving signal strength and reducing noise. Our DIY antenna achieves this by creating a reflector that concentrates the incoming radio waves.
Materials You'll Need: Unveiling the Secrets
The beauty of this DIY antenna lies in its simplicity and the ease with which you can acquire the necessary materials:
- A USB WiFi Adapter (Optional but Recommended): While this DIY antenna primarily focuses on enhancing signal reception for your laptop's integrated WiFi card, the performance is significantly improved when paired with a high-gain USB WiFi adapter. This is crucial, especially for laptops with subpar internal antennas. The adapter allows for seamless integration and provides added flexibility.
- A Metal Can (or Reflective Material): The ideal container for this project is a small, clean metal can, such as a soup can or a can from canned tuna. The can acts as the reflector, focusing the WiFi signal. Alternatively, you can use any shape of reflective material, such as aluminum foil.
- A Sharp Knife or Scissors: For cutting the metal can. Safety first!
- Hot Glue Gun and Glue Sticks: This is our adhesive of choice for securing components. Be careful; these can get very hot.
- A Ruler or Measuring Tape: Accuracy matters!
- A Pen or Marker: For marking measurements.
- A USB Extension Cable (Highly Recommended): This provides flexibility in positioning the antenna. This way, you do not need to place your laptop onto the antenna.
- Electrical Tape (for securing the adapter, if used).
Step-by-Step Construction: Building the WiFi Signal Booster
Let's begin the process of constructing your DIY WiFi antenna.
Prepare the Reflector:
- If using a can, carefully remove the label, clean out any residue, and thoroughly dry the can. Remember to take great care while handling the can, as most metal cans have sharp edges.
- If using aluminum foil, measure out the dimensions and create a suitable shape to catch the wave signals.
Measure and Cut (If Using a Can):
- If using a can, decide on the shape of your antenna. Most frequently, a curved parabolic shape gives the best results.
- Using your ruler and marker, measure where you want to cut lines for the placement of your USB WiFi adapter.
- Carefully cut and create a slot on the can or foil for your USB adapter.
- Consider using a template for a more precise cut.
Attach the USB WiFi Adapter:
- Insert your USB WiFi adapter, or the USB port on your laptop, into the slot you have created. Ensure it fits snug, and you may use electrical tape to secure the adapter in place.
Secure the Antenna and Test:
- Make any necessary adjustments to the positioning of the adapter within the can.
- Power up your laptop and connect to your WiFi network. Compare the signal strength before and after installing the antenna. You will likely see a dramatic improvement.
Fine-tuning and Optimization:
- Experiment with the angle and position of the antenna. Slight adjustments can significantly impact signal strength.
- Try to move the entire system to higher positions to see if it increases reach.
Troubleshooting Common Issues
- Weak or Absent Signal: Double-check all connections, ensuring the USB WiFi adapter is properly connected to both the laptop and the antenna. Make sure the antenna is pointed toward your router.
- Poor Performance: Experiment with different reflector shapes, and material for the antenna to test out which offers the best results.
- Interference: Avoid placing the antenna near other electronic devices that might cause interference, such as microwave ovens or cordless phones.
Benefits of Your DIY WiFi Antenna
By constructing and using this simple antenna, you'll experience a range of benefits:
- Improved Signal Strength: Say goodbye to those annoying dead spots.
- Faster Download and Upload Speeds: Stream videos and download files with significantly less buffering.
- Increased Range: Extend your WiFi coverage, allowing you to use your laptop from further distances.
- Cost-Effectiveness: This project is incredibly inexpensive, using materials you likely already have at home.
- Enhanced Online Gaming Performance: Reduce lag and enjoy a smoother gaming experience.
- Satisfying DIY Project: There's a certain satisfaction in creating something that works so effectively with your own hands.
Beyond the Basics: Advanced Techniques
For those looking to take their DIY antenna to the next level:
- Reflector Shape: Experiment with the shape of the reflector. A parabolic shape often provides the best results.
- High Gain USB WiFi Adapter: Using a high gain USB WiFi adapter greatly increases the reception of the signal.
- Material Selection: Experiment with different reflector materials to see if there are improvements.
Conclusion: Embracing a Stronger WiFi Future
With this simple and effective DIY antenna, you're well on your way to enjoying a much stronger and more reliable WiFi signal. It's a cost-effective solution that empowers you to take control of your WiFi experience. Take the plunge today and wave goodbye to those frustrating connectivity issues. Prepare to be amazed at the difference this simple project makes!
