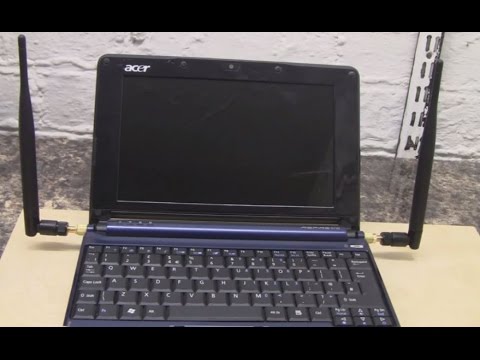
homemade wifi antenna for laptop

Title: Yagi WiFi Antenna 2.4Ghz - RP-SMA Directional Transmitter and Receiver
Channel: Poolarity - Life Hacks
Yagi WiFi Antenna 2.4Ghz - RP-SMA Directional Transmitter and Receiver by Poolarity - Life Hacks
homemade wifi antenna for laptop, diy wifi antenna for laptop, how to make a usb wifi antenna for laptop, how to make wifi antenna for pc, diy wifi antenna
Homemade WiFi Antenna: Blast Your Laptop's Signal Through Walls!
Unleash the Wireless Wave: Supercharge Your WiFi with a DIY Antenna!
Ever feel like your laptop's signal is trapped behind an invisible wall? Perhaps the WiFi struggles to pierce through your home's defenses. You are definitely not alone. Many of us face frustratingly weak WiFi connections. Fortunately, there's a surprisingly simple solution. You can build your own WiFi antenna. It’s an engaging project. It can significantly boost your signal strength. This will improve your online experience.
Decoding the WiFi Weakness: Why Is My Signal Lagging?
Before diving into the DIY adventure, let's briefly understand the enemy. WiFi signals, much like radio waves, weaken over distance. They also struggle with obstacles. Thick walls, metal objects, and even appliances can cause issues. Your router's stock antenna might not be powerful enough. Consequently, these factors contribute to the overall signal degradation. Understanding these factors is key to taking action. Building a superior antenna offers a potential fix. Essentially you are proactively addressing these signal-sabotaging elements.
Crafting Your Signal Savior: The Materials You’ll Need
Ready to fight back against weak WiFi? Gather your supplies. The good news is that the parts are affordable and readily available. These include:
A Pringles Can (or similar metal container): The classic choice! It acts as a reflector.
A WiFi Adapter (USB recommended): This is the heart of your operation.
A Short Length of Coaxial Cable: This connects your adapter to the antenna.
A Connector for the Coaxial Cable: Ensure a secure connection.
A Drill and Drill Bits: For modification purposes.
Electrical Tape: Securing your connections is essential.
Scissors or a Craft Knife: For careful material handling.
Optional: PVC Pipe or Similar for Mounting: To provide stability.
Step-by-Step: Building Your DIY WiFi Antenna
Alright, let's get started! Follow these steps carefully. We'll transform common items into a powerful WiFi booster.
Prepare the Can: Clean and dry your Pringles can. You'll need to make room for the adapter. Drill a hole near the bottom of the can. Ensure it's of a size that fits your coaxial cable connector.
Connect the Cable: Feed the coaxial cable through the hole. Attach the connector securely. This should be a snug fit.
Secure the Adapter: Now, prepare the WiFi adapter. Connect the coaxial cable to your adapter. Use the appropriate connector for a strong link.
Positioning is Key: The next step is to secure the adapter inside the can, keeping the antenna wire in a position. Proper positioning is vital for signal reception. Experiment to get the best results.
Seal and Stabilize: Once everything is carefully fitted, seal the can. Use electrical tape to fix the adapter in place. If using PVC, mount the can's base.
Placement and Testing: Now, place your new antenna. Position it strategically. Try different locations. Test your WiFi speed and range. Compare it to before. You should notice a significant difference!
Boosting Your Signal: Pro Tips and Tricks for Maximum Effectiveness
You've built your antenna. Now, let's optimize performance. Here are a few tips to maximize its effectiveness and increase your success.
Directional Focus: Point your antenna toward your router. This enhances signal reception.
Elevation Matters: Elevate your antenna. Placing it higher often improves signal strength.
Reduce Obstructions: Minimize obstacles between the antenna and router. Clear pathways do wonders.
Test and Tweak: Experiment with different positions. Fine-tune your setup. This is essential.
Consider the Adapter: Using a quality WiFi adapter greatly improves performance. This can greatly impact the output.
Beyond the Can: Exploring Advanced DIY Antenna Designs
While the Pringles can is effective. There are also other designs to consider. These allow for customization. This can offer even greater performance.
Cantenna Variations: Modify the can's shape. Experiment with different materials. Consider reflective liners.
Yagi-Uda Antennas: If you love to create, try building an advanced Yagi antenna. They are directional. They offer exceptional range.
Panel Antennas: Consider the design of a flat, panel-shaped antenna. These can be very effective to use.
Troubleshooting: Common Issues and Solutions
Did your antenna not work as expected? Don’t worry, here are some common issues. And, here are their respective solutions.
Weak Signal: Recheck connections. Ensure the antenna is aimed correctly.
Slow Speeds: Check other devices. Your internet speed might be the bottleneck.
Interference: Relocate the antenna. Move it away from appliances.
No Signal: Ensure the adapter is connected. Double-check your driver.
Final Thoughts: Embrace the DIY WiFi Revolution!
Building a DIY WiFi antenna is a rewarding journey. You are gaining control of your home network. You can enjoy faster, more reliable internet. So, grab your tools, gather your materials, and get ready to experience the freedom of a robust WiFi signal. Embrace the power to change the world, one DIY antenna at a time!
Laptop WiFi Upgrade: Blazing-Fast Speeds, Guaranteed!Homemade WiFi Antenna: Blast Your Laptop's Signal Through Walls!
Hey there, tech enthusiasts! Ever felt the frustration of a weak WiFi signal? That dreaded buffering wheel spinning endlessly as you try to stream your favorite show? Or maybe you're holed up in a corner of the house where the signal just gives up the ghost? Believe me, we all feel your pain. But guess what? You don’t have to spend a fortune on fancy, expensive routers or signal boosters. Today, we're diving headfirst into the wonderfully accessible world of homemade WiFi antennas. Get ready to say adios to dead zones and hola to a blazing-fast internet experience!
1. The WiFi Weakness Woes: A Universal Struggle
Let’s face it, weak WiFi is the modern-day equivalent of a medieval plague. It’s everywhere, it’s annoying, and it disrupts our lives in ways we barely notice until it's gone. Think about it – your work, your entertainment, your connection to the world all hinge on that tiny little signal. When it’s weak, everything slows down. Streaming becomes choppy, video calls freeze up, and even simple web browsing can feel like navigating through molasses. We've all been there, right? I remember trying to work from my back patio and essentially screaming into the void because my video conferencing kept cutting out. This is where the homemade antenna superhero swoops in!
2. Why Build Your Own WiFi Antenna? Saving the Day (and Your Wallet!)
So, why go homemade? Well, aside from the sheer geeky satisfaction of crafting something that actually works, there are a couple of compelling reasons. Firstly, cost. Those commercial signal boosters can be pricey. Building your own antenna is a budget-friendly alternative, using materials you might already have lying around the house! Secondly, customization. You can tailor your antenna to your specific needs and environment. Got thick walls? Need to reach across a larger distance? You can adjust the design to fit. It's like getting a bespoke suit for your WiFi!
3. Before You Begin: Understanding the Basics
Before we get our hands dirty, let’s demystify a few key concepts. Think of a WiFi signal like radio waves. These waves travel from your router and are received by your laptop. The stronger the signal, the better the connection. An antenna's job is to capture and amplify these waves. Understanding the basics of signal direction and how different materials affect the signal's path is key to success. Don't worry; it's not rocket science (unless you are a rocket scientist, in which case, you're probably already ahead of the curve!).
4. The Materials: Treasure Trove of the Everyday
Here's where the fun begins! You’ll be amazed at how everyday items can be repurposed into a high-performing antenna. Typical materials you'll need include:
- A USB WiFi Adapter (or an old router you can cannibalize)
- Copper wire (the thicker, the better - think coat hanger or even some electrician's wire)
- Tin foil (yes, that tin foil)
- A Pringles can, a coffee tin, or a similar cylindrical container
- Hot glue gun or strong adhesive tape
- Scissors or wire cutters
- Optional: Screwdriver, soldering iron (for extra durability)
5. The Pringle Can Antenna: A Classic for a Reason
The Pringles can antenna is a legendary design. It's simple, effective, and (let's be honest) you get to enjoy a delicious snack beforehand. Here's the gist:
- Prepare the Can: Clean out the Pringles can and remove any labels. Make sure it's dry!
- The Antenna: Attach your USB WiFi adapter securely inside the can, pointing towards the open end.
- The Reflector: Cover the inside of the can's base with tin foil. This acts as a reflector, focusing the signal.
- Placement: Aim the open end of the can towards your router, and see the magic happen!
6. The Cantenna: A Pringles Can's Cousin
The Cantenna, a variation of the Pringles can design, takes things a step further, adding a bit more directional control. The principles remain the same, but the approach to the antenna design might be different.
- Prepare the Can: Clean out the Pringles can and remove any labels. Make sure it's dry!
- The Antenna: Attach your USB WiFi adapter securely inside the can, pointing towards the open end.
- The Reflector: Cover the inside of the can's base with tin foil. This acts as a reflector, focusing the signal.
- Placement: Aim the open end of the can towards your router, and see the magic happen!
7. The Coffee Can Antenna: Size Matters (Sometimes)
Want a little extra oomph? A larger can, like a coffee tin, can provide some additional gain. The principle is the same as the Pringles can antenna. You'll need to adapt the construction, but the basic concept is the same.
- Prepare the Can: Clean out the coffee tin and remove any labels. Make sure it's dry!
- The Antenna: Mount your USB WiFi adapter securely inside the can, towards the open end.
- The Reflector: Line the bottom of the can with aluminum foil.
- Placement: Test and test!
8. Beyond the Can: Exploring Other Designs
Don't feel limited to cans! There are tons of other designs you can experiment with:
- Yagi Antennas: More complex, directional antennas that use a series of parallel elements to concentrate the signal. Think of it like a directional spotlight for your WiFi.
- Bi-Quad Antennas: Relatively simple to build and offer good performance.
- Cantenna with Dipole Antenna: Incorporates a dipole antenna for added broadcast capabilities.
9. Enhancing the Signal: Positioning is Key
No matter which antenna you choose, placement is absolutely crucial.
- Height: Higher is often better. Place your antenna as high as possible in a clear space.
- Obstacles: Avoid placing your antenna behind metal objects, thick walls, or other devices that could interfere with the signal.
- Experiment: Try different positions and angles to find the sweet spot. It’s a bit of trial and error but worth it once you find the ideal placement.
10. Connecting and Configuring: The Digital Dance
Once your antenna is built and positioned, it's time to connect it.
- Plug and Play: Most USB WiFi adapters are plug-and-play. Simply plug the adapter into your laptop's USB port.
- Drivers: You may need to install drivers. This is usually a quick process.
- Testing: Use a WiFi analyzer app (many are free) to test your signal strength and see the difference!
11. Troubleshooting: When Things Go Sideways
Sometimes, things don't work perfectly the first time. Frustration is normal. Here are some troubleshooting tips:
- Check Connections: Ensure all connections are secure.
- Repeat: Don't be afraid to try different designs or to tweak your existing one.
- Patience: Building any kind of antenna is a test of patience.
12. The DIY Delight: A Sense of Accomplishment
There's a profound satisfaction in creating something with your own two hands, and that accomplishment is amplified when it improves your digital life.
13. Safety First: Basic Precautions
- Avoid Electrical Hazards: Be careful when working with electrical components.
- Supervision: Always build under parental supervision.
14. Optimizing for Maximum Performance
Beyond the basics, there are ways to further improve your antenna's performance:
- Material Quality: Use high-quality materials to ensure optimal performance.
- Testing and Refinement: Continuously test and refine your design.
15. Beyond the Home: Expanding Your Wireless Horizons
These antennas can take you beyond your home network. You can potentially connect to open access points farther afield or even create a long-range link between two buildings, though we do still recommend keeping safety in mind and adhering to local regulations.
Okay, folks, that’s a wrap! Building a homemade WiFi antenna is a fun, rewarding, and surprisingly effective way to boost your signal strength, save money, and become a tech wizard in your own right.
Closing Thoughts:
Remember, the world of homemade antennas is a journey, not a destination. Don’t be afraid to experiment, learn, and iterate. And who knows? You might just become the hero of your own high-speed internet saga! The key here is experimentation. Don’t be afraid to test, revise, and improve your antenna. Embrace the DIY spirit! We encourage you to dive in and tell us about your experiences in the comments! Happy crafting, and happy surfing!
FAQs:
- Is building a homemade antenna legal? In most places, it's perfectly legal to build and use an antenna for your own personal use. However, it's essential to be aware of and comply with any local regulations regarding radio frequencies and transmission power.
Laptop External Antenna Mod 61
By andrew mcneil Laptop External Antenna Mod 61 by andrew mcneil
DIY USB Wifi Adapter from an Old Tablet REALTEK RTL8188ETV

By LoopLinks DIY USB Wifi Adapter from an Old Tablet REALTEK RTL8188ETV by LoopLinks
How to Get WiFi in a Gaming PC

By Zach's Tech Turf How to Get WiFi in a Gaming PC by Zach's Tech Turf

Title: DIY Extreme Range WiFi USB Antenna in 5 Minutes
Channel: Timothy Pleines
DIY Extreme Range WiFi USB Antenna in 5 Minutes by Timothy Pleines
Working With Laptop
Homemade WiFi Antenna: Blast Your Laptop's Signal Through Walls!
Tired of those frustrating WiFi dead zones that plague your home or office? Does your laptop's signal seem perpetually stuck in the digital basement, unable to penetrate those seemingly impenetrable walls? Fear not! We, the intrepid explorers of the digital frontier, have a solution that combines ingenuity, affordability, and a touch of good old-fashioned DIY spirit. Forget expensive routers and complicated network configurations. We're going to empower your laptop with a homemade WiFi antenna, transforming that weak signal into a powerful, wall-busting force.
Understanding the WiFi Signal: A Primer
Before we delve into the construction, let's briefly demystify the ethereal world of WiFi. WiFi, or Wireless Fidelity, broadcasts data using radio waves. These waves, much like those emitted by your favorite AM/FM radio station, travel through the air, carrying information between your device and your router. The strength and range of this signal are influenced by numerous factors, including the power of your router, the construction materials of your walls, and, crucially, the antenna. A better antenna translates to a stronger, more far-reaching signal. Standard laptop antennas, quite frankly, are often underwhelming, designed more for portability than performance. This is where our homemade solution comes into play.
Gathering Your Arsenal: The Necessary Components
The beauty of this project lies in its simplicity and accessibility. You likely have most of the required materials already lying around the house. Here's your shopping list:
- A USB WiFi Adapter (Optional, but Recommended for Maximum Impact): While your laptop has a built-in WiFi adapter, we're aiming for extraordinary signal strength. A dedicated, external USB WiFi adapter will act as the heart of our enhanced system. Look for one that supports the 802.11n or 802.11ac standards for optimal performance. Consider adapters with detachable antennas for future upgrades.
- A Pringles Can (Or Similar Cylindrical Container): Yes, you read that correctly! The iconic Pringles can, or a container of similar dimensions, acts as the core of our directional antenna. A metal container works best for signal focusing.
- A USB Extension Cable: This will connect your USB WiFi adapter to the antenna, allowing you to position the antenna strategically for optimal signal reception. Choose a length appropriate for your needs.
- Aluminum Foil: Regular kitchen aluminum foil is essential for reflecting and focusing the WiFi signal.
- Hot Glue Gun and Glue Sticks: This is the adhesive of choice for securing the antenna components.
- Scissors or a Craft Knife: For precise cutting.
- Ruler or Measuring Tape: Accuracy is key for optimal signal performance.
- A Drill (Optional, but Helpful): To neatly accommodate the USB connector.
Constructing Your WiFi Signal Amplifier: Step-by-Step Guide
Now, let's get our hands dirty and build the magic. Follow these steps meticulously for the best results:
- Prepare the Pringles Can: Remove the lid and bottom of the Pringles can. Thoroughly clean and dry the inside.
- Line the Interior with Foil: Carefully measure and cut pieces of aluminum foil to completely line the interior of the can. Ensure the foil surface is smooth and wrinkle-free. Secure the foil to the inside of the can using the hot glue gun. Overlap the edges slightly to provide complete coverage.
- Prepare Your USB WiFi Adapter or Laptop Antenna: If utilizing the internal antenna, carefully locate the antenna wire. If you are using a USB WiFi adapter, you can skip this step.
- Create an Entry Point (Optional): If using the included antenna on external adapter, you may need to adapt to fit the antenna inside. If using a USB WiFi Adapter, you should skip this step. At the bottom of the can, drill or carefully cut a hole large enough to accommodate the USB connector of your antenna or adapter.
- Assemble the System: Carefully insert the USB WiFi adapter or wire through the hole. Be sure the adapter is secure.
- Position and Test: Place your newly constructed antenna in a location where it can effectively "see" your router. Experiment with the antenna's direction; subtle adjustments can dramatically affect signal strength. To test, use a WiFi analyzer app on your laptop or smartphone to measure the signal strength. Move the antenna around and observe the signal strength improve.
Fine-Tuning for Optimal Performance: Tips and Tricks
Once your antenna is assembled, here are some tips to further enhance its performance:
- Directional Accuracy: Remember that this is a directional antenna. Point it directly toward your router for the best results. Experiment with minor adjustments to pinpoint the ideal angle.
- Obstacle Awareness: Avoid placing the antenna behind thick walls, metal objects, or large appliances, which can interfere with the signal.
- Elevation is Key: Elevate your antenna. Placing it higher up, even just a few feet, can significantly improve signal range.
- Experiment with Placement: Try placing the antenna in different rooms or near windows to see which location yields the best results.
- Upgrade (Later): Consider experimenting with different materials for the reflector. Try using a metal can. Consider using different types of connectors for best results.
Troubleshooting Common Issues
- Weak Signal: If the signal remains weak, double-check your connections and ensure all components are properly positioned. Ensure the internal foil is smooth and reflecting.
- Interference: Try moving the antenna away from other electronic devices that might be causing interference, such as microwaves or Bluetooth speakers.
- No Connection: Verify that your WiFi adapter is properly installed and that your laptop can connect to the network. Ensure the router is operational.
Beyond the Basics: Advanced Modifications
For the truly ambitious, there are ways to further refine your homemade antenna:
- Parabolic Reflector: Experiment with creating a parabolic reflector shape by curving the foil inside the can. This can concentrate the signal even more effectively.
- External Reflector: Attach a larger sheet of foil or a piece of metal to the back of the can to act as an external reflector. This can help to focus the signal further.
- Antenna Type: Try using different types of antennas. Consider using a directional or omnidirectional antenna.
Conclusion: Unleash the Power of Your WiFi!
By following these simple steps, you've transformed a humble Pringles can into a powerful WiFi signal amplifier. You are now equipped to banish those frustrating dead zones and enjoy seamless connectivity throughout your home or office. Prepare to be amazed as your laptop's signal penetrates walls and reaches previously unreachable corners. Embrace the DIY spirit, and enjoy the fruits of your labor – a stronger, more reliable WiFi connection, all thanks to your ingenuity and a little bit of aluminum foil. Congratulations, and happy browsing!
