como poner clave de wifi en laptop
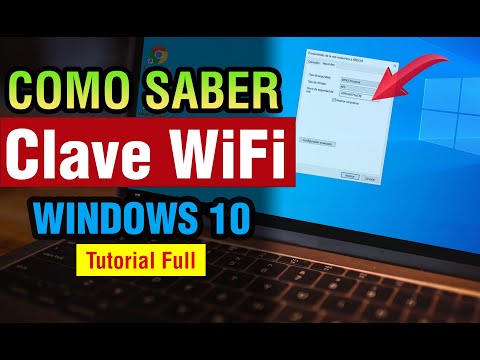
Title: Como saber la contrasea de mi WiFi de mi pc Windows 10 2025
Channel: Erick Clavijo Morante
Como saber la contrasea de mi WiFi de mi pc Windows 10 2025 by Erick Clavijo Morante
como poner clave de wifi en laptop, como desaparecer de internet, como conectar dos laptops
Unlock Your WiFi: The Easiest Laptop Setup EVER!
**Effortless Entry: Your Laptop's WiFi Connection, Demystified!
Alright, let's get you connected! Forget those tech headaches. Setting up your laptop's WiFi doesn't need to feel like rocket science. It's surprisingly straightforward, actually. Many people find themselves struggling initially. But believe me, you can do this!
The Initial Leap: Locating Your Network's Gateway
First off, where do you begin? You need to find your network. Consider this: your WiFi network is like your home address. Your laptop needs to know where to find it. Look at your available networks. In most cases, you'll find an icon on your taskbar. Perhaps it's near the clock. Click that icon to view available connections.
The list might seem overwhelming. However, don't panic! You'll see names, likely with a lock icon. This indicates a protected network. Next you'll probably see your home WiFi. Click it.
The Password Puzzle: Cracking the Code (Sort Of)
Now comes the secret code. You'll probably be prompted for your WiFi password. This is your key to unlocking the internet. It's usually on your router. Look for a sticker. It will display the network name and the password.
Carefully type the password. Double-check it for any typos. Once entered, hit "Connect." What happens next? Well, hopefully, you're online! Sometimes, it's that simple.
Troubleshooting Tango: When Things Don't Quite Click
However, sometimes, life throws a curveball. What if it doesn't connect? Don't throw your laptop out the window just yet! First, verify the password again. Are you absolutely certain you’ve entered the correct information?
Next, restart your router. Unplug it for about 30 seconds. Then, plug it back in. Wait for it to reboot. This step often works wonders.
Moreover, ensure your laptop's WiFi is actually turned on. Check your function keys. Some laptops have a dedicated WiFi on/off switch. Furthermore, your laptop's wireless card may be the problem. In that case, consider updating its drivers. You can typically find these on the manufacturer's website.
Beyond the Basics: Enhancing Your WiFi Experience
Now you are connected! What's next? You can make your WiFi experience even better. First, consider your router's placement. For optimal signal strength, position it centrally. Try to keep it away from walls and obstructions.
Second, consider upgrading your router. Older routers might struggle with modern demands. A newer router offers faster speeds and better coverage. They're more affordable than you think.
Finally, secure your network. Change your default router password. Use a strong password. This protects your data from prying eyes. Take these steps for enhanced safety.
Navigating the Digital Seas: Staying Connected on the Go
Connecting at home is one thing. What about when you’re traveling? Public WiFi networks become important. Use them cautiously. Public networks are usually less secure.
Consider using a VPN (Virtual Private Network). A VPN encrypts your data. As a result, it adds an extra layer of protection.
Moreover, be mindful of phishing attempts. Never enter personal information on an unfamiliar website. Always confirm the website's address before logging in.
The Final Word: Staying Connected with Confidence
There you have it! You’ve successfully set up your WiFi. You have the knowledge to troubleshoot problems. You’re ready to navigate the online world with confidence. Now go explore the internet!
Unlock Blazing-Fast WiFi on Your ASUS Windows 8.1 Laptop!Unlock Your WiFi: The Easiest Laptop Setup EVER!
Alright, let’s be honest. Setting up a new laptop can sometimes feel like navigating a digital minefield. You’re juggling logins, updates, and the ever-present question of how to actually connect to the internet. We've all been there, staring blankly at a blinking Wi-Fi icon, wondering why our brand-new tech seems determined to stay disconnected. Well, breathe easy, friends! We're about to make things infinitely easier. Forget the tech jargon and hair-pulling frustration; this is about to be the simplest laptop Wi-Fi setup you've ever experienced. Prepare for smooth sailing – finally!
1. The Gateway to Freedom: Why Wi-Fi Matters
Think of your Wi-Fi connection as your digital lifeline. It’s the bridge to everything: staying in touch with loved ones, streaming that hilarious cat video you just have to see, or getting some actual work done (when you have to, of course!). Without it, you're stuck, isolated in a digital desert. So, understanding the importance of a good, solid Wi-Fi connection is paramount. It's practically a utility, like electricity! We want to get you connected quickly, painlessly, and back to enjoying all the amazing things your laptop has to offer.
2. Before You Begin: Prepping for a Smooth Setup
Before we dive in, let's make sure you're in the best possible shape for a quick setup. Think of it like prepping the ingredients before you start cooking a stellar meal.
- Know Your Router's Password: This is the golden ticket! Locate the password, usually found on a sticker on your router itself or in your router’s setup guide. If you can’t find it, reach out to your internet service provider.
- Charge, Charge, Charge! Nothing's worse than your laptop dying mid-setup. Be sure you have a decent charge before you start.
- Have Your Phone Handy: Sometimes, you might need to troubleshoot, and having a phone to look something up can be a lifesaver.
3. The Initial Connection: Your Laptop's First Dance with WiFi
This is the moment of truth! Let's get connected.
- Locate the Wi-Fi Icon: It’s usually in the system tray (bottom right corner of your screen, near the clock). It looks like a little curved antenna.
- Click to Scan: Click the Wi-Fi icon. Your laptop will begin scanning for available networks.
- Select Your Network: Look for your home network's name (SSID). Each network has a unique name, so you should be able to spot yours.
- Enter the Password: This is where your router password comes in. Type it carefully; even a single typo can cause issues.
- Connect and Celebrate! Click "Connect." If the password is correct, you should be connected! If it's not, double-check the password and try again.
4. Troubleshooting Troubles: What if It Doesn't Connect?
Sometimes, things don't go as smoothly as planned. Don't panic! Here are a few quick fixes:
- Double-Check the Password: Seriously, it's the most common culprit!
- Restart Your Router: Unplug your router, wait 30 seconds, and plug it back in. This simple reset often does the trick.
- Check Airplane Mode: Make sure Airplane Mode is off. It’s a sneaky little setting!
- Move Closer to the Router: Sometimes, the signal isn't strong enough.
- Contact Your ISP: If all else fails, your internet service provider can provide further assistance.
5. Security First: Protecting Your Network
Now that you're connected, let's talk security. You wouldn't leave your front door unlocked, would you? Your Wi-Fi network is the same.
- Use a Strong Password: Aim for a password with a mix of upper and lowercase letters, numbers, and symbols. The longer, the better!
- Enable Network Encryption (WPA2/WPA3): This encrypts your network traffic, shielding it from prying eyes. Most routers have this enabled by default, but it's worth checking.
- Change Your Router's Default Password: This deters unauthorized access.
- Keep Your Router's Firmware Updated: This patches security vulnerabilities.
6. The Importance of Updates: Keeping Things Running Smoothly
Just like your car needs regular maintenance, your laptop needs updates. They're crucial for security, performance, and compatibility with newer technologies.
- Operating System Updates: Windows and macOS regularly release updates. Accept them when prompted or schedule them for a convenient time.
- Driver Updates: These ensure your hardware (including your Wi-Fi adapter) works optimally.
- Software Updates: Also essential, these improve usability and fix bugs.
7. Maximizing Your WiFi Speed: Tweaking for Top Performance
Do you ever feel like your Wi-Fi is moving at a snail's pace? Let’s tweak the settings for maximum performance.
- Placement Matters: Position your router in a central location, away from walls and potential interference (like microwaves or cordless phones).
- Channel Selection: Some routers allow you to select the Wi-Fi channel. Find the least congested one.
- Use 5 GHz if Possible: This band is faster, offering more speed, but it has a shorter range. It’s perfect for close proximity.
- Optimize Bandwidth: Close unused applications to prevent draining the bandwidth.
8. Common Wi-Fi Problems and How to Solve Them
Life is full of problems, and Wi-Fi is no exception. Let’s get a handle on common challenges:
- Slow Speeds: Try restarting your router, moving closer to it, or upgrading your internet plan.
- Intermittent Connection: This is often caused by interference. Try changing the router's placement or changing the Wi-Fi channel.
- "Limited" Connection: This typically indicates a problem with your internet connection itself. Reset your router or troubleshoot with your ISP.
- "No Internet Access": Double-check the router's connection to the modem, and make sure you are connected to the correct WiFi network, with the correct password.
9. Extending Your WiFi Range: Conquering Dead Zones
Do you have rooms where your Wi-Fi connection is unreliable? No problem! There are several solutions:
- Wi-Fi Extenders: These devices amplify your Wi-Fi signal, expanding its reach.
- Mesh Networking: This system uses multiple access points to create a seamless Wi-Fi blanket throughout your home.
- Powerline Adapters: These use your home's electrical wiring to transmit the Wi-Fi signal.
10. The Power of a Wired Connection: An Alternative Path to the Web
While this article has focused on Wi-Fi, don’t forget the tried-and-true wired connection! It's always the fastest and most reliable option. Simply plug an Ethernet cable from your router into your laptop.
11. Optimizing Your Laptop's WiFi Settings
Let's dive a bit deeper into your laptop settings. You can fine-tune them to boost your Wi-Fi experience.
- Windows Settings: Go to Network & Internet settings. The "Wi-Fi" section lets you manage network connections, adapters, and troubleshooting tools.
- Mac Settings: Open Network Preferences in System Preferences. Here you can manage your Wi-Fi connection and its settings.
- Consider "Roaming Aggressiveness": Sometimes, you can optimize the settings for areas with spotty connections.
12. Managing Multiple WiFi Networks
How do you cope when numerous WiFi networks clutter the landscape?
- Delete or Rename Networks: Remove outdated or unused networks to help the laptop connect faster.
- Prioritize Networks: You can establish a pecking order for your favored WiFi signals.
- Utilize Network Profiles: Some operating systems allow you to create separate profiles for various locations, such as home and work, to streamline connecting.
13. Security Software and WiFi
Cybersecurity can impact your WiFi.
- Firewall Settings: Ensure the network on your firewall is set appropriately, and that the firewall isn't interfering with the WiFi connection.
- Antivirus Scanning: Scan your computer routinely for malware that might affect your connection or compromise the safety of your information.
14. Upgrading Your Hardware: When It's Time for a Change
If your Wi-Fi woes persist, it might be time to upgrade your hardware.
- New Router: An upgraded router can increase your speed and address range issues.
- Wi-Fi Adapter (For Older Laptops): If your laptop's adapter is ancient, a new one can provide noticeable speed enhancements.
15. Enjoying the Fruits of a Well-Connected Laptop
You've done it! You've conquered the Wi-Fi setup, navigated the troubleshooting, and secured your connection. Now, go forth and explore the digital world! Enjoy streaming, gaming, and connecting with loved ones. You deserve it!
Closing Thoughts
There you
Laptop to TV Wireless: The SHOCKINGLY Easy Method!Cmo cambiar la clave de seguridad del wifi en la PC

By Yoney Gallardo Cmo cambiar la clave de seguridad del wifi en la PC by Yoney Gallardo
Como ACTIVAR CONEXIN WI-FI O RED INALMBRICA en PC O LAPTOPMetodo Recomendado 100

By Christian Asto Como ACTIVAR CONEXIN WI-FI O RED INALMBRICA en PC O LAPTOPMetodo Recomendado 100 by Christian Asto
Comando para ver CONTRASEAS WIFI en Windows hacking ciberseguridad infosec windows

By TheGoodHacker Comando para ver CONTRASEAS WIFI en Windows hacking ciberseguridad infosec windows by TheGoodHacker

Title: CAMBIAR LA CONTRASEA DEL WIFI DEL INTERNET EN EL PC
Channel: Robelin Tech
CAMBIAR LA CONTRASEA DEL WIFI DEL INTERNET EN EL PC by Robelin Tech
Change Wifi Settings
Unlock Your WiFi: The Easiest Laptop Setup EVER!
Navigating the digital landscape shouldn't be a Herculean task. In this comprehensive guide, we’ll demystify the WiFi setup process on your laptop, ensuring a seamless, stress-free experience. Forget convoluted instructions and frustrating troubleshooting. We’ve distilled the process into clear, actionable steps designed for everyone, regardless of tech proficiency.
Step 1: Verifying Your Wireless Network Adapter
Before even considering connecting, confirm your laptop possesses a functional wireless network adapter. This is essentially the piece of hardware responsible for detecting and connecting to WiFi signals.
Windows Users: Click the Windows Start button (usually in the bottom-left corner). Type "Device Manager" and select it from the search results. In the Device Manager window, expand the "Network adapters" section. You should see an entry that mentions "Wireless Network Adapter," "WiFi Adapter," or something similar. If you see it, great! Your adapter is present. If not, you may need to install drivers, which we’ll cover later. A red "X" or yellow exclamation mark next to the adapter name indicates a problem.
macOS Users: Click the Apple menu (top-left corner of your screen). Select "About This Mac." Click "System Report…" in the Overview window. In the Hardware section on the left, select "Wi-Fi." This will display detailed information about your Wi-Fi adapter, including its manufacturer and model.
Step 2: Identifying and Selecting Your Network
Once you've confirmed an operational wireless adapter, the next step is to locate and connect to your WiFi network. This process involves selecting your network name (SSID) from a list of available networks.
Windows Users: Click the WiFi icon in the system tray (usually located near the clock in the bottom-right corner). This will reveal a list of available WiFi networks. Look for your network name (SSID). This is often the name you assigned to your WiFi router during setup.
macOS Users: Click the WiFi icon in the menu bar (top-right corner). This will display a list of available WiFi networks. Identify your network name (SSID). A checkmark beside a network indicates you’re already connected.
Step 3: Entering Your Network Password (Security Key)
After selecting your network, you'll be prompted for your network password, also known as a security key or WPA/WPA2/WPA3 passphrase. This is a critical step to secure your network and prevent unauthorized access.
Windows Users: A window will pop up asking for the network security key. Type in the password exactly as it was configured on your router. Capitalization matters! If this is a password you set up yourself, which it should be, make sure you're typing correctly. Consider checking the "Show characters" box to see what you're typing. Once entered, click "Next" or "Connect."
macOS Users: A prompt will appear asking for the password. Enter the security key associated with your network. Similar to Windows, make sure you're typing everything correctly. Click "Join".
Step 4: Troubleshooting Common Connection Issues
Sometimes, things don't go as planned, and connection issues arise. Don't panic! Here are some common problems and their solutions:
Incorrect Password: Double-check your password. The most frequent issue is a mistyped password. Ensure Caps Lock is off and re-enter the password. If you're still unsure, check your router's settings (usually accessible via a web browser by typing the router's IP address; check the router's manual for the specifics) to confirm the correct password.
Network Not Visible: If you don’t see your network listed, move closer to your router. WiFi signals can be affected by distance and obstructions. Also, ensure your router is turned on and broadcasting the SSID. Some routers allow you to "hide" the SSID, in which case you'll need to manually add the network (see the next section).
Router Problems: Restart your router and modem. This simple step often resolves connection issues. Unplug both devices, wait 30 seconds, plug the modem back in, wait for it to power up fully, and then plug the router back in.
Driver Issues: Outdated or corrupted network adapter drivers can cause connectivity problems.
- Windows Users: Go back to Device Manager (as described in Step 1). Expand "Network adapters." Right-click your wireless network adapter and select "Update driver." Choose "Search automatically for drivers." Windows will try to install the latest drivers. If that doesn't work, you can try uninstalling the adapter (right-click, "Uninstall device") and letting Windows automatically reinstall it upon reboot.
- macOS Users: macOS usually updates drivers automatically. However, if you suspect a driver issue, visit the manufacturer’s website of your Wi-Fi adapter (identified in the System Report, as shown in Step 1) and search for specific driver updates.
Step 5: Manually Adding a Hidden Network (Advanced)
Some networks are configured to hide their SSID. This means the name isn't broadcast, and you need to add the network manually.
Windows Users: Click the WiFi icon in the system tray. Select "Network & Internet settings," then "Change adapter options." Right-click your wireless network adapter and select "View available wireless networks" or "Connect to a network." Select "Network and Sharing Center." Click "Set up a new connection or network." Then choose "Manually connect to a wireless network". Enter the SSID, select the security type (usually WPA2-PSK or WPA3-Personal), enter the security key, and select if you want to connect automatically. Click "Connect."
macOS Users: Click the WiFi icon in the menu bar. Select "Join Other Network…" Enter the "Network Name," security type, and the security key. Click "Join."
Step 6: Optimizing Your WiFi for Performance
Once connected, consider a few tweaks to maximize your WiFi speed and reliability.
- Router Placement: Position your router in a central location, away from walls and obstructions. Avoid placing it near metallic objects, which can interfere with the signal.
- Channel Selection: Modern routers automatically select the best WiFi channel. However, if you experience interference, you can try manually changing the channel. Consult your router's manual for instructions. WiFi analyzer apps (available for smartphones) help you identify the least congested channels in your area.
- Upgrade Your Router: If you have an older router, consider upgrading to a newer model with the latest WiFi standards (e.g., Wi-Fi 6 or Wi-Fi 6E). This can significantly improve speed and range.
- Limit Network Usage: Excessive network usage, from video streaming to large downloads, can slow down your connection. Be mindful of bandwidth-intensive activities.
Step 7: Securing Your WiFi Network
Protecting your network is as crucial as connecting to it.
- Strong Password: Use a strong, complex password for your WiFi network. It should be at least 12 characters long and include a mix of uppercase and lowercase letters, numbers, and symbols.
- WPA3 Encryption: Configure your router for WPA3 encryption if it supports it. WPA3 is the most secure WiFi security protocol.
- Guest Network: Use a guest network to provide internet access to visitors without giving them access to your primary network or your devices.
- Regular Firmware Updates: Keep your router's firmware updated. Firmware updates often address security vulnerabilities. Check your router manufacturer's website for updates.
Step 8: Staying Connected and Maintaining a Stable Connection
Once you've successfully set up your WiFi, maintaining a stable connection is key.
- Monitor Your Connection: Regularly check your WiFi signal strength and internet speed.
- Troubleshoot Promptly: If you experience connection problems, address them immediately. The sooner you resolve any issues, the better.
- Regular Maintenance: Perform occasional maintenance. Restart your devices, and regularly update your device drivers and your router firmware.
Additional Resources:
- Your Laptop’s Manual: Consult your laptop’s manual for specific instructions and troubleshooting steps.
- Router Documentation: Refer to your router’s manual for detailed information on its features and settings.
- Online Forums and Support: Websites like Google Support forums, Reddit, and online tech communities can provide help and troubleshooting support.
Conclusion: A Connected World, Simplified
Setting up your laptop's WiFi is no longer a hurdle. With the clear steps and troubleshooting tips outlined above, you can confidently navigate the setup process. Embrace the digital world, and enjoy a seamless, secure, and lightning-fast internet experience on your laptop, and transform the way you experience the digital world, one effortless connection at a time.
