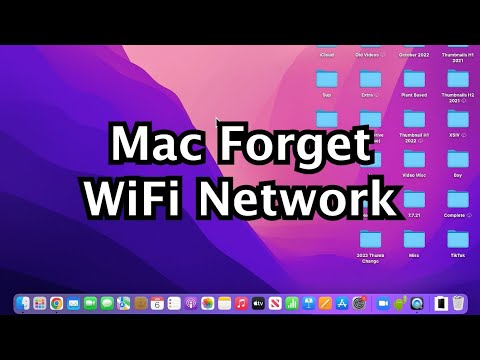
how do i get a mac laptop to forget wifi

Title: How to Forget a WiFi Network on Mac
Channel: Pixel & Bracket
How to Forget a WiFi Network on Mac by Pixel & Bracket
Mac WiFi Nightmare? Erase It NOW! (Forget Network Trick)
Mac WiFi Woes Vanquished: Unleash Blazing Speed!
Is your Mac’s WiFi a persistent source of frustration? Is it consistently slower than it should be? Perhaps your connection drops at the most inopportune moments. It can transform even the simplest tasks into a battle. Well, hold on, because we’re about to change that. We'll banish those pesky WiFi demons for good. Forget the tedious network tricks you’ve probably tried already. Instead, we’ll explore the root of the problem. We'll find the solutions that actually work.
The Silent Saboteur: Unmasking WiFi Gremlins
Think of your Mac's WiFi as a bustling highway. Data is racing to your device. Other devices connected to your router are also using this highway. Sometimes, roadblocks appear. These can significantly impede your connection. They can even halt everything completely! These roadblocks are the WiFi gremlins. They manifest in various ways. Interference is a major culprit. Think of crowded radio waves. Other devices are like noisy neighbors. They are broadcasting on the same channel. This creates interference and can cause a slower connection. The physical distance from your router matters, too. The further away you are, consequently, the weaker the signal becomes. Furthermore, old or outdated WiFi hardware can be sluggish. It struggles to keep up with today's demands.
Diagnostic Deep Dive: Identifying the WiFi Culprit
Before jumping into fixes, we need intel. Where does the problem lie? Let’s run some quick diagnostics. First, check your internet speed. Websites like Speedtest can easily assist. Compare your results with the speed you’re paying for. Is it dramatically different? Then, investigate the router itself. Try restarting it. Sometimes, a simple reboot is all it takes. Also, examine other devices. Are they experiencing similar WiFi issues? If so, the problem likely lies with your internet service or router. If not, the focus shifts to your Mac.
Signal Strength Secrets: Amplifying Your WiFi Might
Signal strength is critical. Your WiFi signal is like a whisper. Walls, furniture, and other obstacles can muffle it. So, reposition your router. Place it in a central, open location. Elevate it if possible. This helps it broadcast its signal further. Update your router's firmware. Manufacturers constantly issue updates. These updates improve performance and security. They often resolve known issues. Be sure to reduce interference. Move your router away from microwaves, Bluetooth devices, and other electronics. These devices can interfere with your WiFi signal.
Channel Surfing for Superior Connectivity
Your router broadcasts on a specific channel. This channel can become congested, causing slowdowns. Like lanes on a highway, some channels are busier than others. Using your router's settings, you can switch to a less crowded channel. Many routers have an "auto" setting. This setting lets your router automatically find the best channel. If you’re technologically inclined, investigate WiFi analyzer apps. These apps can show you which channels are least congested in your area.
Mac Magic: Optimizing Your System Settings
Your Mac's settings can impact your WiFi as well. Ensure your Mac is up-to-date. Old software can cause compatibility issues. Then, verify your network settings. Go to System Preferences > Network. Select your WiFi connection. Make sure the settings are correct. Experiment with different DNS servers. The default DNS servers your internet service provider provides can be slow. Consider using a faster, more reliable DNS provider. Google Public DNS or Cloudflare are popular choices. They can improve your browsing experience.
The Router Renaissance: Upgrade for Peak Performance
If everything else fails, it might be time for an upgrade. Consider a new router. Older routers may struggle with today’s demands. They can become bottlenecks. Look for routers with the latest WiFi standards. Such as WiFi 6 (802.11ax) or WiFi 6E. These standards offer faster speeds and improved performance. Consider the range your router covers. Does it cover your entire home? If not, explore mesh WiFi systems. A mesh system uses multiple access points. They extend your WiFi coverage throughout your home.
Troubleshooting Triumph: A Checklist for Success
Let's recap. Here is a checklist to help you solve your WiFi problems:
- Check your internet speed.
- Restart your router and modem.
- Reposition your router.
- Update your router's firmware.
- Reduce interference.
- Change your WiFi channel.
- Update your Mac's software.
- Experiment with different DNS servers.
- Consider a router upgrade.
Following these steps will hopefully resolve your WiFi issues. Moreover, these helpful suggestions can improve your overall experience. You'll soon be enjoying lightning-fast internet speeds. Finally, say goodbye to those maddening WiFi nightmares forever.
Laptop WiFi Antenna Upgrade: SHOCKING Speed Boost!Mac WiFi Nightmare? Erase It NOW! (Forget Network Trick)
Ever felt like your Mac's WiFi is possessed? One minute you're streaming your favorite show, the next you're staring at the spinning wheel of death, wondering if you accidentally angered the internet gods. We've all been there. The frustration of a flaky WiFi connection can be enough to make you want to chuck your MacBook across the room (don't do that!). But before you resort to such drastic measures, let's dive deep into the common culprits behind your Mac WiFi woes and, more importantly, how to fix them. We're ditching the typical, overly technical network tricks and focusing on practical, real-world solutions that actually work. Get ready to say goodbye to those frustrating connection issues and hello to blazing-fast WiFi!
1. The Silent Saboteur: Identifying Your WiFi Problem
First things first, let's diagnose the issue. Is your WiFi connection completely dead, or is it just painfully slow? Does this happen with all websites and apps, or just specific ones? Does it happen only on your Mac, or are other devices on your network experiencing the same problem? Think of it like a doctor's appointment; the more information you can provide, the better the diagnosis. A slow connection could be due to a multitude of factors, from router overload to interference. A completely dead connection, however, points to a different set of potential problems. We'll tackle both.
2. Router Reboot: The Underrated WiFi Powerhouse
This sounds ridiculously simple, but honestly, it fixes about 80% of WiFi problems. Think of your router as the heart of your internet connection. It works tirelessly, 24/7, and like any hardworking organ, it sometimes needs a break. A simple restart can clear out any minor glitches, refresh its memory, and get things running smoothly again. Unplug your router (and your modem, if they're separate) from the power outlet. Wait a full 30 seconds – yes, the full 30 seconds – before plugging them back in. Give them a few minutes to boot up completely, and then test your connection. Magic!
3. Distance Doesn't Make the Heart Grow Fonder (of WiFi): Location, Location, Location!
Where is your Mac in relation to your router? The closer, the better. Walls, particularly those made of concrete or brick, can significantly weaken your WiFi signal. Think of it like a radio signal trying to get through a dense forest. If your Mac is far away from the router, or if there are multiple obstructions in between, your connection will suffer. Try moving your Mac closer to the router and see if that improves things. Seriously, it's often as simple as that. It worked for me when I was troubleshooting my own Mac WiFi problems.
4. Channel Surfing for a Stronger Signal: Minimizing Interference
Your router broadcasts WiFi signals on a specific channel. In a crowded environment with lots of WiFi networks (apartment buildings, busy neighborhoods), these channels can overlap, causing interference. Think of it like everyone trying to talk at the same time at a party – it gets noisy and difficult to understand. To improve your connection, you can change your router's channel. Log into your router's admin panel (usually by typing its IP address into your web browser – check your router's manual for instructions). Look for the WiFi settings and find the channel selection. Experiment with different channels (1, 6, and 11 are often good starting points as they are the least likely to overlap), and see if your connection improves. You can often find apps that help you find less congested channels, if needed.
5. The "Other Devices" Factor: Bandwidth Bandits
Do you have other devices hogging all the bandwidth? If your roommate is streaming 4K movies, your kids are playing online games, and you're trying to download a massive file, your Mac might be getting the short end of the stick. Think of it like sharing a single slice of pizza with a hungry crowd. Prioritize. If possible, ask others to limit their bandwidth usage while you're trying to work or stream. Many routers also have Quality of Service (QoS) settings, which allow you to prioritize certain devices or applications.
6. Software Shenanigans: The macOS Update Check
Sometimes, outdated software can cause compatibility issues that affect your WiFi connection. Make sure your Mac is running the latest version of macOS. Go to System Preferences (or System Settings in newer versions) > Software Update and check for updates. Regularly updating your operating system is like giving your Mac a health check-up – you're ensuring everything is running smoothly and efficiently.
7. Airport Utility's Secret Weapon: Diagnosing the Problem (Really!)
Apple's Airport Utility isn't just for setting up AirPort devices. It can also be a great tool for diagnosing WiFi problems. It might be buried in your utilities – find it by searching for it using Spotlight (the magnifying glass icon in the top right corner of your screen). Use Airport Utility to check for network issues and identify potential problems with your connection. It can provide valuable insights into what's happening behind the scenes.
8. Firewall Fiddling: Ensuring WiFi Access
Your Mac’s firewall is designed to protect your system, but occasionally, it can block legitimate network traffic, including WiFi connections. Check your firewall settings in System Preferences (or System Settings) > Network > Firewall. Ensure that the firewall isn't inadvertently blocking any necessary connections. Though, be cautious when adjusting your firewall settings. Always double-check the implications before making changes.
9. Network Settings Reset: A Clean Slate
If all else fails, we can try resetting your network settings. This will clear your saved WiFi passwords and settings, essentially starting from scratch. Go to System Preferences (or System Settings) > Network. Select WiFi, and then click the "Advanced" button. In the "Preferred Networks" tab, delete all of the WiFi networks in the list. Then go back to the WiFi menu and reconnect to your network.
10. The Mystery of the Profiles: Removing Old and Corrupted Profiles
Your Mac stores WiFi network profiles, which can sometimes become corrupted, leading to connection problems. These corrupt profiles can be tough to track down. If you are having persistent issues, it might be helpful to remove old and unused network profiles. Go to System Preferences (or System Settings) > Network > WiFi > Advanced > Preferred Networks. Remove any networks you no longer use. Then, reconnect to your desired network.
11. Look to the Hardware: Is the Router the Culprit?
Sometimes, the problem isn't with your Mac, but with your router. Is it old? Is it starting to show its age? Routers have a limited lifespan, and if your router is outdated, or if it's simply not powerful enough to handle your internet usage, it might be time for an upgrade. If you've tried all of the above steps and your WiFi is still a disaster, consider upgrading your router.
12. The Ethernet Alternative: The Wired World
If you absolutely need a reliable connection, and WiFi is consistently failing you, consider using an Ethernet cable. It's the gold standard of internet connections. Connect your Mac directly to your router using an Ethernet cable. Think of it as the highway, while WiFi is a bumpy dirt road. You’ll experience a much more stable and faster connection, although it sacrifices the wireless convenience.
13. Malware Matters: Ensuring Your Mac is Clean
While less common than other causes, malware can sometimes interfere with your WiFi connection. Run a scan with a trusted antivirus program to ensure your Mac is clean. Think of it like ridding your home of unwanted, uninvited guests. If you suspect malware, it's crucial to take the appropriate action to remove it and protect your device.
14. AppleCare and Beyond: Seeking Professional Help
If you've tried everything and your WiFi problems persist, it might be time to seek professional help. Contact Apple Support, or take your Mac to an Apple Store or an authorized service provider. They have the tools and expertise to diagnose and fix more complex issues.
15. The Final, Final Steps: Troubleshooting Your Router
There are a few specific router troubleshoots that can help. Firmware updates, for instance. Router manufacturers regularly update their firmware to fix bugs and improve performance. Check your router's admin panel for firmware updates and install them if available. If the problem is still present, try factory resetting your router. This wipes all your settings and returns it to its original state. And, on occasion, contacting your ISP (Internet Service Provider) may be helpful, especially if the problem seems to be beyond just your devices.
Closing Thoughts: Reclaiming Your WiFi Sanity!
Dealing with a flaky WiFi connection can be incredibly frustrating. We hope the tips and tricks we've provided have helped you troubleshoot and resolve the issues plaguing your Mac. Remember, it's a process. Not all solutions work for everyone. But, by systematically working through these steps, you'll be able to pinpoint the source of your WiFi woes and get back to enjoying a fast, reliable internet connection. Now go forth and conquer those connection problems!
Frequently Asked Questions
My WiFi is connected, but the internet is slow. What can I do?
Start by checking your internet speed using an online speed test. Then, try restarting your router and modem. Make sure other devices aren't hogging all the bandwidth. Reset your network settings. Finally, look at the hardware. A faulty router or modem may lead to slow
How to Forget a WiFi Network on MacBook
By Tech Tips How to Forget a WiFi Network on MacBook by Tech Tips
How To Forget Wifi Networks On Mac

By Foxy Tech Tips How To Forget Wifi Networks On Mac by Foxy Tech Tips
How to Forget a Wi-Fi Network on a Mac

By howtomac9319 How to Forget a Wi-Fi Network on a Mac by howtomac9319

Title: Remove Previous Wi-Fi Networks From Your Mac
Channel: MacTricksAndTip
Remove Previous Wi-Fi Networks From Your Mac by MacTricksAndTip
Laptop Wifi Hotspot
Mac WiFi Nightmare? Erase It NOW! (Forget Network Trick)
Are you perpetually battling the ghost of slow Wi-Fi performance on your beloved Mac? Does the spinning beachball of death seem to taunt you every time you attempt to load a webpage or stream your favorite show? You're not alone. Millions of Mac users worldwide experience frustrating Wi-Fi inconsistencies, and the culprit is often more nuanced than a simple network outage. We are here to help you reclaim your digital freedom. Let’s dive deep and expose the hidden gremlins that sabotage your Mac’s wireless connectivity, providing actionable solutions that go far beyond the surface-level suggestions you've likely encountered.
Understanding the Mac WiFi Ecosystem: A Deep Dive
Before we begin untangling the web of Wi-Fi woes, it's important to grasp the intricate dance between your Mac, your router, and the wider internet. Your Mac's Wi-Fi adapter is a sophisticated piece of hardware, constantly striving to find the optimal connection. It analyzes signal strength, channel congestion, and a multitude of other factors to maintain a stable and speedy link. But this process is susceptible to interference from various sources, and subtle misconfigurations can lead to substantial performance drops. Think of your Wi-Fi as an invisible highway; traffic jams, detours, and poorly maintained roads can significantly impact travel time.
Common Culprits: Identifying the Wi-Fi Saboteurs
The primary sources of Wi-Fi degradation often lie undetected. These silent saboteurs include:
- Channel Congestion: Your router broadcasts its signal on a specific channel. If neighboring routers operate on the same channel, they create interference, effectively jamming the Wi-Fi highway.
- Router Placement: Where you place your router in your home is often a critical, yet overlooked, factor. Walls, metal objects, and electronic devices can interfere with wireless signals and significantly diminish speed and coverage.
- Outdated Firmware: Router firmware, like the operating system on your Mac, needs regular updates. These updates often contain critical security patches and performance enhancements.
- Interference from Electronic Devices: Microwaves, Bluetooth devices, and even baby monitors can generate interference, especially on the 2.4 GHz frequency.
- DNS Issues: Your Domain Name System (DNS) settings translate website addresses into numerical IP addresses. If your DNS server is slow or unreliable, it can cause significant delays when loading websites.
- Software Conflicts: Certain applications on your Mac can inadvertently interfere with Wi-Fi performance.
- Hidden Bloatware: Background processes you're unaware of can quietly consume bandwidth.
The Forgotten Network Trick: A Superior Approach
Many online suggestions offer generic network troubleshooting such as restarting your Mac or resetting your router. This guide moves beyond the basics. We’ll implement the “forgot network” approach, but this time with a deep understanding of the underlying factors contributing to your slow Wi-Fi.
Step-by-Step: Erasing the Mac WiFi Nightmare
Archiving Your Existing Network Settings:
Before deleting your Wi-Fi network settings, it is imperative to create a backup. This prevents the potential loss of important information such as your passwords.
- Open Keychain Access: Launch the Keychain Access application (located in /Applications/Utilities/).
- Search for Your Network: Use the search bar to find the name of your Wi-Fi network.
- Examine Keychain Entry: Double-click your network’s entry in the list. In the Attributes tab, you’ll see your password. Securely copy this information, or take a screenshot.
- Securely Store this Information: Save or copy the saved password and wireless network information in a secure location. This may be a password manager or a physical document (like a notebook), that is securely stored.
Forgetting and Resetting Your Network:
Now, let's proceed with the "forget network" process that many other guides will recommend. The critical difference here is the care taken to ensure a complete and clean reset.
- Open System Settings: Navigate to System Settings (formerly System Preferences) from the Apple Menu.
- Select Wi-Fi: Choose the "Wi-Fi" entry.
- Forget the Network: Click the "i" information button next to your connected Wi-Fi network. In the new window, select "Forget This Network." Confirm the action when prompted.
Router Reboot and Thorough Cleaning:
After clearing network settings, a complete router restart is imperative. This clears the router's cache as well as its operating system.
- Unplug the Router and Modem: Power down both your router and your modem (if separate). Allow them to remain unplugged for a minimum of 60 seconds. This allows the devices to fully clear their memory.
- Power Up the Devices: Plug in the modem first, and wait for it to fully initialize. This may take a few minutes, as the modem needs to reconnect to your Internet Service Provider (ISP). Next, plug in the router and allow it to start up.
- Clear Cache: Restart your Mac. This clears many of the temporary files that could interfere with your Wi-Fi performance.
Reconnecting and Optimizing Network Settings:
Once your router has rebooted, reconnect to your Wi-Fi network. This time, we'll optimize settings for a smoother experience.
- Connect to Your Network: In System Settings, select your Wi-Fi network and, using the stored password, re-enter your Wi-Fi password.
- Re-evaluate the Router Channel: Use a Wi-Fi analyzer app (available in the App Store) to identify the least congested Wi-Fi channel in your area. Most routers automatically select a channel, but it's worth checking. Consider changing your router's channel to one that is less crowded, especially for the 2.4 GHz band.
- Update Router Firmware: Check your router’s manufacturer’s website for firmware updates. Download and install updates, following the manufacturer's instructions. Firmware updates frequently include critical security and performance enhancements.
- Optimize DNS Settings: Change your DNS settings to a public DNS server like Google DNS (8.8.8.8 and 8.8.4.4) or Cloudflare DNS (1.1.1.1 and 1.0.0.1). This can significantly improve your internet speed. Navigate to System Settings > Network > Wi-Fi > Details > DNS and add the preferred DNS servers.
- Disable Unnecessary Connections: Evaluate apps running in the background. Identify and disable any applications that may be using excess bandwidth.
Advanced Troubleshooting: Digging Deeper
If you're still experiencing issues, these advanced steps provide greater diagnostic clarity.
- Evaluate Your Mac's Location Relative to the Router: Position your Mac in the same room as the router if possible. Try testing the Wi-Fi speed from various locations within your home.
- Examine Hardware Interference: Ensure your router isn't placed near appliances such as microwaves. Ideally, it should be in a central location, away from walls and metal objects. Elevating the router can also enhance its signal distribution.
- Monitor Network Activity: Use the Activity Monitor (located in /Applications/Utilities/) to monitor your Mac’s network activity. This can help identify bandwidth-hogging apps. Sort processes by network activity and assess which applications are consuming the most bandwidth.
- Advanced Network Diagnostics (Terminal): For a more in-depth look, use the Terminal application.
- Ping Test: Use the ping command to test network latency and packet loss. Open Terminal and type
ping google.com. This will show you the response time (latency) and any packet loss that might be occurring. Analyze these results. High latency or packet loss can indicate problems with your network. - Traceroute: Use the traceroute command to trace the path your data takes to reach a specific server. This can help identify points of delay along the network. Type
traceroute google.comto check the path. This command provides insights into the different hops your data takes over the network. High latency during the traceroute may indicate problems beyond your immediate network.
- Ping Test: Use the ping command to test network latency and packet loss. Open Terminal and type
Proactive Measures: Maintaining a Healthy Wi-Fi Ecosystem
The journey to a reliable Wi-Fi experience is not a one-time fix; it's an ongoing practice.
- Regular Firmware Updates: Make it a regular habit to check for and install firmware updates for your router.
- Monitor Performance: Regularly test your Wi-Fi speed using online speed test tools (like Speedtest.net) to track performance trends.
- Keep Your System Updated: Ensure your Mac's operating system is up-to-date, including security patches.
- Review and Refine: Every few months, revisit and re-evaluate your Wi-Fi settings, looking for optimization opportunities.
- Prioritize Bandwidth: If you have multiple devices using your network, consider using Quality of Service (QoS) settings on your router to prioritize devices or applications that require higher bandwidth.
Conclusion: Embrace the Upgrade
By implementing these strategies, and moving beyond those other guides, you can significantly enhance your Mac’s Wi-Fi performance. With these advanced techniques, you can break free from the shackles of slow Wi-Fi and reclaim a fast, reliable internet experience. Embrace this opportunity to optimize your network setting
