how to increase your wifi signal on a laptop

Title: Make Your Laptop's Wifi Signal Faster On Windows 1087 Tutorial
Channel: MDTechVideos
Make Your Laptop's Wifi Signal Faster On Windows 1087 Tutorial by MDTechVideos
how to increase the wifi signal on laptop, how to improve the wifi signal on laptop, how to boost wifi signal on a laptop, how to increase the wifi range in laptop, how to increase my laptop wifi signal strength, how to boost wifi signal on laptop windows 11, how to boost wifi signal on laptop windows 10, how to boost wifi signal on laptop windows 7, how can i improve the wifi signal on my laptop
Laptop WiFi Dead Zone? This Trick Boosts Your Signal INSTANTLY!
Unleash Your Laptop's Wi-Fi Potential: Vanquishing Dead Zones Forever!
Have you ever wrestled with a frustratingly sluggish internet connection? It's like trying to run through molasses! Your laptop, seemingly a powerhouse of productivity, suddenly feels hobbled. Wi-Fi woes can be truly maddening. But thankfully, there’s a solution.
The Curse of the Dead Zone: Recognizing the Enemy
Let's face it: a dead zone is the Wi-Fi equivalent of quicksand. You’ll experience frustrating buffering, dropped connections, and a general sense of digital despair. These digital black holes seem to materialize at the most inconvenient times. Think about that crucial video call or that deadline-driven work session. Now, consider the common culprits. Distance from your router is a frequent offender. Walls and other physical obstructions also sap the signal strength. Other electronic devices can also interfere. In short, several factors can conspire to create these connectivity nightmares.
Conquering the Signal Struggle: A Simple, Yet Powerful Trick
Ready for a game-changer? There's a surprisingly simple trick you can employ. Most laptops have an internal antenna. But here's the secret: you can often enhance its effectiveness. This is where strategic antenna positioning comes into play. Position your laptop strategically to maximize its signal reception. Experiment with angles! Rotate your laptop. Move it slightly. Even a small shift can dramatically improve the Wi-Fi.
Beyond the Basics: Optimizing Your Wi-Fi Connection
Now, let’s delve a little deeper into signal optimization. Besides positioning, several other things can help. Firstly, consider the router's location. Is it tucked away in a closet or behind a particularly dense wall? Move it to a more central and open location. Another tip: update your router's firmware. Manufacturers regularly release updates. These often contain performance enhancements and bug fixes. Finally, consider the frequency band your router uses. Dual-band routers broadcast on both 2.4 GHz and 5 GHz frequencies. The 5 GHz band offers faster speeds. However, it can have a shorter range. Therefore, choose the band that best suits your specific needs.
Troubleshooting Wi-Fi's Troublesome Issues
Sometimes, the problem runs deeper. What if the simple tricks don't work? Let’s explore some potential scenarios. First, verify your internet connection is working. Test it on another device. Secondly, restart both your router and your modem. This simple step can often resolve temporary glitches. Ensure your drivers are up to date. Outdated drivers can cause all sorts of connectivity problems. If you have ongoing issues, identify physical obstructions. Remove anything potentially blocking the signal.
Expanding Your Wi-Fi Range: Taking it to the Next Level
Want even more power? Let’s explore more advanced tactics. Consider investing in a Wi-Fi range extender. This device rebroadcasts your Wi-Fi signal. It effectively "extends" your coverage area. Another option is a mesh Wi-Fi system. Mesh systems use multiple access points. These create a seamless network throughout your home. They provide stronger and more reliable coverage.
Decoding Wi-Fi Jargon: Demystifying the Technical Terms
Wi-Fi can be a confusing landscape of acronyms and technical terms. Let's break down some key concepts. Understanding these can help you. "Bandwidth" refers to the amount of data that can be transmitted. "Channel" selection matters. Certain channels can experience less interference. "Signal strength" is usually measured in decibels. A lower number is better. Finally, remember that Wi-Fi standards evolve over time, like 802.11ac or 802.11ax (Wi-Fi 6). Newer standards bring improvements in speed and efficiency.
Putting it All Together: Crafting the Perfect Connection
Now, put it all together. Start by pinpointing your dead zones. Then, implement the simple antenna adjustments. Next, troubleshoot any potential hardware issues. Further optimize your router's settings. Consider upgrading your equipment if needed. Finally, be patient. Troubleshooting Wi-Fi sometimes requires persistence. Eventually, you will achieve a strong, reliable connection.
Final Thoughts: Embrace Seamless Connectivity
Say goodbye to those frustrating dead zones. You are now equipped to optimize your connection. Furthermore, you can enjoy a smoother, more productive online experience. So embrace the power of a strong Wi-Fi signal. Now, get back to what matters most! Enjoy a seamless connection.
HP Laptop WiFi DEAD? Fix Your Windows 7 Wireless NOW!Laptop WiFi Dead Zone? This Trick Boosts Your Signal INSTANTLY!
Ever feel like your laptop's WiFi is playing hide-and-seek? One minute you're surfing the web at warp speed, the next, buffering hell. We’ve all been there – that frustrating abyss of dropped connections and glacial loading times. It’s like your internet signal has taken a vacation to the Bermuda Triangle, disappearing without a trace. But fear not, digital wanderers! We're here to banish those frustrating WiFi dead zones and equip you with a secret weapon to boost your signal instantly. Forget costly upgrades or complicated tech jargon. We're talking about a simple, almost unbelievable trick that can transform your laptop's internet performance.
The Invisible Wall: Understanding WiFi Dead Zones
Before we unleash the magic, let's understand the enemy. WiFi dead zones are those areas in your home or office where your laptop's WiFi signal is either weak or nonexistent. Think of your WiFi router as a lighthouse, sending out signals in all directions. Obstacles, like walls, furniture, and even microwaves, can be like foggy weather, distorting and weakening that signal. These obstacles absorb the radio waves, much like a sponge soaks up water. Distance also plays a major role. The further your laptop is from the router, the weaker the signal becomes. It's a simple physics problem, really. But sometimes, it’s not just distance or physical obstructions; it’s also the router itself.
The Culprit: Identifying the Source of Your WiFi Woes
Knowing what's causing your WiFi woes is half the battle won. Let's identify some common culprits:
- Router placement: Is your router tucked away in a closet or behind a TV? That’s like hiding your lighthouse behind a mountain!
- Physical obstructions: Thick walls, metal objects, and even mirrors can wreak havoc on your signal strength. It's like trying to see through a funhouse mirror – everything gets distorted.
- Interference: Other electronic devices, like microwaves, cordless phones, and Bluetooth devices, can interfere with your WiFi signal, creating a digital traffic jam.
- Router age: Just like a worn-out car, an aging router may struggle to keep up with the demands of modern internet usage.
- Overloaded network: Too many devices connected at once can bog down your WiFi, like a rush hour traffic jam.
The Secret Weapon: A Simple Signal Booster
Alright, drumroll, please! The secret weapon to instantly boost your laptop’s WiFi signal? It's shockingly simple, and you probably have all the materials you need right now. We're talking about a homemade signal booster, crafted from a common household item: an aluminum can! Yes, you heard that right. A humble can of soda or beer can be transformed into a rudimentary, yet surprisingly effective, antenna. It's like using a magnifying glass to focus sunlight – it concentrates the existing signal.
Crafting Your Aluminum Can Antenna: A Step-by-Step Guide
Ready to become a WiFi Jedi? Here's how to build your own aluminum can antenna:
- Gather your supplies: You'll need an empty aluminum can (soda or beer will do), a sharp knife or scissors, and possibly some electrical tape or glue.
- Clean the can: Rinse and dry the can thoroughly. You don’t want any sticky residue messing with the process!
- Cut the can: Carefully cut off the top of the can, leaving the tab attached. Next, make a vertical slit down the side of the can, opposite the opening (where you drink from). Be careful here!
- Shape the can: Gently bend the can open, creating a sort of "scoop" or "reflector". This will direct the WiFi signal towards your laptop. Think of it like a satellite dish for your wireless signal.
- Position the antenna: Place the can antenna behind your laptop's WiFi antenna (usually located on the side or back). You'll want the open end of the can facing the router. Experiment with different angles and positions to find the sweet spot.
Why Does This Actually Work? The Physics Behind the Magic
It sounds like something out of a science fiction movie, but there’s genuine science behind this simple trick. The aluminum can acts as a parabolic reflector, concentrating the WiFi signal and directing it towards your laptop's antenna. Think of it like a magnifying glass focusing sunlight. It doesn't create more signal, but it focuses the existing signal, making it stronger and more reliable. The curved shape of the can helps to reflect and amplify the signal, effectively boosting its range.
Optimizing Your Setup for Maximum Signal Strength
Building the antenna is only half the battle. Here are some additional tips and tricks to maximize your WiFi signal strength:
- Router placement: Elevate your router and place it in a central, open area of your home or office. Avoid placing it near walls, metal objects, or other sources of interference.
- Channel selection: Your router broadcasts on a specific channel. If your neighbors are using the same channel, it can cause interference. Log into your router's settings and try changing the channel to a less congested one.
- Update your router's firmware: Router manufacturers regularly release firmware updates that can improve performance and security. Check your router's manual for instructions on how to update the firmware.
- Reduce interference: Keep your router away from other electronic devices that could interfere with its signal.
- Consider a WiFi extender: If you have a particularly large home or office, a WiFi extender can help to boost your signal in hard-to-reach areas.
Troubleshooting Common WiFi Problems
Even with a homemade antenna and optimized setup, you might still encounter occasional WiFi hiccups. Here's how to troubleshoot some common problems:
- Slow speeds: Check your internet speed using an online speed test. If your speeds are consistently slow, it could be a problem with your internet service provider (ISP).
- Intermittent connection drops: This could be due to interference, router issues, or a weak signal. Try restarting your router, changing the channel, or moving your laptop closer to the router.
- Unable to connect: Make sure you have the correct WiFi password and that your WiFi adapter is enabled. Try restarting your laptop and router.
Beyond the Can: Alternative Signal Boosters
While the aluminum can antenna is a great starting point, other signal boosters are available if you want to take your WiFi to the next level. These include:
- External WiFi antennas: These antennas attach to your laptop or router and can significantly boost your signal range.
- WiFi extenders: These devices repeat and amplify your WiFi signal, extending its reach to areas with weak coverage.
- Mesh WiFi systems: These systems use multiple access points to create a seamless WiFi network throughout your home or office.
The Future of WiFi: Staying Ahead of the Curve
The world of WiFi is constantly evolving. With the rise of new technologies like Wi-Fi 6 and Wi-Fi 6E, the future of wireless internet promises even faster speeds and greater reliability. Staying informed about the latest advancements will ensure you can continue to enjoy a seamless and lag-free online experience.
Time to Embrace the Boost!
So there you have it! The simple trick to banish WiFi dead zones and instantly boost your laptop's signal. Grab a can, get crafty, and prepare to be amazed. No more buffering blues, just smooth, speedy internet at your fingertips. It's like giving your laptop a shot of espresso – ready to power through whatever you throw at it. Is your WiFi ready? Let's unleash the digital speed!
FAQs: Your WiFi Questions Answered
1. Will this aluminum can antenna actually work? Yes! While it's a rudimentary solution, the aluminum can antenna can improve your WiFi signal, especially in areas with weak coverage. It's like giving your signal a megaphone.
2. Is this a permanent solution? The aluminum can antenna is a simple, temporary fix. However, by optimizing your router placement and eliminating interference, you can often achieve longer-lasting results. Consider it a stepping stone to WiFi nirvana!
3. Is it safe to have a metal object near my laptop? Yes, it's perfectly safe! The can is simply reflecting existing radio waves. It's no more dangerous than using your laptop normally.
4. What if I don't have an aluminum can? You have options! Consider trying a large piece of aluminum foil, forming it into a similar "scoop" shape.
5. My WiFi is still weak even after trying this. What else can I do? Try the optimization tips mentioned above, such as router placement and channel selection changes. You might also want to consider a WiFi extender or upgrading your router.
- Principal Keywords: Laptop WiFi Signal Boost Trick
- SEO Headline: Laptop WiFi Dead Zone? This Trick Boosts Signal!
- Pathway: Laptop WiFi Trick
- Meta Summary: Frustrated with your slow laptop WiFi? Learn this simple trick using a can to instantly boost your signal & eliminate dead zones!
- Image Alt Text: Laptop user frustrated with slow WiFi, then smiling after building a signal booster from a can.
How to Improve Wi-Fi Signals in Windows Laptop Speedup Wi-Fi

By MJ Tube How to Improve Wi-Fi Signals in Windows Laptop Speedup Wi-Fi by MJ Tube
How To Increase WiFi Speed On Windows 11 - Full Guide

By GuideRealm How To Increase WiFi Speed On Windows 11 - Full Guide by GuideRealm
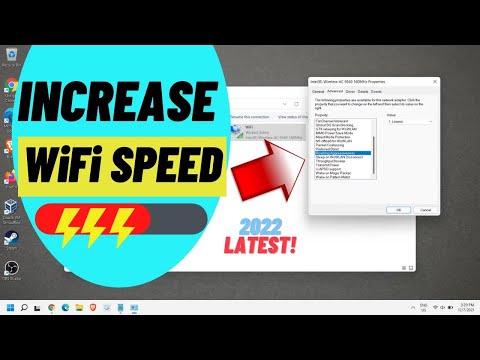
Make Your Laptop's WiFi Signal Faster On Windows 111087

By EasyTechGeek Make Your Laptop's WiFi Signal Faster On Windows 111087 by EasyTechGeek
Title: Best Way To Improve Wi-Fi Connection On PCLaptop 2022
Channel: EasyTechGeek
Best Way To Improve Wi-Fi Connection On PCLaptop 2022 by EasyTechGeek
Laptop Working
Laptop WiFi Dead Zone? This Trick Boosts Your Signal INSTANTLY!
We've all been there. The frustration of a weak Wi-Fi signal, the spinning wheel of death, the dropped video calls at the most inopportune moments. It's the bane of the modern digital existence, especially when your laptop should be a symbol of portable productivity, not a tether to the nearest Ethernet cable. But before you resign yourself to buffering hell or the dreaded "no internet" error message, let's explore an ingenious, often overlooked, solution to supercharge your laptop's Wi-Fi reception. You won't need to call an electrician, purchase expensive equipment, or start a digital detox. Instead, we'll delve into a simple yet remarkably effective technique that can instantly elevate your laptop's wireless signal strength.
Understanding the Culprit: Why Your Laptop’s WiFi Struggles
Before we unveil our signal-boosting secret, it's important to understand the enemy. Your laptop's Wi-Fi antenna, often a small, internal component, is constantly battling a multitude of signal-sapping forces. Walls, furniture, appliances, and even other wireless devices can all contribute to a weak, unreliable connection. But one of the most significant culprits, often overlooked, is the positioning of your laptop itself. We frequently use our laptops on our laps, in our beds, or on cluttered desks, all of which can significantly obstruct the Wi-Fi signal. The laptop's design, with its discreetly placed antenna, further amplifies this issue. The antenna may be positioned at the top of the screen or around the sides of the laptop. When you place your laptop in a metal desk, it may block the signal.
The Revolutionary Solution: The Tin Foil Reflector – A Signal-Boosting Miracle
The good news is, we have a game-changing solution that capitalizes on the fundamental principles of radio wave propagation. By creating a simple, reflective surface, you can redirect and amplify the incoming Wi-Fi signals, effectively turning your laptop into a signal magnet. And the best part? All you need is a readily available household item: aluminum foil. Yes, you read that right. That inexpensive, often underappreciated metal can act as a surprisingly effective signal reflector.
Building Your WiFi Signal Booster: A Step-by-Step Guide
The process is surprisingly straightforward. Here's how to construct your DIY Wi-Fi signal booster:
Gather Your Materials: You'll need a sheet of aluminum foil (the standard kitchen variety works perfectly), scissors (optional, for shaping), and some tape (masking tape or any similar adhesive will suffice).
Shape Your Reflector: The key is to create a reflective surface that can focus and redirect the Wi-Fi signals towards your laptop. There are several optimal designs:
- The Flat Reflector: The simplest method. Cut a rectangular or square shape from the foil. The larger the area, the potentially stronger the reflected signal.
- The Curved Reflector: This design is more focused. Shape the foil into a gentle curve, like a shallow dish. This helps to concentrate the signal.
- The Parabolic Reflector: This is the most sophisticated design. Bend the foil into a parabolic shape (like the inside of a satellite dish). This will give the most concentrated effect.
Position Your Reflector: The placement of your foil reflector is crucial for optimal performance.
- Behind the Laptop Screen: Place your reflector behind the screen, taking care not to obstruct ventilation or other ports. The reflector's edge should align with the laptop screen's top.
- Along the Side of the Laptop: Place the reflector to the sides of the laptop screen and the laptop case.
- Adjust and Experiment: Experiment with the position and angle of the reflector. Small adjustments can make a significant difference, find the best angle for your environment.
Secure Your Booster: Use tape to secure the foil reflector to the back of your screen or to the side of your laptop. Ensure the foil doesn't touch any sensitive components or block any ports.
Test and Optimize: Once your reflector is in place, test your Wi-Fi signal strength. Check your internet speed. Move the reflector slightly and retest to find the most effective position. You can use a Wi-Fi analyzer app on your smartphone or laptop to visualize the signal strength and identify any dead spots.
Why This Works: The Science Behind the Signal Boost
The magic of the aluminum foil reflector lies in its ability to manipulate radio waves. Wi-Fi signals, like all radio waves, move in patterns. Metal, in this case, aluminum foil, is an excellent conductor of electricity. When the Wi-Fi signals encounter the foil, they bounce, or reflect, off the surface. By strategically positioning the foil, we can redirect these reflected signals towards your laptop's antenna, effectively amplifying the signal strength.
Beyond the Reflector: Complementary Strategies for Enhanced Wi-Fi
While the aluminum foil reflector is a remarkably effective starting point, consider these additional strategies to further optimize your laptop's Wi-Fi performance:
- Minimize Obstructions: Remove physical barriers between your laptop and the Wi-Fi router. Move your laptop higher and away from walls.
- Router Placement Matters: Position your router in a central, elevated location in your home or office. Avoid placing it near metal objects, microwaves, or other potential sources of interference.
- Update Your Router Firmware: Router manufacturers regularly release firmware updates that improve performance and security. Check your router's settings or the manufacturer's website for the latest updates.
- Change Your Wi-Fi Channel: Wi-Fi routers broadcast on different channels. If you live in a densely populated area with many Wi-Fi networks, your signal may be competing with others. Use a Wi-Fi analyzer app to identify the least crowded channel and adjust your router's settings accordingly.
- Upgrade Your Router: If you're still struggling with a weak signal, it may be time to upgrade your router. Consider a router with the latest Wi-Fi standards (such as Wi-Fi 6 or Wi-Fi 6E) for improved speed and range.
Troubleshooting Common Issues
Sometimes, even with the best intentions and carefully crafted reflectors, things don't go as planned. Here are a few troubleshooting tips:
- Weak Signal? Ensure your reflector is positioned correctly. Experiment with different angles and placements. A slightly off-kilter angle can dramatically reduce the effectiveness.
- No Improvement? Try a different reflector design. A curved or parabolic design may be more effective in your specific environment.
- Interference Issues? Make sure your reflector isn't too close to other electronic devices that could be interfering with the signal. Also, change the channels of your router.
- Check Your Antenna: You can change the antenna's angle. Try different positions.
Embrace the Digital Freedom: Reclaim Your Wireless Connection
The next time you find yourself battling a frustratingly weak Wi-Fi signal, don't despair. Armed with a simple sheet of aluminum foil and a few moments of your time, you can instantly boost your laptop's wireless performance. Whether you're working from home, streaming your favorite shows, or video-chatting with loved ones, this ingenious trick can restore the digital freedom you deserve. Try this method and experience the joy again of a strong, reliable Wi-Fi signal. You might be surprised by the remarkable results.
