cara setting wifi laptop windows 8

Title: Cara mengaktifkan wifi di windows 8
Channel: AW Tutorial
Cara mengaktifkan wifi di windows 8 by AW Tutorial
cara mengaktifkan wifi di laptop windows 8, cara mengaktifkan wifi di laptop lenovo windows 8, windows 8 wifi settings, how do i connect my windows 8.1 laptop to wifi
Windows 8 WiFi Setup: The Easiest Guide EVER!
Conquering the Wi-Fi Frontier: Your Windows 8 Setup Odyssey
Embark on a journey, because setting up Wi-Fi on Windows 8 isn’t a chore. It's a digital adventure. Forget the tech jargon. We'll navigate the process with ease. You’ll be connected in moments. So, grab your coffee. Then, let’s get started.
Unveiling the Wireless Realm: A Pre-Flight Checklist
Before we launch, make sure you have essentials. First, you will need your Wi-Fi network's name (SSID). Next, you’ll need the password. Without these, we’re grounded. Also, ensure your Wi-Fi adapter is turned on. That seems basic. However, it's often the culprit for connection woes. If you're using a laptop, check the physical switch. It is often located on the side or front. Next, confirm the adapter is enabled within Windows. Don't panic, the process is effortless.
Decoding the Digital Gateway: Accessing the Settings
Alright, pilots, prepare for takeoff. We'll start by accessing the Settings charm. Swipe from the right edge of your screen. Or, move your mouse to the right corner. Next, select “Settings.” You will see a panel appear. Then select "Network Icon" or "Wi-Fi Icon" if it is available. After that, click on your Wi-Fi network. That is usually a few steps. But trust me, it's straightforward.
Connecting to Your Wireless Citadel: The Password Protocol
Clicking on your network will prompt you. It will ask for the security key. That’s your password. Type it carefully. Double-check your entry. A single misplaced character prevents entry. Then, click "Connect". The system will authenticate your credentials. It should connect momentarily. If successful, a “Connected” message will appear. If not, don’t fret. This is expected.
Troubleshooting Turbulence: Navigating the Connection Storm
Sometimes, the journey gets bumpy. If you can't connect, troubleshoot. Therefore, first, verify your password. It's the most common issue. Second, move closer to the router. Sometimes your location matters. Third, restart your router. That is essential to resolve many issues. Unplug it for 30 seconds. Plug it back in. After a few minutes, try again. Fourth, check your device's Wi-Fi adapter status. Finally, if problems persist, check for driver updates. They may be available.
Beyond the Basics: Advanced Configuration and Exploration
Once connected, explore further. Right-click the Wi-Fi icon in the system tray. This opens network settings. From there, you can manage connections. You can also see connection details. Consider changing your network settings. However, proceed with caution. If you're unfamiliar, don't change too much. Also, explore your Wi-Fi router's settings. These are often accessible via a web browser. Just type your router's IP address. Many router settings are adjustable. However, be aware of the risks.
Securing Your Digital Territory: Protecting Your Network
Security is paramount. Because of this, always use a strong password. Don't opt for easy-to-guess phrases. Moreover, enable WPA2 or WPA3 encryption. This gives greater security. Also, consider changing your router's default password. You may do this with ease. Furthermore, keep your router's firmware updated. Updates often include security patches.
The Finishing Touches: Customization and Optimization
You're almost there! Fine-tune your settings. Right-click your network connection. Then, select "Properties". Adjust network settings to your preference. You can limit data usage. Or, customize network sharing options. Make these adjustments per your needs. Ultimately, personalize your Wi-Fi experience.
Conclusion: Your Wireless Freedom Awaits
Congratulations, you are connected! You have successfully set up your Windows 8 Wi-Fi. It was not as hard as you thought. Now, enjoy the digital world. Browse the internet. Stream videos. Or, connect with friends. Remember, if you encounter issues, don't despair. Troubleshooting is part of the journey. You can now conquer other setup challenges. Enjoy your newfound wireless freedom. So, go connect.
Laptop to Phone WiFi: The SHOCKINGLY Easy Trick!Windows 8 WiFi Setup: The Easiest Guide EVER!
Alright, tech adventurers! Let's face it, sometimes setting up Wi-Fi can feel like navigating a minefield, especially when you’re trying to connect on an older operating system like Windows 8. And believe me, I've been there! Picture this: late at night, deadlines looming, and the internet just won’t cooperate. I remember the sheer frustration – the spinning wheel of doom, the endless troubleshooting, the feeling that I was wrestling with a particularly stubborn gremlin. But fear not! Because after countless hours of trial and error, and a fair share of caffeine-fueled learning, I've cracked the code. We're going to make setting up your Wi-Fi on Windows 8 so easy, you’ll be wondering why you ever struggled in the first place. This guide will be easier than ordering pizza – promise!
1. Why Windows 8 WiFi Setup Still Matters
Even though Windows 8 might be considered a bit of a vintage treasure, it’s still kicking around on quite a few laptops and desktops. And the need to connect to the internet? Remains as vital as ever. Think of it like this: your computer is a car, and the internet is the highway. You need a working Wi-Fi connection to get anywhere interesting! Ignoring the Wi-Fi setup is like leaving your car in the garage – you miss out on all the adventures. Plus, the core principles apply to other Windows versions, so mastering these steps is a valuable tech skill.
2. Decoding the Wi-Fi Jargon: A Beginner's Guide
Before we dive in, let’s quickly clear up some tech-speak. We need to speak the same language! You'll hear terms like "SSID" (that's your Wi-Fi network’s name), "password" (the secret code), and "router" (the box that dishes out the Wi-Fi signal). Think of your router as the friendly bartender, the SSID as the bar's name, and the password as your ID to get in. Understanding these basics is like knowing the alphabet before you start reading.
3. Accessing the Network Settings: Your Starting Point
The first step is to actually find the network settings. Windows 8 makes this relatively straightforward. On the right side of your screen, you should see a black bar. Swipe the mouse or use the Windows key + C to bring up the Charms bar. Then, you'll see the "Settings" option. It looks like a gear. Click that!
4. Opening the "Networks" Panel: The Gateway to Connectivity
Now inside Settings, you'll have a few options. Click on the Wi-Fi icon. It should resemble a radio wave, a symbol you see everywhere these days. Clicking on this will open the "Networks" panel, where all the magic happens. It's like opening the door to a secret club!
5. Identifying Your Network: Finding the Right Signal
The "Networks" panel will display a list of available Wi-Fi networks, like a menu of delicious options. Each network will have an SSID (the name we talked about earlier). Scroll through the list and find your network’s name. If you don't recognize any of the names, double-check your router – the SSID is usually printed somewhere on it. It's like finding your favorite restaurant on a bustling street.
6. Inputting Your Password: The Digital Key
Once you've found your network, click on it. You'll be prompted to enter your network's password. Be very careful here! Passwords are case-sensitive, so make sure you're typing it correctly. This step is like putting your key in the lock – get it right, and you're in!
7. Connection Status: Watching the Progress Bar
After you enter your password, Windows 8 will attempt to connect to your Wi-Fi network. You'll see a progress bar or indicator, which is like watching a movie trailer – all the suspense and buildup! Watch the progress bar, checking the connection status, which will hopefully change from "Connecting…" to "Connected."
8. Troubleshooting Common Connection Issues
Sometimes, things don't go according to plan. Maybe you mistyped the password, or perhaps there's an issue with your router. Here are some common problems and fixes:
- Incorrect Password: Double-check the password and re-enter it.
- Router Issues: Restart your router. Unplug it for about 30 seconds, then plug it back in. Like a power nap for your router!
- Driver Problems: Occasionally, your Wi-Fi adapter’s driver might be outdated. You can try updating it through Device Manager (search for "Device Manager" in the search bar). Think of it as a software upgrade for your network card.
- Distance from Router: Make sure you are close to your router. Walls can be barriers!
9. Checking Your Internet Connection: The Final Test
Once you see "Connected," open your web browser (like Chrome, Firefox, or Edge) and try browsing a website. If a webpage loads, congratulations! You've successfully connected to Wi-Fi. If not, it's time to check your internet connection.
10. Using the Windows Troubleshooter: When All Else Fails
Windows 8 has a built-in troubleshooter that can often identify and fix connectivity issues. In your Network settings, you'll usually see a "Troubleshoot" option. Give it a try! It’s like having a built-in tech support agent.
11. Securing Your Connection: Keeping Your Data Safe
Once you're connected, it's essential to secure your Wi-Fi network. Make sure your router uses a strong password (a combination of letters, numbers, and symbols) and WPA2 or WPA3 encryption. Think of it as a castle with strong walls and a well-guarded gate.
12. Connecting to a Hidden Network: Finding the Secret Signal
If your network is hidden (meaning it doesn’t broadcast its SSID), you’ll need to manually enter the network’s name. In the Networks panel, there's usually an option to "Connect to a hidden network." This method is like knowing the secret handshake to get into an exclusive club.
13. Dealing With Public Wi-Fi: Staying Vigilant
Connecting to public Wi-Fi (like at a coffee shop) requires extra caution. Avoid accessing sensitive information like banking details on public networks. Consider using a VPN (Virtual Private Network) for added security. It's like wearing a suit of armor online.
14. The Guest Network Feature: Protecting Your Home Network
Many routers have a "guest network" feature, which lets you share your Wi-Fi with visitors without giving them access to your main network. This is a brilliant security measure. Think of it as having a separate room for visitors.
15. Final Thoughts and Future-Proofing Wi-Fi
Now you should be well on your way to enjoying the benefits of a reliable Wi-Fi connection on your Windows 8 device! Remember, technology evolves. As the standard for wireless communication rapidly transforms with advancements such as Wi-Fi 6, Wi-Fi 6E, and even Wi-Fi 7, it is important to stay abreast of these advancements. This will ensure your device is not only compatible but also operates at its peak performance and security levels.
Closing Thoughts: You've Got This!
And there you have it! We’ve covered everything from the basics to troubleshooting tips, making this task as enjoyable as possible. Remember, it's all about taking it one step at a time. If you get stuck, don’t panic! Take a break, grab a coffee, and come back to it. You are now equipped to tackle these situations. You rock! Your Wi-Fi woes are now a thing of the past. Go forth and surf the web with confidence!
Frequently Asked Questions (FAQs)
1. My Wi-Fi is connected, but I can't access the internet. What gives?
Check your router's internet connection. Sometimes, the issue isn't your computer; it's the modem, like your car's engine might fail the internet highway, which could be preventing you from getting online. Also, try restarting your router and modem.
2. I can't even see my Wi-Fi network listed. What should I do?
Make sure your Wi-Fi adapter is turned on. This could be a hardware switch on your laptop or a setting in Windows. Also, verify that the router is broadcasting its SSID (network name). Finally, check your adapter drivers.
3. My password isn't working. What's the deal?
Double-check the password. Be aware of case sensitivity (capitalization matters!). If you’re certain the password is correct, try restarting your router and computer. This resets everything.
4. Is Windows 8 safe to use with today’s internet?
Yes, but it's essential to keep your software updated. Also, use a good antivirus program and practice safe browsing habits. Think of it as wearing a seatbelt online.
5. Is there a way to speed up my Wi-Fi connection?
Try moving closer to your router. Also, consider upgrading your router to a newer model that supports the latest Wi-Fi standards (like Wi-Fi 6). Eliminating possible
Unlock Your Laptop's Wi-Fi: Phone Hotspot Hack!Cara Mengatasi Wifi Laptop Tidak Bisa di Aktifkan Windows 8

By LAPTOP TUTORIAL Cara Mengatasi Wifi Laptop Tidak Bisa di Aktifkan Windows 8 by LAPTOP TUTORIAL
Cara Mengatasi Laptop Tidak Bisa Connect Wifi Windows 10, 8 & 7
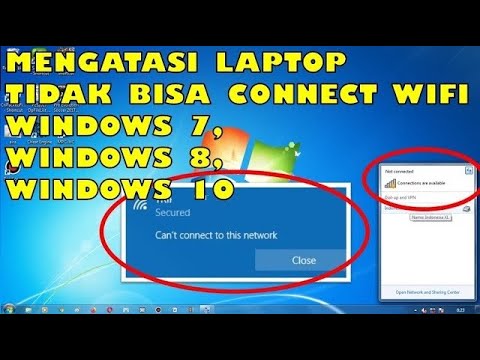
By Jari Mungil Rayyan Cara Mengatasi Laptop Tidak Bisa Connect Wifi Windows 10, 8 & 7 by Jari Mungil Rayyan
Cara Mengaktifkan Wifi di Laptop Windows ASUS LENOVO HP ACER AXIO TOSHIBA

By Multi Talenta Tutorial Cara Mengaktifkan Wifi di Laptop Windows ASUS LENOVO HP ACER AXIO TOSHIBA by Multi Talenta Tutorial

Title: Cara Download & Install Driver WIFI & ETHERNET Manual untuk Windows 781011
Channel: inprez id
Cara Download & Install Driver WIFI & ETHERNET Manual untuk Windows 781011 by inprez id
Working With Laptop
Windows 8 WiFi Setup: A Seamless Connection, Simplified
Setting up a WiFi connection on a Windows 8 device shouldn't feel like navigating a labyrinth. It should be intuitive, straightforward, and ultimately, a process that brings you closer to the digital world. This guide is crafted to deliver precisely that: a clear, comprehensive walkthrough, guaranteeing a successful WiFi setup experience. We'll navigate the process with precision, ensuring you're connected and ready to go in no time.
Initiating the WiFi Connection: The First Steps
The foundation of any successful WiFi setup lies in the initial steps. Begin by ensuring your Windows 8 device is powered on and has fully booted up. Next, locate the WiFi icon, typically found in the system tray in the bottom-right corner of your screen, near the clock. This icon resembles a series of curved lines emanating from a central point. Clicking this icon, or sometimes a single tap if using a touchscreen device, initiates the WiFi connection process.
Discovering Available Networks: Finding Your Gateway
Once you've clicked the WiFi icon, a list of available wireless networks will appear. These are the networks broadcasting their signal within range of your device. Each network will typically display its Service Set Identifier (SSID), often labeled as the network's name. Carefully scan the list and identify your desired network. This could be your home network, a public WiFi hotspot, or a network provided at your workplace. Remember, choosing the correct network is paramount to establishing a successful connection.
Entering the Network Security Key: Securing Your Connection
Once you've selected the correct network, the system will prompt you for the network security key, also commonly known as the password. This key is essential for authentication and protects your network from unauthorized access. Ensure you enter the key precisely, paying close attention to case-sensitivity and avoiding typos. Double-check your input for accuracy; even a single incorrect character will prevent you from connecting. If you are unsure of your password, consult your router’s documentation, the router itself (it may be printed on a sticker), or the network administrator.
Troubleshooting Common Connection Issues: Overcoming Obstacles
Even with careful preparation, unexpected issues can arise. Fear not; these common troubleshooting steps often resolve the most frequent connection roadblocks.
- Incorrect Password: Retype the password with utmost precision. Consider temporarily disabling the password visibility mask to confirm accurate input.
- Router Range: Ensure your device is within the router’s effective range. WiFi signals diminish over distance and through obstructions like walls. Move your device closer to the router or consider investing in a WiFi range extender.
- Router Reboot: Restarting your router can often resolve temporary connectivity glitches. Unplug the router from its power source, wait for at least thirty seconds, then plug it back in. Allow the router a few minutes to fully reboot before attempting to connect again.
- Network Adapter Driver Issues: Outdated or corrupted network adapter drivers can hinder connectivity. Access the Device Manager (search for it in the Windows 8 start menu) and verify the network adapter driver is up-to-date. If not, download the latest driver from the manufacturer's website and install it.
- Firewall Interference: Certain firewall settings may inadvertently block the WiFi connection. Check your Windows Firewall settings or any third-party firewall applications to ensure they aren't preventing access.
Advanced WiFi Configuration: Exploring Further Options
For users seeking more control over their WiFi settings, Windows 8 offers advanced configuration options, accessible through the Network and Sharing Center in the Control Panel. These settings allow for customized configurations, including:
- Static IP Addresses: Instead of automatically obtaining an IP address from the router, you can manually configure a static IP address. This is often required in specific network environments and requires careful attention to IP address ranges and subnet masks.
- DNS Server Settings: Modify the Domain Name System (DNS) server addresses to utilize specific DNS servers. This may be necessary for troubleshooting network issues or utilizing faster DNS servers.
- Preferred Network Order: Prioritize preferred WiFi networks. If multiple networks are within range, you can specify which network your device should automatically connect to first.
- Wireless Security Protocols: Depending on your router and security preferences, you can configure various wireless security protocols, like WPA2 or WPA3, for stronger network protection.
Connecting to Hidden Networks: Entering Concealed Networks
Hidden networks, those that don't broadcast their SSID, require a slightly different setup process. To connect to a hidden network, you'll need to manually input its SSID name, along with the security key. When viewing available networks, you will typically see an option to "Connect to a hidden network." Click this option, and you will be prompted to enter the network's SSID and the associated security key, the password. After entering these details, the system will attempt to connect to the hidden network.
WiFi Profiles and Management: Streamlining Your Connections
Windows 8 allows the creation and management of WiFi profiles. These profiles store your network settings, including the SSID, security key, and other customized configurations. This means that the next time you are within range of that WiFi network, your device will automatically connect, saving you the hassle of re-entering the credentials. The Network and Sharing Center facilitates the management of these profiles. You can view, modify, delete, and prioritize different WiFi profiles within this interface, giving you fine-grained control over your network connections.
Mobile Hotspot Integration: Leveraging Your Device's Connectivity
Windows 8 also allows you to transform your device into a mobile hotspot, sharing your internet connection with other devices. This capability is especially handy when you need to connect multiple devices to the internet while on the move or in an area without a readily available WiFi network. The specifics of setting up a mobile hotspot vary depending on your device's capabilities and mobile carrier.
WiFi Security Best Practices: Safeguarding Your Network
Securing your WiFi network is essential for protecting your data and privacy. Implement the following best practices to strengthen your network's security:
- Use a strong, unique password: Employ a password that is at least 12 characters long and includes a combination of uppercase and lowercase letters, numbers, and symbols.
- Enable WPA2 or WPA3 encryption: These protocols provide robust protection against unauthorized access.
- Change the default router password: The default password is often easily accessible online. Change it immediately to a strong, unique password.
- Disable SSID broadcasting: Hiding your SSID can make it slightly more difficult for unauthorized users to discover your network.
- Keep your router's firmware updated: Router manufacturers regularly release firmware updates that address security vulnerabilities.
- Monitor your network traffic: Regularly review the devices connected to your network to identify any suspicious activity.
Conclusion: Embracing the Digital Frontier
Setting up a WiFi connection on your Windows 8 device doesn't have to be a complicated endeavor. By following this detailed guide, you can establish a reliable and secure connection, enabling you to effortlessly navigate the digital world. Whether you are connecting to a public hotspot, your home or office network, or even creating your own mobile hotspot, the steps outlined here will equip you with the knowledge and skills to succeed. Now go forth and explore the boundless possibilities that the internet offers.
