gateway laptop netgear router wifi booster setup

Title: Netgear WiFi Extender Setup Without Website or Computer
Channel: Do-It-Yourself and Save
Netgear WiFi Extender Setup Without Website or Computer by Do-It-Yourself and Save
Unlock Blazing-Fast WiFi: Gateway Laptop + Netgear Router Setup Guide!
Blazing-Fast WiFi Unleashed: Supercharging Your Gateway Laptop with a Netgear Router!
Welcome, tech enthusiasts! Are you tired of sluggish internet speeds? Does buffering drive you batty? You aren't alone. Many of us crave a seamless online experience. Good news: we can drastically improve your WiFi. This guide will assist you in pairing your Gateway laptop with a Netgear router. Prepare for warp-speed internet that will redefine your online life.
Step 1: Unboxing & Initial Preparations
First things first, let's gather our supplies. You will need your Gateway laptop. Grab your shiny new Netgear router. Locate the power adapters for both devices. Also, find an Ethernet cable. Set everything on a clean surface. Now, take your time to unbox both devices. Carefully read the Netgear's included quick-start guide. This is critical for your router setup. Identify the ports on the router. Also, identify the ports on your Gateway laptop.
Step 2: Physical Connections - The Foundation of Speed
Next, let's make the physical connections. Plug the Netgear router into a power outlet. Then, plug the power cable into the router itself. Power on the Netgear router. Wait until the power light stabilizes. Now, connect the Ethernet cable to your modem. If you don't have a separate modem, connect directly to your internet provider's connection. Plug the other end of the Ethernet cable into the router's "WAN" (or "Internet") port.
Step 3: Accessing the Netgear Router's Interface
After the physical connections, it's time to access the router's settings. Connect your Gateway laptop to the router. You must use an Ethernet cable for the initial setup. Open a web browser on your Gateway laptop. Type your router's default IP address into the address bar. This address is usually printed on the router. The default IP is typically 192.168.1.1 or 192.168.0.1. If not, check the Netgear manual. Press Enter.
Step 4: Logging In & Customizing Settings
The router's login page should appear. Enter the default username and password. Again, this information resides on the router or in the manual. After logging in, you'll find the router's main interface. Here, you fine-tune your settings. Change the default administrator password. This immediately enhances security. Next, personalize your WiFi network name (SSID). Choose a strong password for your WiFi network. This is paramount for security. Select the appropriate security protocol (WPA2 or WPA3 is recommended).
Step 5: Optimizing Your WiFi Channels
Now, let's optimize your WiFi channels for better performance. Your router broadcasts on different channels. It is essential to find the least congested channels. Look for the "Wireless Settings" section. The router will automatically try to optimize. You often can select specific channels (e.g., 1, 6, 11 for 2.4 GHz). This depends on the band available. Utilize a WiFi analyzer app on your smartphone. You can use this to identify the least crowded channels. Select the least congested channels. Save your new settings.
Step 6: Troubleshooting Common Issues
Sometimes, things don't go perfectly. So, let's address some common issues. If you can't connect to the internet, check your Ethernet cables. Ensure they are securely plugged in. Double-check the internet connection to your modem. Reboot your modem and router. This solves many issues. If you still experience problems, consult the Netgear router manual. The manual offers more detailed troubleshooting steps. Contact Netgear's customer support, if necessary.
Step 7: Maximizing Your WiFi Signal Strength
Want to maximize your WiFi's signal strength? Position your router in a central location. Place it away from obstructions. Avoid placing the router near microwaves or cordless phones. They can interfere with the signal. Consider using a WiFi extender. These devices extend your network's range. Regularly update your router's firmware. Download these updates from Netgear's website.
Step 8: Embrace the Speed!
Congratulations! You've successfully set up your Gateway laptop and Netgear router. You are now ready to experience blazing-fast WiFi. Enjoy streaming, gaming, and browsing without lag. Remember to always prioritize network security. Keep your firmware updated. This ensures the best performance and protects your data. Now, go forth and conquer the internet!
HP Windows 7 WiFi Nightmare? Solved! (Fast & Easy!)Unlock Blazing-Fast WiFi: Gateway Laptop + Netgear Router Setup Guide!
Hey there, fellow tech travelers! Let's face it, in today's world, slow Wi-Fi is the bane of our existence. It’s like trying to run a marathon with lead shoes or attempting to enjoy a perfectly brewed coffee with a teaspoon – frustrating and ultimately diminishing the core experience. And if you're anything like me, relying on a Gateway laptop and a Netgear router to get you connected, the frustration can reach epic proportions. But fear not! We're about to embark on a journey to transform your Wi-Fi experience from a sluggish crawl to a lightning-fast race. Consider this your all-in-one guide to setting up and optimizing your Gateway laptop with your Netgear router for a truly blazing-fast connection.
1. The Wi-Fi Woes: Why Speed Matters
Before we dive into the nitty-gritty, let's ponder why fast Wi-Fi even matters. Think about your daily routine. Are you a streamer, constantly engrossed in binge-watching your favorite shows? Do you work from home, relying on seamless video calls and rapid file transfers? Perhaps you're a gamer, craving lag-free online battles. Or maybe, like most of us, you simply want the internet to work – instantly. Slow Wi-Fi disrupts all these experiences. It squashes productivity, kills entertainment, and generally makes you want to throw your laptop out the window (don't do that, though! We'll get you sorted).
2. Gateway to Glory: Understanding Your Laptop
Your Gateway laptop is your portal to the digital world, your trusty steed in this Wi-Fi quest. To maximize speed, we need to understand its capabilities. Check your laptop's Wi-Fi adapter specifications. This little piece of hardware determines the speed your laptop can receive the Wi-Fi signal. Look for the latest standards like 802.11ac or 802.11ax (Wi-Fi 6). These are your workhorses for speed. Knowing your laptop’s potential is the first step to unlocking its performance.
3. Netgear Navigator: Decoding Your Router
Your Netgear router is the traffic controller of your home network. It's the gatekeeper, deciding who gets access and, more importantly, how much bandwidth they get. The model number is key here. Older routers might be holding you back, like trying to run a Formula 1 race on a bicycle. Modern Netgear routers, especially those supporting 802.11ac or 802.11ax, are essential for maximizing your speed. Investigate your router's specifications. You'll want to ensure it supports the latest Wi-Fi standards and dual-band (or even tri-band) capabilities. This essentially gives you multiple "lanes" on the Wi-Fi highway.
4. Pre-Flight Checklist: Gathering Your Gear
Before we start, gather your essentials:
- Your Gateway laptop
- Your Netgear router (with its power adapter)
- An Ethernet cable (just in case, for initial setup)
- Your internet service provider (ISP) login credentials (if you need them)
- Your patience (essential for any tech adventure)
5. The Physical Connection: Setting Up Your Router
Time to get physical! Unplug your old router (if you have one), and plug in your Netgear router. Connect the power adapter to the router and plug it into a wall outlet. Wait for the router to power up – this might take a minute or two. Next, connect your modem (the device provided by your ISP) to the router's "Internet" or "WAN" port using an Ethernet cable.
6. Initialising: Accessing the Router's Interface
Now, you'll need to access your router's settings. This is usually done through a web browser on your laptop. Type in your router's IP address (usually 192.168.1.1 or 192.168.0.1 – check the router's manual if these don't work. Alternatively, you can search online for “Netgear router IP address” and include your model number). You'll be prompted for a username and password (again, often found in your router's manual or on a sticker on the router itself). The default is often "admin" for both, but change this after access!
7. The Wizard's Wand: Running the Router Setup Wizard
Once logged in, you'll often find a setup wizard to guide you through the process. This wizard will help you:
- Set up your internet connection type (often "Dynamic IP" or "PPPoE" - your ISP will tell you which)
- Create a strong Wi-Fi network name (SSID)
- Set a secure Wi-Fi password (WPA2 or WPA3 encryption is recommended)
Follow the wizard's instructions carefully. This isn't the time to rush!
8. Fine-Tuning: Optimizing Your Wi-Fi Settings
Once the initial setup is complete, it's time to optimize. Go to the router's wireless settings. Here, you can:
- Choose the right channel: Wi-Fi channels can get congested. Use a Wi-Fi analyzer app (available for your smartphone or laptop) to find the least crowded channels (1, 6, or 11 are frequently recommended for 2.4GHz).
- Enable WMM (Wi-Fi Multimedia): This prioritizes traffic for things like video and voice calls, improving their quality.
- Update your router's firmware: Regularly updating your router's firmware is like giving it a software upgrade, often fixing bugs and improving performance.
9. Dual-Band Delight: Leveraging 2.4GHz and 5GHz
Modern routers offer dual-band capabilities – broadcasting on both 2.4GHz and 5GHz frequencies.
- 2.4GHz: Offers wider range, ideal for devices further away from the router, or when you need to penetrate through walls.
- 5GHz: Offers faster speeds and less congestion (but a shorter range).
Connect your Gateway laptop to the 5GHz network for optimal performance inside your home. Think of the 2.4GHz connection as a back-up option, like a slower lane on the highway.
10. Positioning Power: Router Placement for Maximum Coverage
Where you place your router significantly affects your Wi-Fi range and speed.
- Central location: Place your router in a central, open location in your home. Avoid placing it in a closet or behind thick walls. Think of the router as a radio station with the best reach!
- Elevated position: Elevate your router off the floor, maximizing signal propagation.
- Avoid interference: Keep your router away from other electronic devices (microwaves, cordless phones), which can interfere with the Wi-Fi signal.
11. The Great Ethernet Gambit: Wired Connection for Top Speed
While we're aiming for fast Wi-Fi, consider the wired connection for your desktop or gaming computer. An Ethernet cable offers the most reliable and fastest connection available. It bypasses the wireless interference and offers maximum speed due to its direct nature.
12. Troubleshooting Troubles: Resolving Common Issues
Even with the best setup, you might encounter issues. Here are some common problems and solutions:
- Slow speeds: Reboot your router and modem. Check your internet speed using a speed test website. If the problem persists, contact your ISP.
- Intermittent connection: Move your router to a better location. Check for interference from other devices.
- Weak signal: Consider a Wi-Fi extender or mesh Wi-Fi system (for larger homes).
13. Security Safeguards: Protecting Your Network
Don't forget about security! Make sure you:
- Use a strong, unique password for your Wi-Fi network.
- Enable WPA2 or WPA3 encryption (WPA3 is recommended if your devices support it).
- Regularly update your router's firmware.
- Change your router's default username and password.
14. The Joy of Speed: Enjoying Your Blazing-Fast Wi-Fi
Congratulations! You've successfully set up and optimized your Gateway laptop with your Netgear router. Take a moment to revel in the joy of fast, reliable Wi-Fi. Stream your favorite shows without buffering, make crystal-clear video calls, and download files in a flash. Enjoy!
15. Ongoing Optimization: Maintaining Peak Performance
Wi-Fi performance isn't a one-time fix. Regularly:
- Test your speed to monitor performance.
- Update your router's firmware.
- Reboot your router occasionally.
- Reposition your router if you experience dead zones.
Closing Thoughts
We've covered a lot of ground– from understanding your equipment's potential to the nuances of optimizing your connection. Setup can feel like untangling a ball of yarn at first, but with a little bit of patience and some guided steps, we’ve successfully brought the blazing speed to your digital experience. So go forth and enjoy the fruits of your labor. Let nothing stand in your way of the streaming video, online gaming or seamless video calls that
iPhone 6 to Laptop WiFi: The SHOCKINGLY Simple Trick!NETGEAR WiFi Extender Setup How To
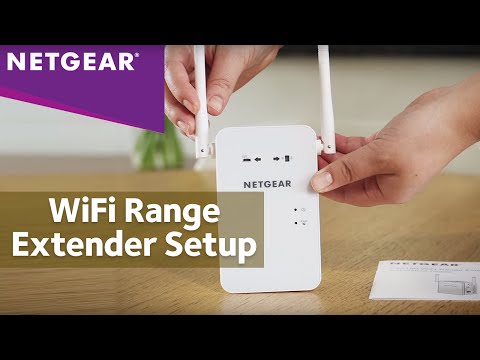
By NETGEAR NETGEAR WiFi Extender Setup How To by NETGEAR
Reuse Your Old Router Make It a WiFi Repeater, Extender, or Access Point

By Torogi Pro Reuse Your Old Router Make It a WiFi Repeater, Extender, or Access Point by Torogi Pro
How to Setup NETGEAR Desktop WiFi Range Extender

By NETGEAR How to Setup NETGEAR Desktop WiFi Range Extender by NETGEAR

Title: Configuring Netgear as Repeater
Channel: M.Y.L.E.
Configuring Netgear as Repeater by M.Y.L.E.
Laptop Wifi Connect
Unlock Blazing-Fast WiFi: Gateway Laptop + Netgear Router Setup Guide!
We all crave it: seamless, lightning-fast WiFi that lets us stream, game, and work without frustrating buffering or lag. If you've invested in a powerful Gateway laptop and a robust Netgear router, you're already on the right track. But the true magic happens when you connect and configure them correctly. This comprehensive guide will walk you through the process, ensuring you unlock the full potential of your hardware and achieve a WiFi experience that truly shines.
Preparing for the Perfect Connection: Hardware and Initial Assessment
Before diving into the setup, let's ensure you have everything you need and are prepared for a smooth transition. First, confirm that you have your Gateway laptop fully charged or connected to a power source. Power is crucial during the setup process, preventing interruptions that could potentially corrupt the configuration. Next, gather your Netgear router, its power adapter, and the Ethernet cable typically included in the box. Locate the router's serial number and MAC address; these often are found on the underside or a sticker. You may need these during initial configuration, so have them readily available.
Carefully unpack the Netgear router and inspect it for any physical damage. Examine the ports on the back, confirming that the Ethernet ports are intact and not bent or damaged. Ensure the power adapter fits securely into the router.
Now, let’s perform a basic assessment of your current internet situation. Identify your internet service provider (ISP) and the type of connection you have (cable, fiber optic, DSL, etc.). Knowing this information will be vital when configuring your Netgear router, which you will configure in a manner that is specific to your connection type. Also, locate your ISP’s provided modem. If you don’t have a separate modem, your ISP’s equipment likely combines modem and router functions. Note the model number of the modem or combined unit, as you may need this information during setup.
Finally, consider your desired WiFi coverage area. Where will you be using your Gateway laptop the most? This will influence where you place the Netgear router for optimal signal strength. A central location, away from walls and obstructions, is generally best.
Physical Connections: The Foundation of Fast WiFi
The physical connections are the starting point. They might seem simple, but a mistake here can derail the entire process.
Connecting the Modem: Locate your ISP's modem. Using the Ethernet cable, connect one end to the "WAN," "Internet," or "Ethernet" port on the Netgear router. Connect the other end to the corresponding port on your modem.
Powering Up: Plug the Netgear router's power adapter into a wall outlet and connect it to the router itself. The router should power on automatically. Observe the front panel lights; they will go through a startup sequence, indicating the device is initializing.
Connecting to Your Gateway Laptop: Once the router has finished booting, you can connect your Gateway laptop to the router. You have two options:
- Wired Connection (Recommended for initial setup): Use another Ethernet cable (if you want a dedicated, fast connection for configuration) to connect your Gateway laptop to one of the numbered Ethernet ports (typically labeled 1, 2, 3, or 4) on the router.
- Wireless Connection: Enable WiFi on your Gateway laptop. The router should broadcast a default WiFi network name (SSID), often printed on a sticker on the router's bottom or side. Select this network and enter the default password (also found on the sticker) to connect.
Setting Up Your Netgear Router: Configuration for Optimal Performance
Now, it's time to configure your Netgear router. This is where you truly customize your WiFi experience.
Accessing the Router's Interface: Open a web browser on your Gateway laptop (connected via either Ethernet cable or WiFi).
Entering the Router's IP Address: In the address bar, type in the router's default IP address. This is usually, but not always, 192.168.1.1 or 192.168.0.1. You can find this IP address in the router's documentation or on the router itself. Press Enter.
Logging In: You will be prompted to enter a username and password. The default credentials are often "admin" for both the username and password. Check the router's documentation if these credentials don't work.
Navigating the Interface: Once logged in, you'll be presented with the router's web-based interface. The layout may vary slightly depending on your specific Netgear router model, but the core functions will be similar.
Internet Setup: Find the "Internet," "Setup Wizard," or similar section in the router's interface. Specify your internet connection type (Cable, DSL, etc., as determined earlier). You may need to enter your ISP login information (username and password). This information is vital to successfully connect to the internet. If your ISP provided a static IP address, you will need to input that information into the router. If your ISP uses PPPoE, you will also need to supply your ISP username and password. Consider running the setup wizard to streamline this process.
WiFi Configuration: This is where you personalize your WiFi.
- Network Name (SSID): Change the default WiFi network name (SSID) to something unique and memorable. Avoid using personal information.
- Security: Enable WPA2 or WPA3 security. These are the most secure options. Choose a strong passphrase (password) that is at least 12 characters long and includes a mix of uppercase and lowercase letters, numbers, and symbols.
- Channel Selection: The router will often automatically select a WiFi channel. However, you might experience interference from other WiFi networks in your area. To optimize performance, you can manually select a channel. The ideal channel depends on your environment. If you live in a dense urban area with many WiFi networks, channel 1, 6, or 11 on the 2.4 GHz band is usually recommended. In the 5 GHz band, you can typically leave it on auto for optimal performance. You also might consider using a WiFi analyzer app on your smartphone or tablet to identify and compare the WiFi channels in your area as well.
- Bandwidth: Ensure your router is set to broadcast on both 2.4 GHz and 5 GHz bands. The 5 GHz band offers faster speeds but has a shorter range. The 2.4 GHz band has a wider range but is generally slower.
- Guest Network: Consider setting up a guest network to provide WiFi access to visitors without sharing your main network password.
Saving and Rebooting: After making your changes, save the configuration. The router will usually prompt you to reboot. This is necessary for the settings to take effect.
Optimizing Your WiFi Experience: Advanced Settings and Troubleshooting
Once your basic setup is complete, you can further refine your WiFi performance.
QoS (Quality of Service): Many Netgear routers offer QoS settings, which allow you to prioritize certain types of network traffic. This can be useful for gaming or video conferencing. Consider prioritizing traffic based on application or device.
Firmware Updates: Regularly check for firmware updates for your Netgear router. These updates often include performance improvements, bug fixes, and security enhancements. You can usually find the update option within the router's interface.
Channel Optimization (Periodic Check): WiFi channels can become congested over time. Periodically check your WiFi environment using a WiFi analyzer app to look for interference. If necessary, change the WiFi channel in your router settings.
Placement is Key: Even with the best configuration, WiFi performance can be limited by the router's location. Avoid placing the router near walls or metal objects that can block the signal. Elevate the router if possible.
Troubleshooting Common Issues:
- Slow Speeds: Ensure your Gateway laptop is connected to the 5 GHz band (if supported) for faster speeds. Run a speed test to determine if your internet speed is the problem.
- Intermittent Connection: Try rebooting both your router and Gateway laptop. Check the Ethernet cables for any damage. Check your WiFi network for interference.
- Cannot Connect to the Internet: Double-check your internet connection settings in the router's interface. Contact your ISP if the problem persists.
- Weak Signal Strength: Consider adding a WiFi extender to your network. A WiFi extender will help boost your signal.
Fine-Tuning for Gateway Laptop Compatibility
While Netgear routers are generally compatible with most devices, including Gateway laptops, you can check for particular settings that can optimize performance.
- Wireless Mode/Standard: Ensure the router is set to support the latest WiFi standards, such as 802.11ac or 802.11ax (WiFi 6 or WiFi 6E), which your Gateway laptop likely supports. This is often found within the WiFi settings of your router.
- Antenna Configurations: Make sure your router’s antenna configurations are set up correctly. Some routers have external antennas that you can adjust to improve signal direction.
- Check Gateway Laptop Network Adapter Settings: Occasionally, there can be conflicts between your Gateway laptop's network adapter and the router settings. Go to your Gateway laptop's network adapter settings.
