coonevting wifi printer from lenovo laptop

Title: How to Connect a Wireless Printer to Windows 1110 2022
Channel: EasyTechGeek
How to Connect a Wireless Printer to Windows 1110 2022 by EasyTechGeek
Lenovo WiFi Printer Nightmare? This One Trick Fixes It!
Lenovo WiFi Printer Troubles? Conquer the Chaos!
Have you ever wrestled with a malfunctioning Wi-Fi printer? It's a frustrating experience. You're ready to print, but the printer refuses to cooperate. This is especially true with Lenovo WiFi printers. Many users report connection issues. Fortunately, there's a solution that might save your sanity. This tip could be the key to smooth sailing.
The Wi-Fi Whirlwind: Why Lenovo Printers Can Be Tricky
Lenovo printers, in theory, offer seamless wireless printing. However, the reality can be different. Intermittent connections, driver glitches, and network hiccups are common. These issues frequently plague users. Printers can become unresponsive. You might get error messages galore. The problem often stems from the printer's inability to maintain a stable connection. Also, your network configuration can be a factor. Therefore, troubleshooting is essential.
Unlocking the Magic: The One Trick That Works
Here’s the secret sauce to wrangling your Lenovo WiFi printer. It is deceptively simple yet remarkably effective. Many people overlook this method. The fix? Assigning a static IP address to your printer. This can dramatically improve its reliability. Dynamic IP addresses change. Your router assigns them automatically. This is where problems start. Your printer might lose its assigned address. A static IP address permanently identifies your printer on your network.
Getting Started: Setting up Your Static IP
First, you need to access your router's settings. Consult your router's manual. It will guide you through the process. Typically, typing your router's IP address in a web browser will work. Your router's documentation will explain the exact address. This will lead you to the login page. You'll need your admin credentials. Next, locate the DHCP settings. DHCP stands for Dynamic Host Configuration Protocol. You should see a list of connected devices. Find your Lenovo printer on this list.
Reserving the Address: The Crucial Step
Now, reserve a static IP address for your printer. This is where the magic happens. Most routers provide a "reserve" function. Click this button. This tells your router to always assign the same IP to your printer. Then, assign an IP address that is outside of your router's DHCP range. For example, if your router assigns addresses from 192.168.1.2 to 192.168.1.254, pick an IP like 192.168.1.10. However, this is only an example. It is best to review your settings.
Printer Configuration: Making the Final Adjustments
Next, you need to configure your printer. Go to your computer's printer settings. Add a new printer. Choose the option to manually add a printer. Use the static IP address you assigned earlier. Select the correct printer driver. Ensure the correct driver is installed. Follow the on-screen instructions. Test the connection. Always, always test.
Troubleshooting Tips: Steering Clear of Pitfalls
Even with a static IP, problems can occur. Check your network connection first. Ensure your printer and computer are on the same network. Restart your printer and router. Sometimes, a simple reboot solves the issue. Verify the printer's Wi-Fi signal strength. Obstacles can weaken the signal. Update your printer's firmware. Outdated firmware can cause connection issues.
Beyond the Fix: Maximizing Print Efficiency
Using a static IP address will improve your printing experience. You'll likely see faster and more reliable connections. Furthermore, consider other factors that impact print quality. Use high-quality paper. Adjust your printer's print settings. Clean your printer's print heads regularly. Finally, make sure you have enough ink or toner.
The Verdict: Reclaiming Your Printing Peace
The Lenovo WiFi printer nightmare is solvable. Assigning a static IP address is a significant step. Therefore, you can take control of your printing. This one trick can eliminate frustration. You can print quickly and easily again. Implement this solution. Then, enjoy printing without the usual headaches. It's a straightforward fix, indeed.
Laptop WiFi Nightmare: Solved! (Domain, Login, Different User)Lenovo WiFi Printer Nightmare? This One Trick Fixes It!
Have you ever felt like you're wrestling a caffeinated octopus when trying to print wirelessly with your Lenovo WiFi printer? Maybe you're staring down a blinking blue light, a cryptic error message, or the dreaded "printer not found" notification. We feel you. We've been there. I remember one particularly frustrating evening, deadlines looming, when my Lenovo printer decided to stage a digital rebellion. It was like the printer had a vendetta against perfectly good paper and ink. But after hours of troubleshooting, frantic Googling, and the near-temptation to chuck the thing out the window, we found the solution. And guess what? It was surprisingly simple. This article isn't just about fixing the problem; it's about reclaiming your peace of mind and your printing sanity.
1. The WiFi Printer Struggle is Real: Why Lenovo Printers Sometimes Act Up
Let's be honest, wireless technology should be a beautiful thing. No wires, no clutter, instant access. But sometimes, especially with printers, it’s more like a digital minefield. The struggle is real. Lenovo printers, brilliant as they often are, aren't immune. The reasons behind these WiFi woes are varied, ranging from simple network glitches to more complex router configurations. Think of it like this: your printer is a guest at a party (your home network). If the guest isn't properly introduced to the host or can't understand the house rules, things get messy.
2. Identifying the Culprit: Pinpointing the Source of Your Printing Problems
Before diving headfirst into solutions, understanding what’s causing the problem is crucial. Is your printer constantly disconnecting? Is it printing gibberish? Or perhaps it's simply refusing to acknowledge the existence of your computer. Consider:
- Network Connectivity: Is your printer connected to the WiFi network correctly? Try connecting another device to the same network to check your internet connection.
- Driver Issues: Are your printer drivers up-to-date? Outdated drivers are like an old map; they can lead you astray.
- Printer Settings: Are the printer settings, like the IP address, configured correctly?
- Router Compatibility: Is your router compatible with your printer's WiFi standards?
3. The One Trick: The Power of a Static IP Address
Drumroll, please… The single most effective solution to many Lenovo WiFi printer woes is setting a static IP address. But what does that even mean? Think of it like this: your printer usually gets an IP address dynamically from your router (like a temporary street address). This can change. A static IP address assigns a permanent address to your printer. It’s like giving your printer its own fixed address, ensuring it’s always reachable.
4. Step-by-Step Guide: Setting Up a Static IP Address on Your Lenovo Printer
Ready to become an IP address ninja? Here's how to set up a static IP address.
- Access Your Router's Settings: You'll need to log into your router's admin panel. This usually involves typing your router's IP address (often 192.168.1.1 or 192.168.0.1) into your web browser. You'll need your router's username and password.
- Find Your Printer's MAC Address: Every device has a unique MAC address (like its fingerprint). You can usually find this printed on a sticker on the printer itself or check the information on printer's settings panel.
- Reserve the IP Address: In your router's settings, look for the "DHCP Reservation" or "Address Reservation" option. Use the printer's MAC address to reserve a specific IP address for it. Choose an IP address outside of your router's DHCP range (e.g., if your router assigns addresses from 192.168.1.2 to 192.168.1.254, you could use 192.168.1.250).
- Set the Static IP on the Printer: Now, go to your Lenovo printer control panel on the printer itself and find the network settings. Manually input the static IP address you reserved on your router, the subnet mask (usually 255.255.255.0), the default gateway (your router's IP address), and the DNS servers (you can use your router's IP address or a public DNS like Google's 8.8.8.8).
5. Troubleshooting Tips: What to Do if the Trick Doesn't Work Immediately
Patience, young Padawan! Things don't always click instantly. If the static IP address doesn't solve your problem immediately, try these troubleshooting steps:
- Restart Everything: Turn off your printer, router, and computer. Wait a minute or two, and then turn them back on in the order: router, printer, computer. This often clears up minor glitches.
- Check the Printer's Firewall Settings: Sometimes, your computer's firewall can block the printer. Make sure your firewall allows the printer to communicate.
- Reinstall the Printer Drivers: Uninstall and reinstall the latest printer drivers.
- Factory Reset: As a last resort, you can factory reset your printer. This resets all settings to their default values.
6. Keeping Your WiFi Printer Happy: Maintenance and Best Practices
Like any piece of technology, your Lenovo printer needs a little TLC to keep it running smoothly. Some tips:
- Regular Driver Updates: Keep your printer drivers updated.
- Firmware Updates: Check for and install any firmware updates for your printer.
- Printer Placement: Place your printer in a location with a strong WiFi signal.
- Network Interference: Avoid placing your printer near sources of interference like microwaves or cordless phones.
7. Beyond the Basics: Advanced Troubleshooting Techniques
For the more tech-savvy among us, here are a few advanced troubleshooting techniques:
- Ping the Printer: From your computer's command prompt, try pinging the printer's IP address. This will help you determine if the printer is responding to network requests.
- Check the Wireless Security Protocol: Ensure your router is using a secure wireless protocol like WPA2 or WPA3.
8. Understanding DHCP vs. Static IP: A Deeper Dive
Let's get a little geeky for a moment. DHCP (Dynamic Host Configuration Protocol) is like a rental service for IP addresses. The router hands out temporary addresses to connected devices. Static IP addresses are more like owning property—your printer always gets the same address. Static IP addresses are beneficial for printers because they ensure they can always be found on the network.
9. The Benefits of a Static IP Address for Your Printer
Switching to a static IP address unlocks several benefits:
- Reliable Connectivity: The printer always has the same address.
- Easier Troubleshooting: It simplifies the process of identifying and resolving network issues.
- Improved Performance: Slightly better network performance.
10. Common Lenovo Printer Blunders and How to Avoid Them
We've all made printer blunders. Here’s how to avoid a few:
- Incorrect Driver Installation: Always install the correct drivers for your printer model.
- Ignoring Error Messages: Read the error messages! They often contain critical clues.
- Forgetting to Restart: Reboot both your printer and your computer.
11. Exploring Alternative Printing Solutions: When Wireless Isn't Working
If, for some reason, your Lenovo WiFi printer continues to defy your efforts, don't despair. Consider these alternatives:
- USB Connection: Connect your printer to your computer with a USB cable.
- Network Cable (Ethernet): If your printer has an Ethernet port, you can connect it directly to your router with a network cable.
12. Optimizing Your Home Network for Printing Efficiency
A healthy network makes for a happy printer. Make sure your home network is optimized:
- Strong WiFi Signal: Ensure your router's signal reaches your printer.
- Prioritize Printer Traffic: Some routers allow you to prioritize network traffic for specific devices.
- Keep Your Router Updated: Regularly update your router's firmware.
13. The Importance of Wireless Security for Your Printer
Don't overlook the importance of securing your network. Protect your printer!
- Use a Strong Password: Protect your WiFi network with a strong password.
- Enable Encryption: Make sure your router uses WPA2 or WPA3 encryption.
14. When to Call for Backup: Seeking Professional Help
If all else fails, don't hesitate to seek professional help.
- Contact Lenovo Support: Lenovo has customer support.
- Hire a Tech Expert: A local tech expert can diagnose and fix more difficult issues.
15. The Final Victory: Enjoying Hassle-Free Printing!
Congratulations! You've overcome the Lenovo WiFi printer labyrinth. Now, you can finally enjoy those perfectly crisp documents and vibrant photos without the stress and frustration.
Conclusion: Reclaiming Your Printing Peace
So there you have it. Setting a static IP address might seem like a small thing, but it can make a huge difference in your printing experience. It’s like a secret weapon
Laptop WiFi MIA? Find Your Network NOW!How to connect your Computer or Laptop in Wireless WiFi Shared Printer for Windows 10 Pro
By Lantaw TV How to connect your Computer or Laptop in Wireless WiFi Shared Printer for Windows 10 Pro by Lantaw TV
How to Connect Epson L3251 Printer to Laptop via Wi-Fi Easy Setup for L3250, L3210, and L3256.

By Device Doctor How to Connect Epson L3251 Printer to Laptop via Wi-Fi Easy Setup for L3250, L3210, and L3256. by Device Doctor
How To Connect Lenovo Laptop To Printer
By Tothepoint Tutorials How To Connect Lenovo Laptop To Printer by Tothepoint Tutorials
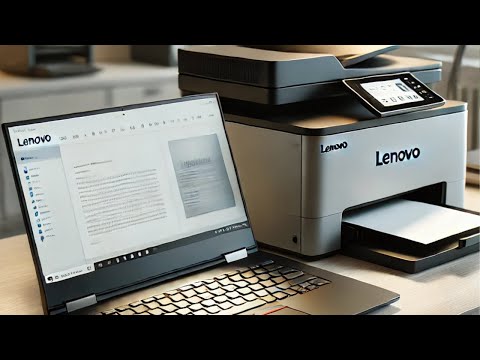
Title: How To Connect Lenovo Laptop With Printer
Channel: Tothepoint Tutorials2
How To Connect Lenovo Laptop With Printer by Tothepoint Tutorials2
My Laptop Work
Lenovo WiFi Printer Nightmare? This One Trick Fixes It!
If you’re here, chances are you've encountered the digital equivalent of a paper jam: the Lenovo WiFi printer. The promise of wireless printing, of crisp documents and vibrant photos appearing seemingly out of thin air, often gives way to frustration, dropped connections, and the dreaded "printer not found" error. We understand. We, too, have wrestled with these infernal devices. But fear not, because we’ve found a solution – a single, overlooked trick that often resolves the most persistent Lenovo WiFi printer woes – enabling consistent, reliable printing.
Diagnosing the Lenovo WiFi Printer's Disconnect: A Common Culprit
Before diving into the fix, let's establish a common ground. The Lenovo WiFi printer, like many wireless peripherals, relies on a stable and consistent network connection. Interruptions, interference, and misconfigurations can quickly lead to printing paralysis. While numerous factors can contribute to these issues, our experience points to a frequently overlooked area: the printer's IP address. The dynamic nature of IP addresses can cause issues. They are assigned to devices by a router's DHCP server, which can change automatically. This change can disrupt the printer's connection to the network, rendering it inaccessible to your computer or other devices.
The Cornerstone of Connectivity: Static IP Address Configuration
The core of the solution revolves around assigning a static IP address directly to your Lenovo WiFi printer. This critical step ensures the printer maintains a fixed address on your network, eliminating the uncertainty of dynamically assigned addresses. By fixing the printer's IP, we're creating a dedicated pathway, a guaranteed point of entry that your devices can always find. This ensures that your printer is always on the same network address and accessible.
Step-by-Step: How to Assign a Static IP to Your Lenovo WiFi Printer
This process varies slightly depending on your specific Lenovo printer model, but the underlying principles remain consistent. Here's a comprehensive guide to get you started:
1. Accessing Your Printer's Control Panel:
- Physical Interface: Most Lenovo printers have a small control panel, often featuring an LCD screen and navigation buttons. Use these buttons to navigate the printer's menu. The exact menu structure varies among models, but look for options related to "Network," "Wireless," "TCP/IP," or "IP Address."
- Web Interface: Many Lenovo printers have a built-in web server, accessible through your web browser. To find the IP address of your printer by checking your router’s connected devices list, which will list the IP address the printer currently has as a DHCP client. You can also consult your printer’s user manual. Once you know the IP, type it into your web browser (e.g.,
http://192.168.1.100). You will likely need to enter a username and password, which are usually found in the printer's manual or on a label on the printer itself. Once logged in, look for a "Network" or "Settings" section.
2. Locating the IP Address Configuration:
Within the control panel or web interface, search for the IP address configuration settings. You will likely find options for "DHCP" (Dynamic Host Configuration Protocol, which assigns IP addresses automatically) and "Static IP" (which lets you manually set the IP address).
3. Choosing Your Static IP Address:
This is where careful planning is essential. Avoid using an IP address that is already in use on your network. Here's how to safely choose an IP address:
- Determine Your Network's IP Range: Your router assigns IP addresses within a specific range (e.g., 192.168.1.100 to 192.168.1.200) so your devices can connect to your home network. Check your router's admin interface (usually accessed via a web browser, the IP address is typically 192.168.1.1 or 192.168.0.1, check your router’s manual for the exact address) for the IP address range. Look for "DHCP Range" or similar settings.
- Select a Free IP Address: Choose an IP address outside your router's DHCP range to avoid conflicts. For example, if your router assigns addresses from 192.168.1.100 to 192.168.1.200, you could choose an address like 192.168.1.201.
- Consider Consistency: Write down the IP address you choose, as you will need it later.
4. Entering the Static IP Address:
Select the "Static IP" option and enter the following information:
- IP Address: The IP address you selected in the previous step.
- Subnet Mask: Usually, the subnet mask is 255.255.255.0.
- Default Gateway: The IP address of your router (e.g., 192.168.1.1).
- DNS Servers: You can use your router's IP address or public DNS servers like Google's (8.8.8.8 and 8.8.4.4).
5. Saving the Configuration and Restarting the Printer:
Save the changes you made to the printer’s configuration. Your printer should prompt a restart once the settings are applied. Allow the printer to fully restart.
6. Configuring Your Computer:
After the printer restarts, you may need to update your computer's printer settings.
- Windows: Go to "Devices and Printers." Remove any existing instances of your Lenovo printer. Add a new printer, selecting the "Add a printer using a TCP/IP address or hostname" option. Enter the static IP address you assigned to the printer. Follow the on-screen instructions to install the printer driver.
- macOS: Go to "System Preferences" > "Printers & Scanners." Remove existing printer instances. Click the "+" button to add a printer. Select "IP" from the top menu. Enter the static IP address, select the "Protocol" as "HP Jetdirect – Socket," and choose your printer model from the "Use" drop-down menu.
Troubleshooting Common Static IP Issues
While assigning a static IP address is a powerful solution, occasional issues can arise. Here are troubleshooting steps:
- Verify the IP Address: Double-check that you entered the correct IP address, subnet mask, gateway, and DNS server information in both the printer and your computer's settings.
- Power Cycle Everything: Restart your router, your computer, and your printer. This clears any temporary glitches.
- Network Connectivity: Ensure that your computer and printer are connected to the same network.
- Firewall Interference: Temporarily disable any firewalls on your computer or router to see if they are blocking the printer's communication. If this resolves the issue, reconfigure your firewall to allow printer traffic.
- Driver Compatibility: Make sure you're using the latest printer drivers for your Lenovo model. Download the drivers from Lenovo's official website.
- Router Issues: In rare cases, your router might be causing the problem. Try resetting your router to its factory defaults (though this will require reconfiguring your network settings). Contact your ISP or consult your router’s manual for assistance.
- Printer Firmware: Check your printer’s control panel or web interface for firmware updates. Keep your printer’s firmware up-to-date to fix software bugs.
Beyond the Static IP: Additional Considerations for Seamless Lenovo Printing
While a static IP address is the primary solution, other best practices can further enhance your Lenovo WiFi printing experience:
- Router Placement: Position your router in a central location, away from obstructions and interference from electrical devices, microwave ovens, or other electronics.
- Signal Strength: Ensure your WiFi signal strength is strong in the area where your printer is located. Consider using a WiFi extender if necessary.
- WiFi Security: Secure your WiFi network with a strong password to prevent unauthorized access and potential network disruptions.
- Regular Maintenance: Regularly clean your printer's print heads and perform maintenance tasks as recommended by Lenovo.
The Lenovo WiFi printer doesn't have to be a source of constant frustration. By assigning a static IP address and following these best practices, you can establish a reliable and consistent printing experience. This one trick often resolves the core issues that plague these devices, transforming your relationship with your printer from a battle of wills into a productive partnership.
